
Marketing Campaigns
Marketing Campaigns allow you to display targeted video, image, or app advertisements to WiFi visitors.
Create one or more ads, combine them into a campaign, define where and when the campaign should run, and optionally target visitors by audience criteria.
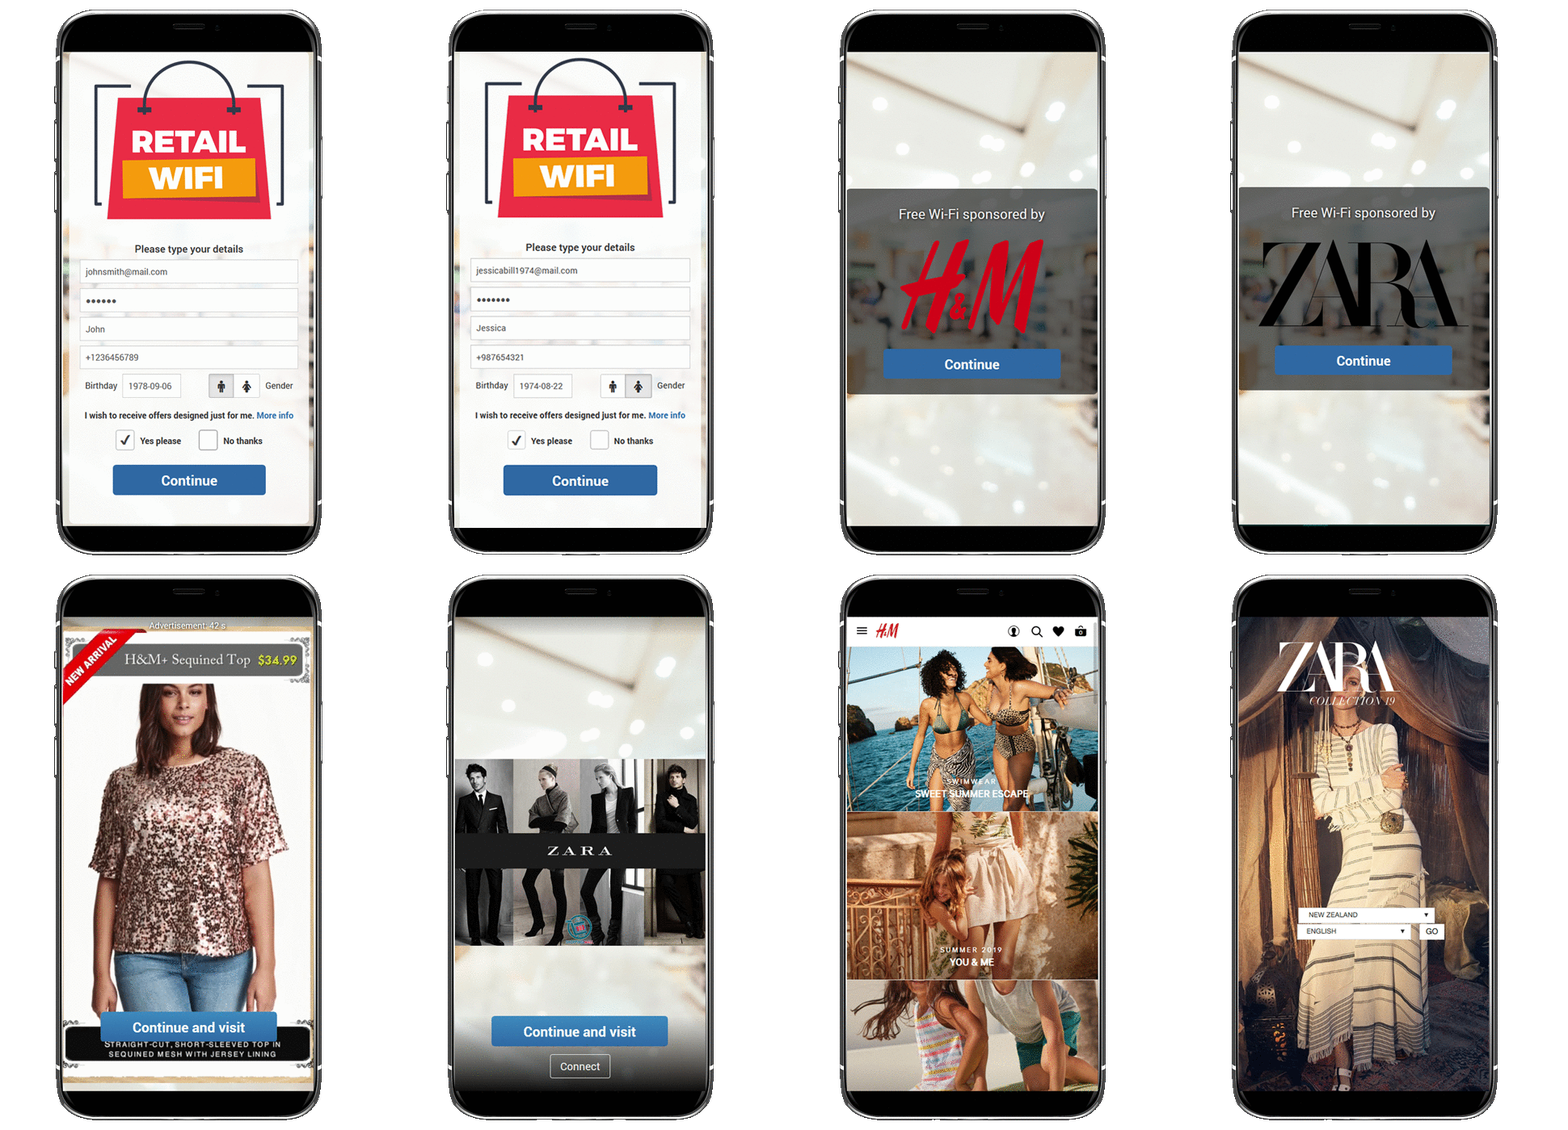
Create an Ad
Before creating a campaign, create the advertising content that will be displayed to WiFi visitors.
Open:
WiFi Marketing → Ads → New Ad
Enter the Ad name and select the required Ad type:
Video
Image
App
Video Ad
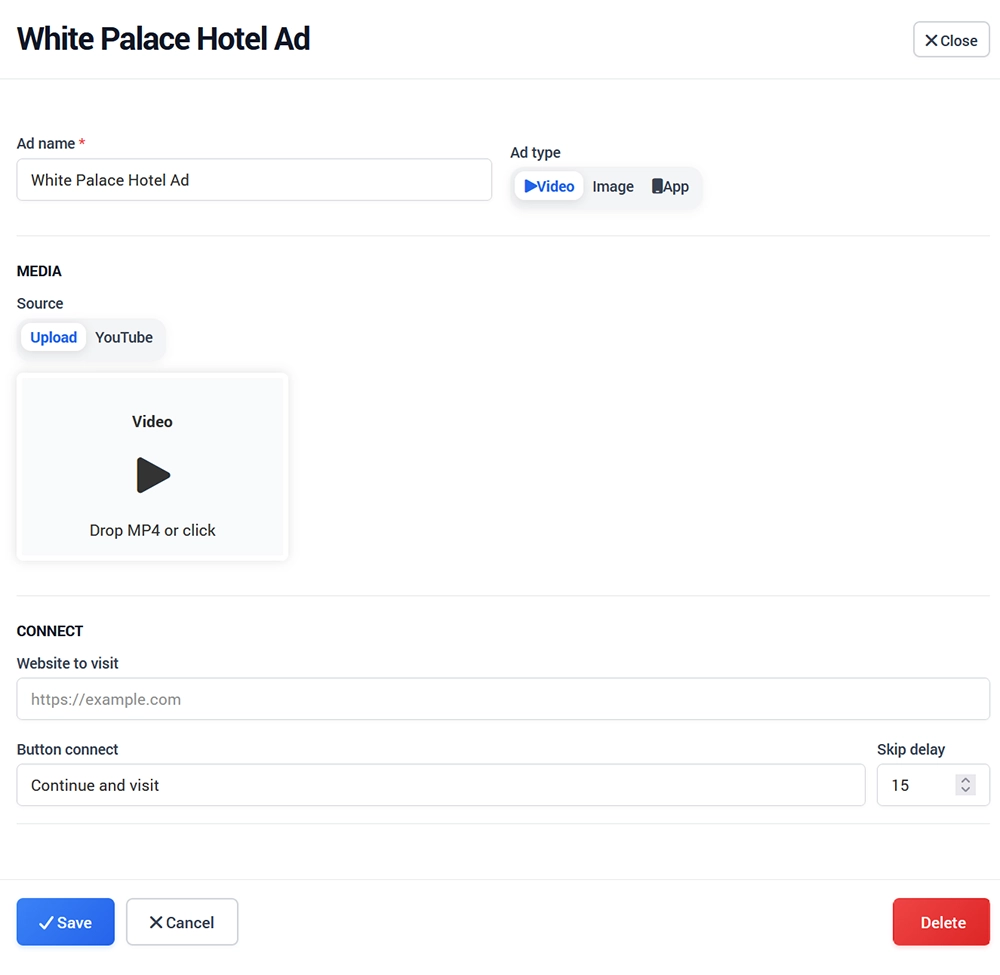
Select Video when you want to display video content.
Video can be provided using:
Upload – upload an MP4 file.
YouTube – use a YouTube video.
When YouTube is used, make sure the required YouTube services are available through the guest network whitelist.
Connect Options
Configure:
Website to visit – The page that should open when the visitor continues from the advertisement.
Button connect – The text displayed on the continue button, for example:
Continue and visit
Skip delay – Defines how long the visitor must wait before continuing.
Click Save when finished.
Image Ad
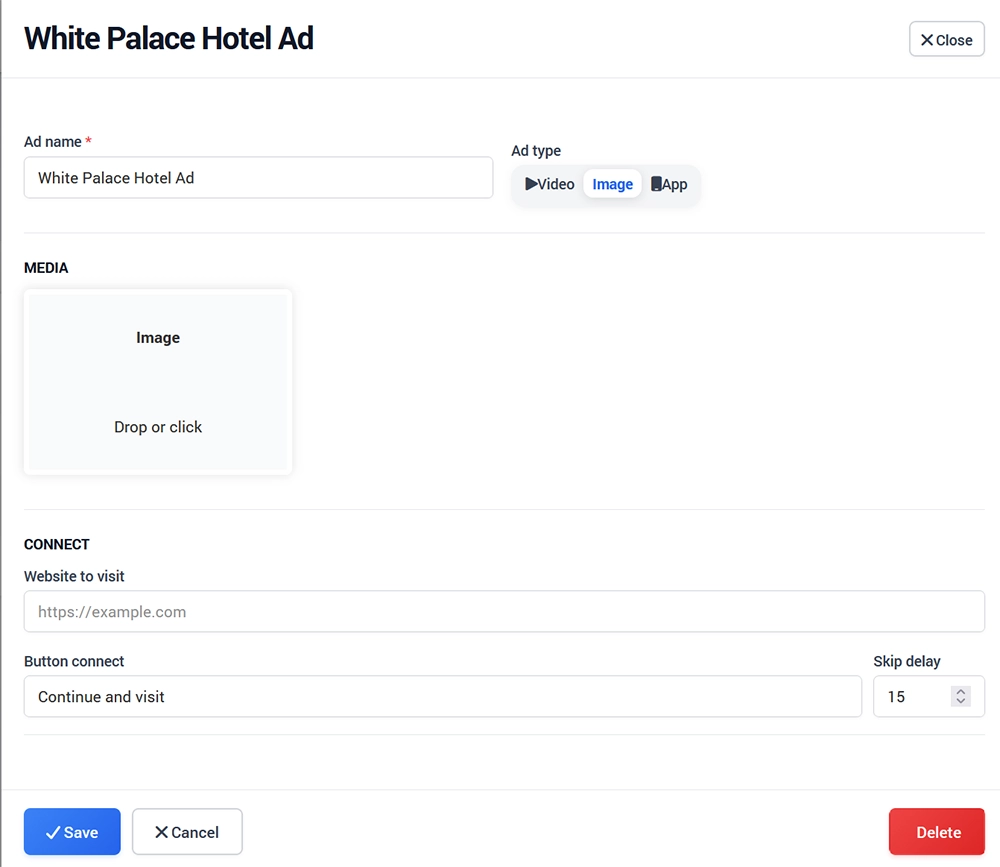
Select Image and upload the image that should be displayed.
Then configure:
Website to visit
Button connect
Skip delay
Use web-optimized images that remain clear on mobile devices.
App Ad
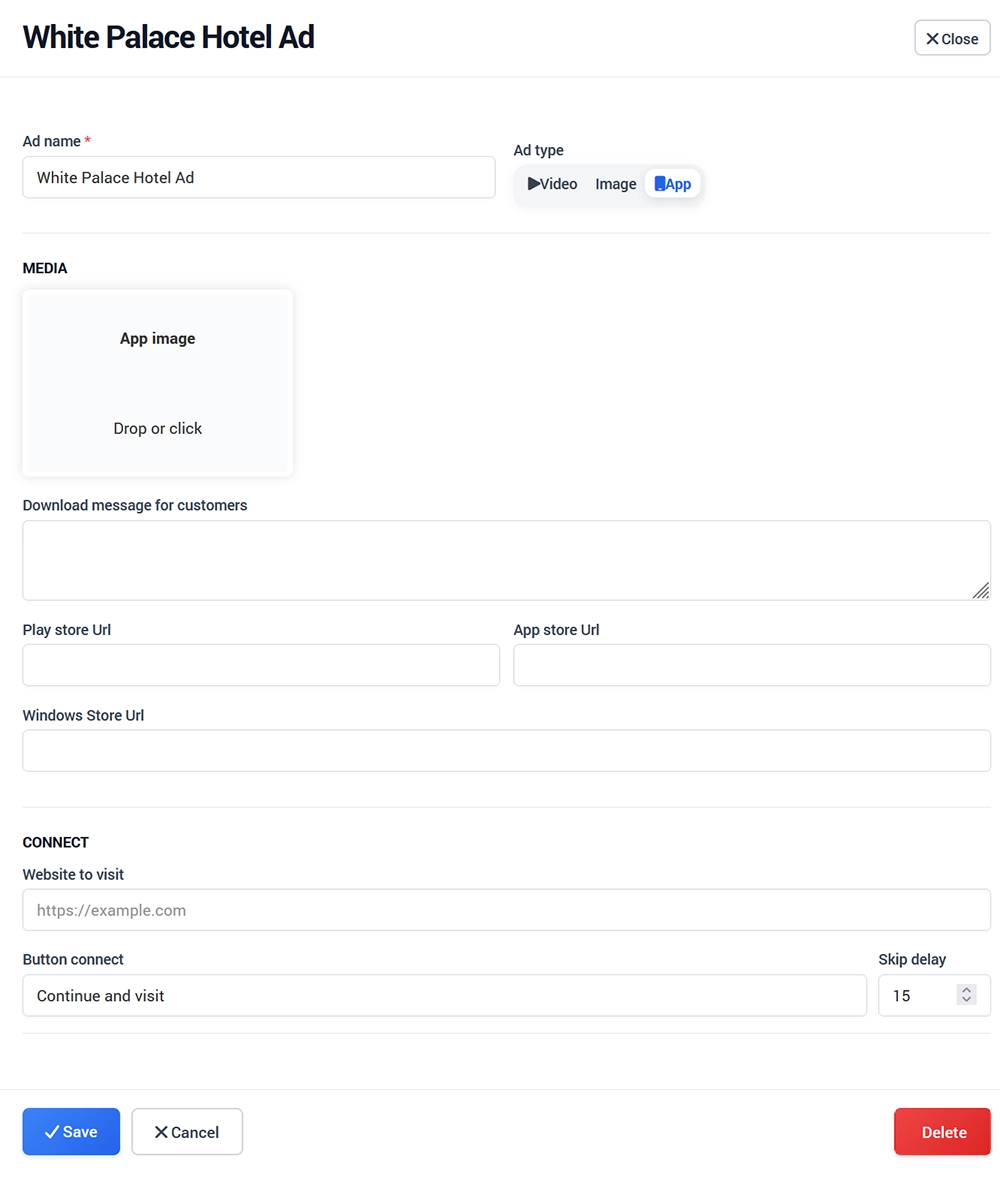
Select App when the campaign should promote an application.
Configure:
App image
Download message for customers
Google Play URL
Apple App Store URL
Windows Store URL
You can also configure the destination website, connect button text, and skip delay.
Only add store links where the application is actually available.
Create a Marketing Campaign
After creating the required ads, open:
WiFi Marketing → Campaigns → New Campaign
Enter the campaign name and configure the campaign period.
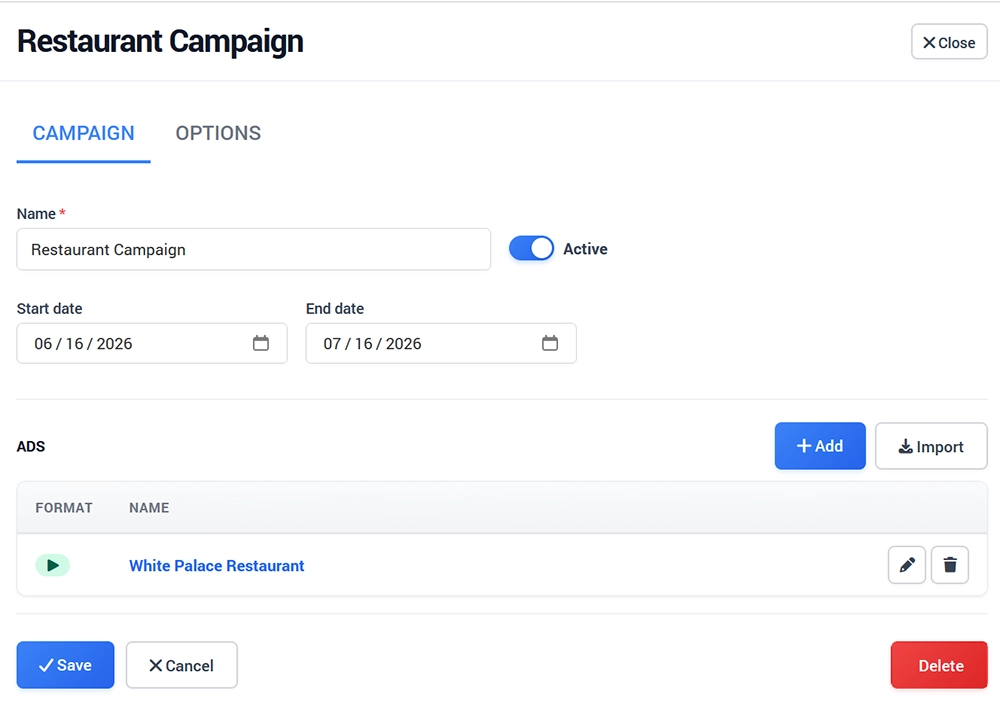
Campaign Settings
Under the Campaign tab configure:
Name
Enter a clear internal name for the campaign.
For example:
Restaurant Campaign
Active
Enable Active when the campaign should be available for delivery.
Start and End Date
Define the period during which the campaign can run.
Outside this date range, the campaign will not be displayed.
Add Ads to the Campaign
The Ads section contains the advertisements included in the campaign.
Use:
+ Add – Create and add a new advertisement.
Import – Select an advertisement that was previously created under WiFi Marketing → Ads.
A campaign can contain one or multiple ads.
Click the edit icon to modify an included ad or the delete icon to remove it from the campaign.
Campaign Options
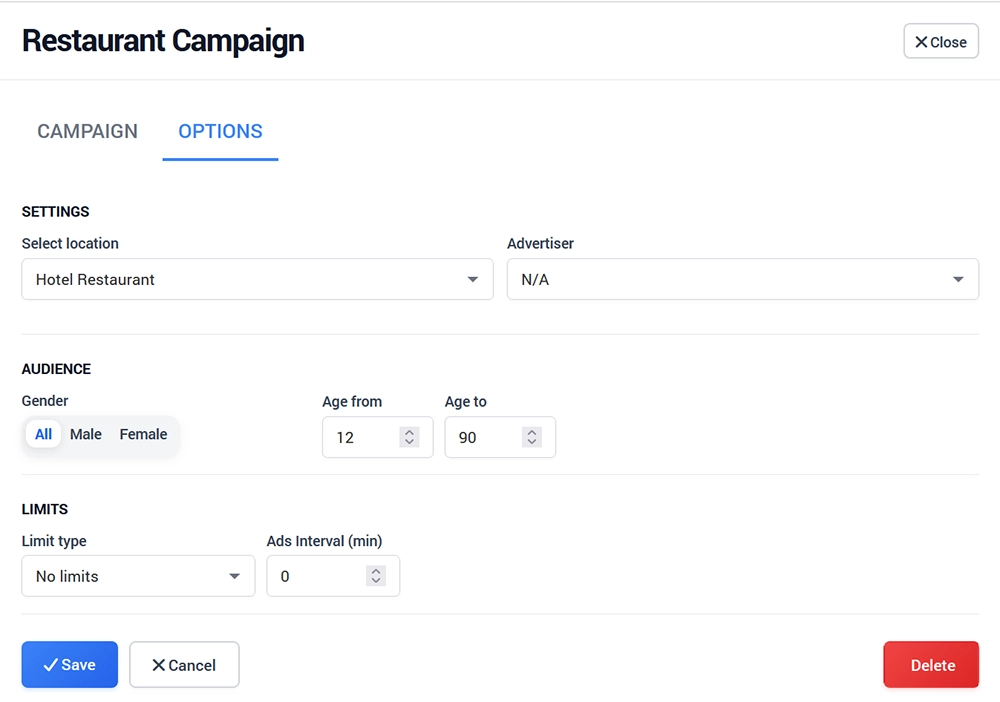
Open the Options tab to control where the campaign is displayed and which visitors should receive it.
Location
Use Select location to choose the WiFi location where the campaign should run.
This makes it possible to use different campaigns for different properties, restaurants, hotels, venues, or other locations.
Advertiser
Select an Advertiser when the campaign belongs to a specific advertiser.
Leave the value at N/A when advertiser tracking is not required.
Audience
Campaigns can be targeted using available visitor profile information.
Gender
Select:
All
Male
Female
Age
Use Age from and Age to to define the intended age range.
Audience targeting works only when the required visitor information is available.
Limits
Use Limit type to control campaign delivery limits.
Depending on the configuration, campaigns can operate without limits or use the available impression or campaign limit options.
Ads Interval
Use Ads Interval (min) to define the minimum interval between advertisement displays when required.
This can prevent the same visitor from seeing campaign content too frequently.
Add the Campaign to a Splash Page
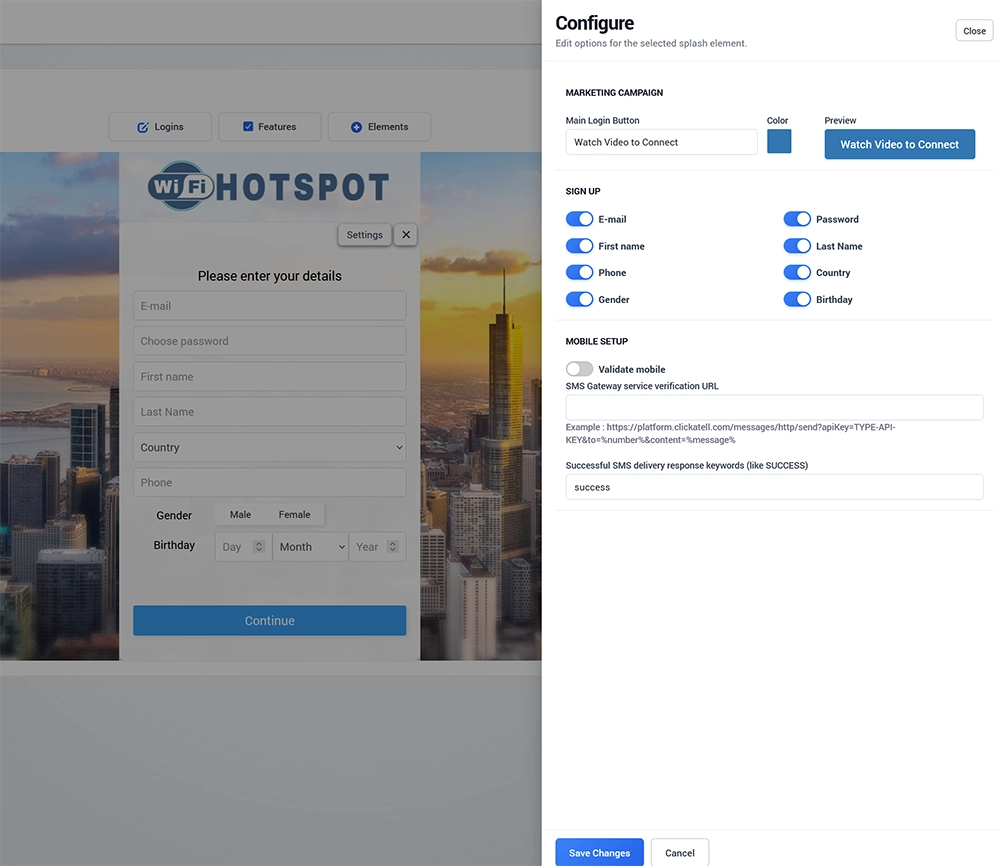
Creating a campaign does not automatically make it part of the guest WiFi login process.
To enable it:
Open Splash Pages.
Select the required Splash Page.
Open Login → Logins.
Add Marketing Campaigns.
Configure the required customer data and verification options.
Save the login method.
Save the Splash Page.
For detailed configuration, see Marketing Campaign Login Method.
Test the Campaign
Before using the campaign in production:
Confirm that the campaign is Active.
Check the Start and End dates.
Verify the selected Location.
Confirm that the correct Ads are included.
Review Audience and Limit settings.
Connect a test device to the guest WiFi.
Complete the Marketing Campaign login process.
Confirm that the expected ad is displayed.
Verify the skip delay and destination link.
Confirm that Internet access is granted after the campaign flow.
If audience targeting is used, test with profile data that matches the campaign criteria.
Marketing Campaign Reports
Campaign activity can be reviewed through the Marketing Campaign reporting section.
Available reporting includes campaign impressions, clicks, users, watched time, engagement, location, hotspot, device information, and campaign-level statistics. User and campaign data can also be exported where available.
Use campaign reporting to compare performance and identify which ads, locations, and audiences generate the strongest engagement.