DD-WRT Configuration
Installing DD-WRT on a router in most cases is almost as simple as installing a program onto your computer. However, doing it incorrectly can leave you with a router that you have to throw away. In this guide, we will install DD-WRT firmware and configure Chillispot settings on the TP-Link router (TP-Link WR 841 ND in this example), but these instructions can be applied to other supported router models.
It is required to have a DD-WRT-Compatible device programmed with a distribution of DD-WRT containing ChilliSpot.
Before you start, please check the DD-WRT router database first.
For a list of devices working with DD-WRT, please see the wiki page DD-WRT Supported Devices.
If you have installed OpenWRT or some other firmware previously, please install default firmware for your router model before the start.
Connect your computer by network cable to the router LAN port.
Go to the web browser and access to router configuration using default IP address e.g 192.168.0.1.
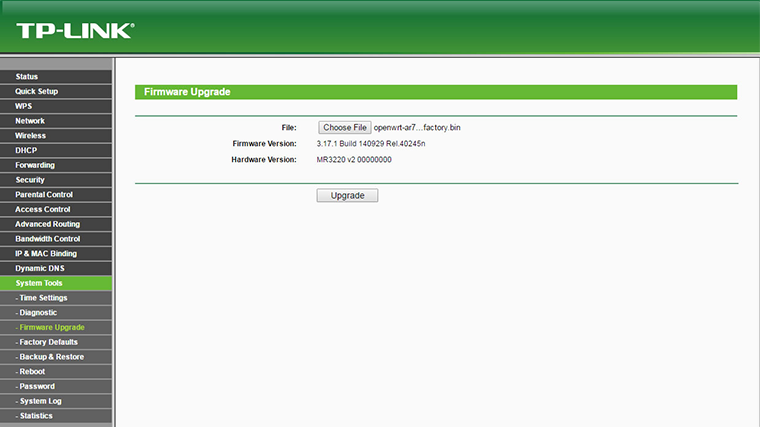
From System Tools find Firmware Upgrade.

Click on Choose File.
Navigate to the location where the DD-WRT firmware for your model is downloaded and press on Open.
Press the Upgrade button.
Confirm that you want to upgrade the firmware.
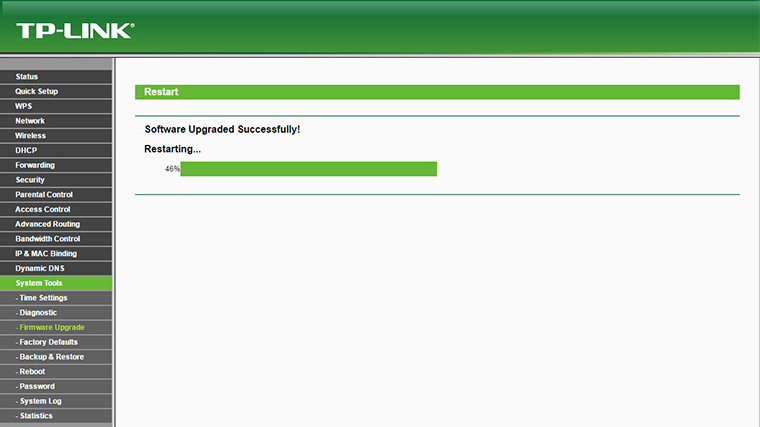
During this process, you will see information about the processing.
Once when it is finished you will get message Software Upgraded Successfully! Restarting.
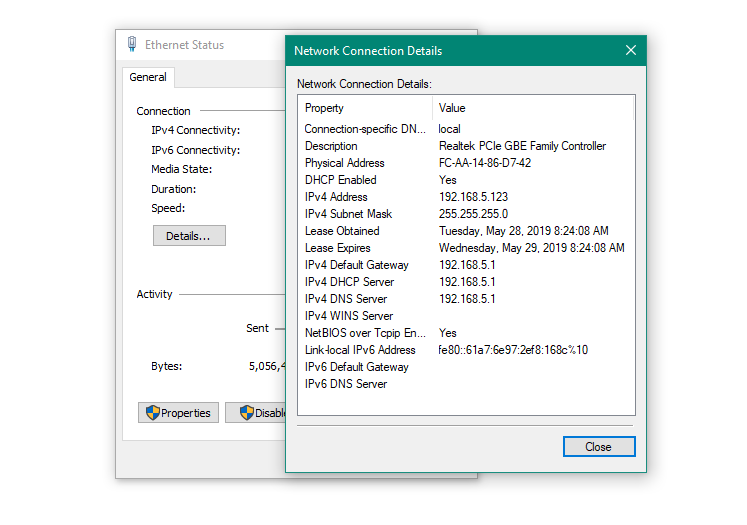
Reconnect LAN cable or Disable/Enable NIC card in order to get the new valid IP address in the IP range which is set in the router DHCP server (192.168.5.x in our case).
Start your browser and in URL field type https://192.168.1.1
Username : admin
Password : admin
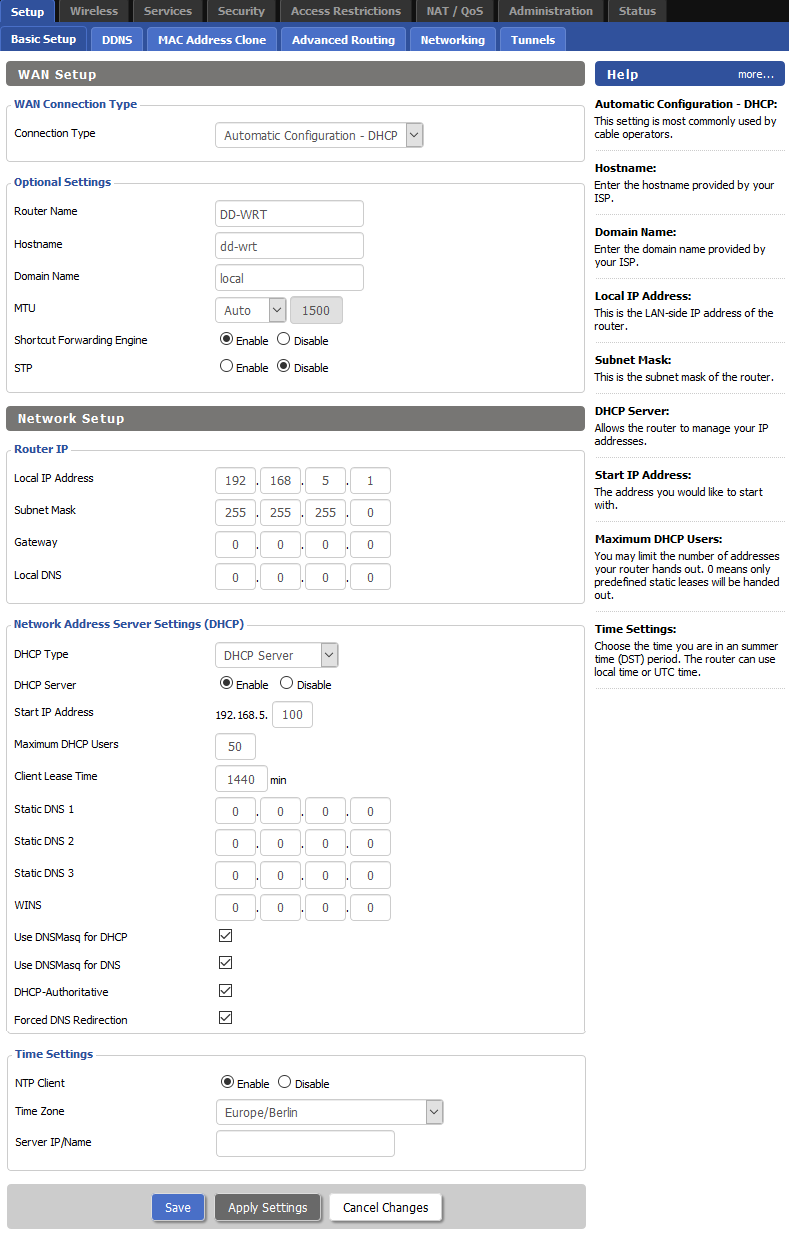
On the DD-WRT Control panel –Setup – Basic Setup page set Automatic Configuration – DHCP as Connection type.
Set desired Router Name and Hostname, as Domain name type local.
In the Network Setup section set Local IP address and Subnet mask.
As DHCP type select DHCP server and enable it.
Click Save then Apply settings button.
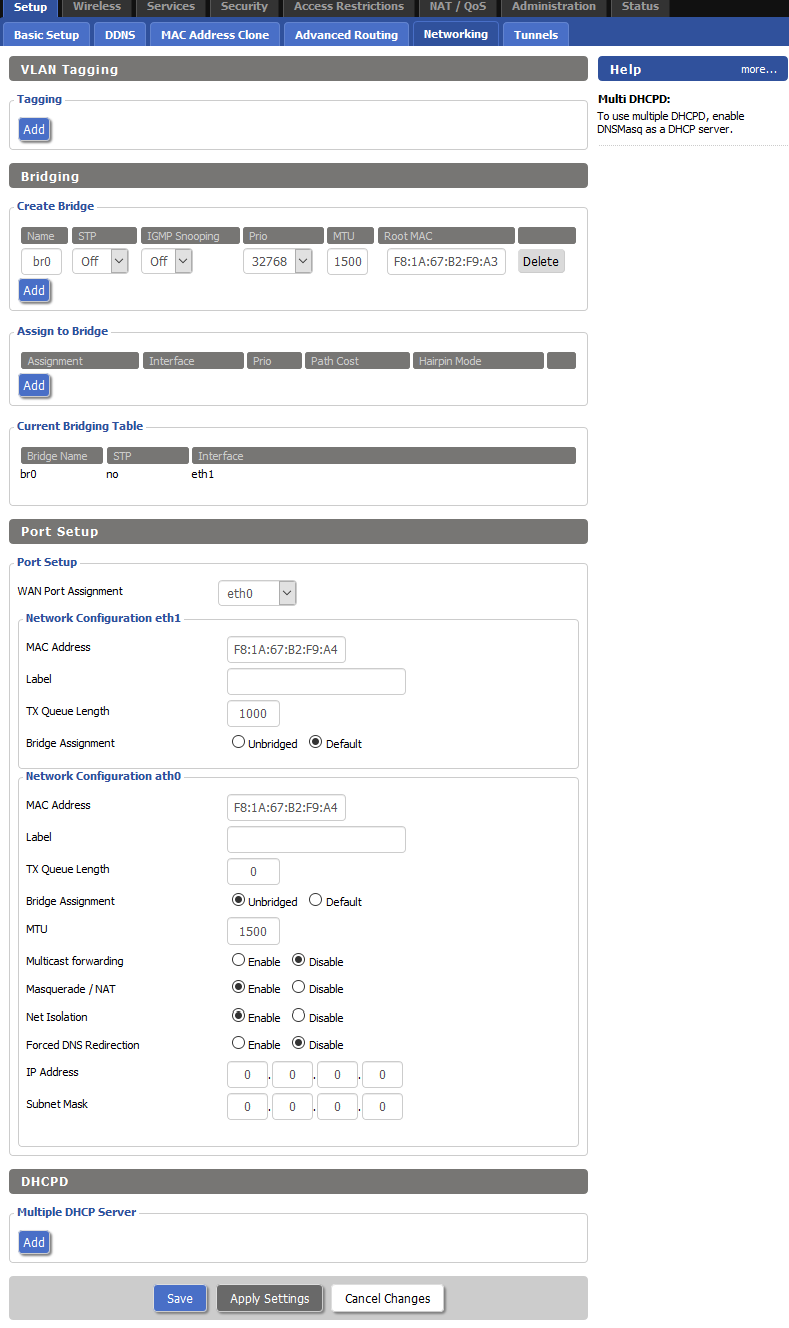
 Go to the Setup – Networking page.
Under the Port Setup section, as WAN Port Assignment set eth0.
Check router MAC address on the Status page and set it in the Network Configuration eth1 and Network Configuration ath0 MAC address field.
In the Port Setup – Network Configuration ath0 section, as Bridge assignment select Unbridged, Save changes and Apply settings.
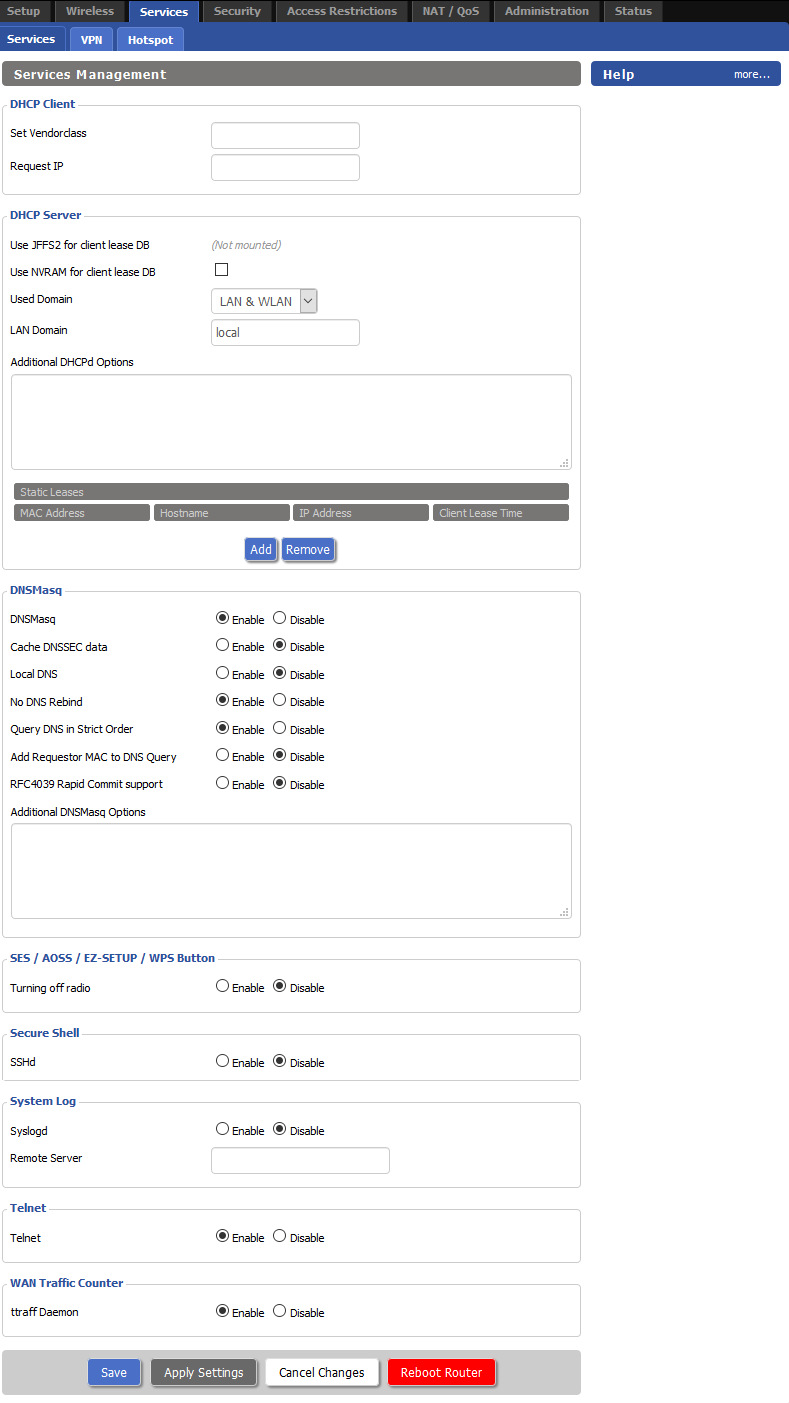
 Go to the Services – Services page.
Under the DHCP Server section as Used Domain select LAN & WLAN.
As LAN Domain type local, Save changes and Apply settings.
ChilliSpot is an open source captive portal or wireless LAN access point controller. It is used for authenticating users of a wireless LAN. It supports web based login which is today’s standard for public Hotspots. Authentication, authorization and accounting (AAA) is handled by your radius server.
To configure Chillispot go to the Services – Hotspot page.
Under Chillispot section enable Chillispot, and as DHCP Interface select ath0.
Chillispot Hotspot Network is by default set to 192.168.182.0/24 and our recommendation is to keep that setting.
Other details should be same as at the screen bellow.
Go to the UAM Allowed (comma separated) field and add the domains in the following format:

If you want to enable Social network login feature, add further domains and IP’s in the UAM Allowed (comma separated) field as per below for each network you plan to support.
31.13.24.0/21
157.240.0.0/16
31.13.0.0/16
facebook.com
www.facebook.com
fbcdn.net
facebook.net
www.facebook.net
connect.facebook.net
maps.googleapis.com
akamaihd.net
staticxx.facebook.com
static.xx.fbcdn.net
pixel.facebook.com
fbsbx.com
– if it does not work, try adding:
45.64.40.0/22
66.220.144.0/20
69.63.176.0/20
69.171.224.0/19
74.119.76.0/22
103.4.96.0/22
129.134.0.0/16
173.252.64.0/18
179.60.192.0/22
185.60.216.0/22
204.15.20.0/22
twitter.com
www.twitter.com
abs.twitter.com
abs.twitimg.com
api.twitter.com
pbs.twimg.com
199.16.156.0/22
199.59.148.0/22
199.96.56.0/21
192.133.76.0/22
91.225.248.0/23
linkedin.com
www.linkedin.com
platform.linkedin.com
slicdn.com
licdn.com
static.licdn.com
184.51.0.0/16
108.174.0.0/16
– if it does not work, try adding:
103.20.94.0/23
108.174.0.0/22
108.174.4.0/24
108.174.8.0/22
108.174.12.0/23
144.2.0.0/22
144.2.192.0/24
216.52.16.0/23
216.52.18.0/24
216.52.20.0/23
216.52.22.0/24
65.156.227.0/24
8.39.53.0/24
185.63.144.0/24
185.63.147.0/24
199.101.161.0/24
64.152.25.0/24
8.22.161.0/24
google.com
www.google.com
clients1.google.com
accounts.youtube.com
accounts.google.com
ssl.gstatic.com
ssl.google-analytics.com
googleusercontent.com
youtube.com
www.youtube.com
doubleclick.net
googlesyndication.com
googlevideo.com
ytimg.com
Facebook app setup instructions
LinkedIn app setup instructons
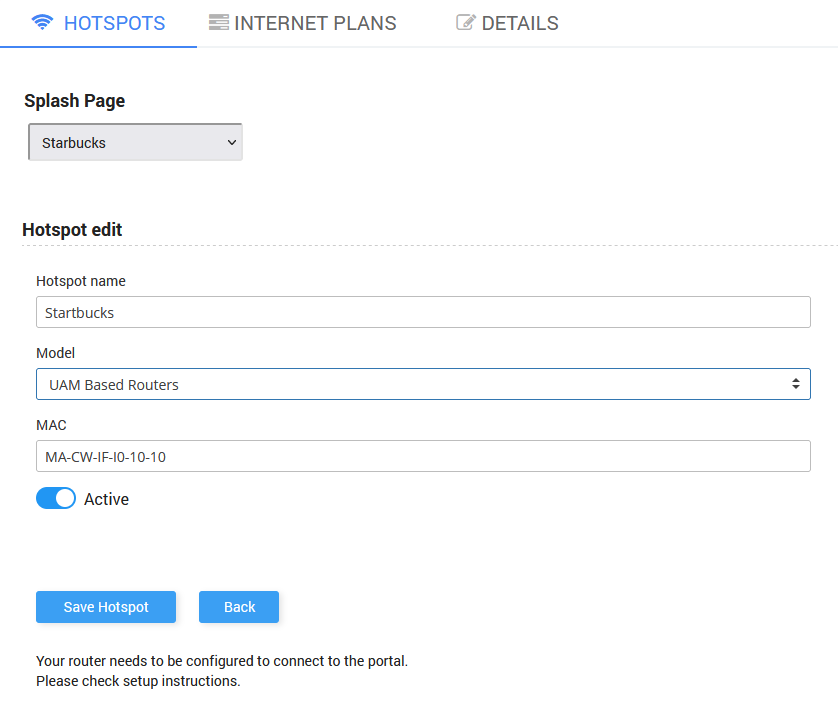
Login to your Start Hotspot portal account, go to the WiFi Locations page, select location, and from Hotspot section as Hotspot model select UAM Based Routers, add your router MAC address and Save changes.