It is very important to stay in touch with your users.
Email campaigns help you send informational and marketing emails to your customers.
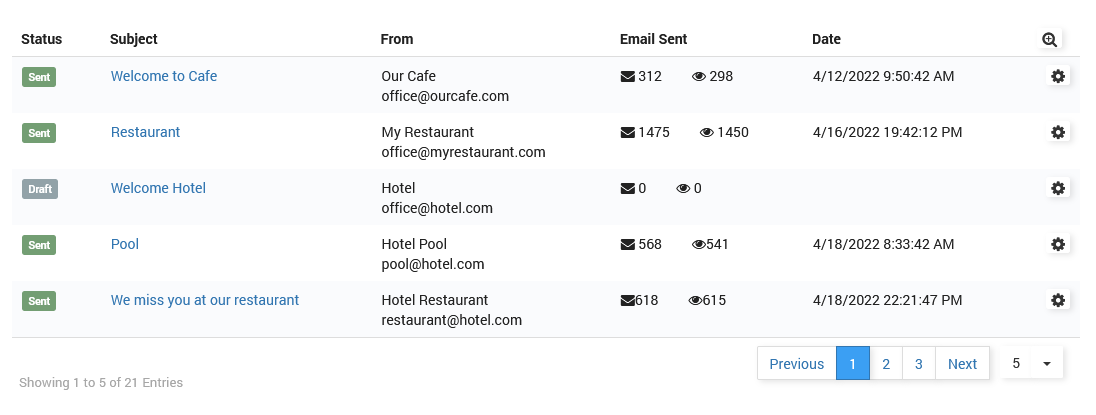
From the Email Campaign panel is visible previously configured Email campaigns with details: Status, Subject, From, Email Sent ( total number of sent emails and open emails) and Date.
Search button gives you the ability to perform it based on the same details.
Using the Configuration button is possible to Delete or Edit the campaign.
To create a new email campaign press on + New email campaign button.
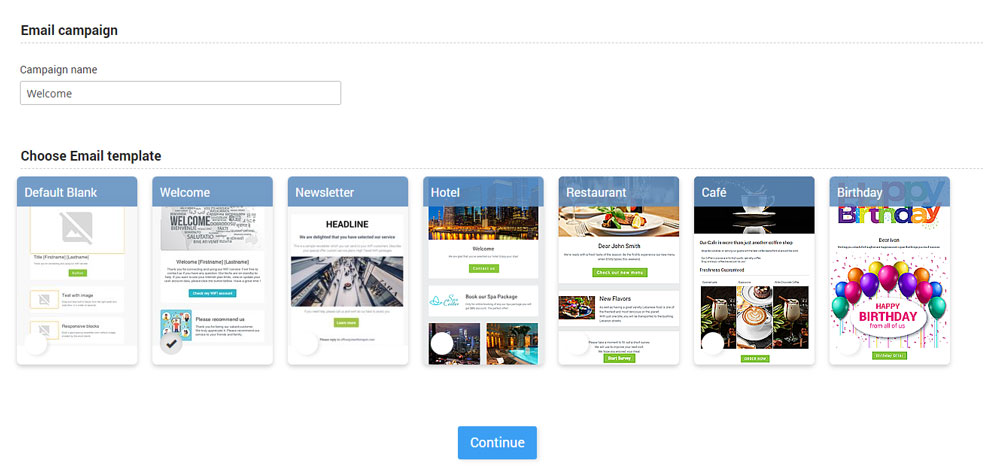
Set the Email campaign Name and Choose Email Template.
You can select Blank email or some predefined, then press the Continue button.
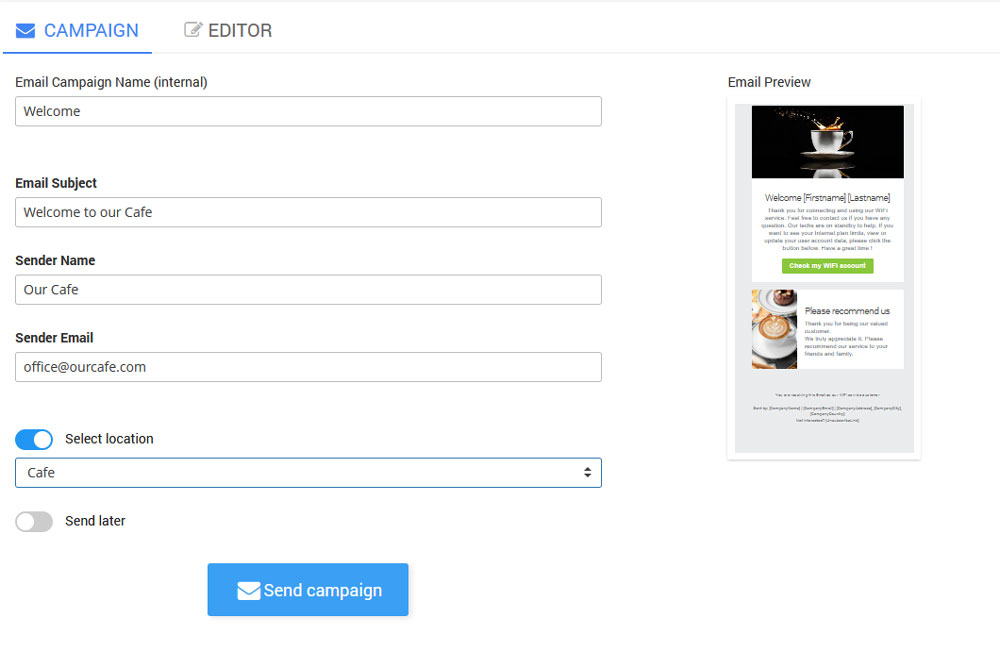
From the Campaign tab, set the email campaign Subject, Sender Name, and Sender email.
If you want to send an Email Campaign to the customers on a specific WiFi location, enable Select location and choose WiFi location. Email Campaign will be displayed on users’ devices logged in to that location.
You can specify an exact date when the email campaign will be sent using Send Later option.
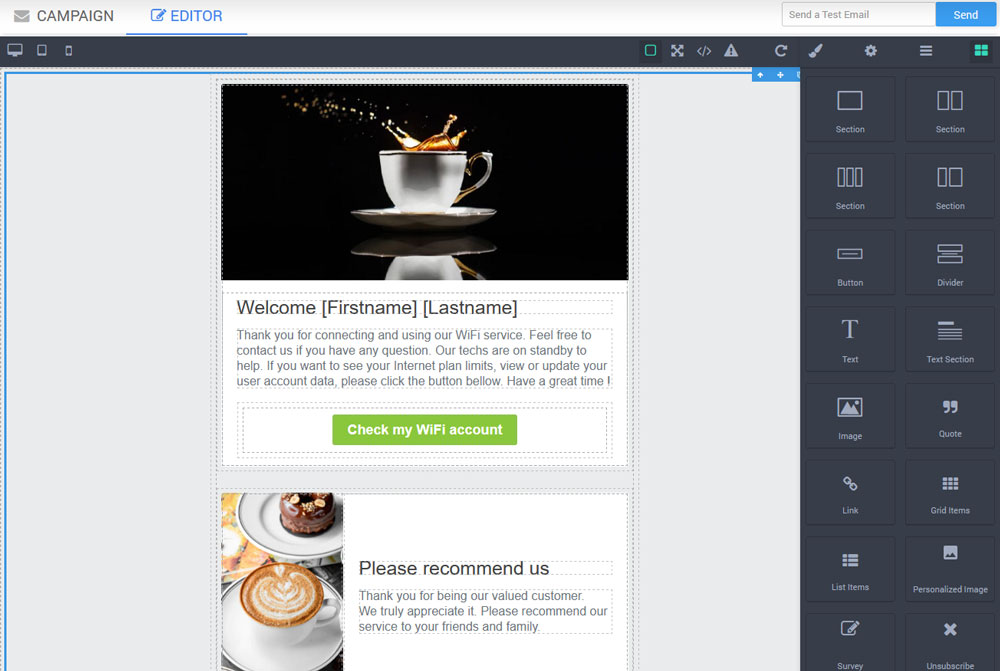
 From the Editor tab, you can make needed changes to the loaded template in minutes with the drag & drop email builder.
This brand new editor helps you quickly build effective Email campaigns, with much less effort than before. There are different elements you can drag and drop in an email, like text, tables, sections, and images.
Elements are configurable so you can edit the style for each component, and change their order, without any coding skills.
Here are great new features inside the Email editor:
Survey link that user can click and fill in a satisfaction survey. Surveys are collected and displayed in the Logs and Stats.
Personalized Image is a great thing to add to your email as it will embed predefined text into the selected image. For example, choose a photo of your interior and write “Welcome Peter” or “Thanks for visiting Peter”. Customers are more likely to respond to personalized stuff.
Unsubscribe link can be simply added as a component, and this is important to stay compliant with GDPR and Antispam. It includes your business name, address and contact and of course unsubscribe link.
You can test the look of the email using Send a Test Email option.
When you finish with the configuration press the Save button.
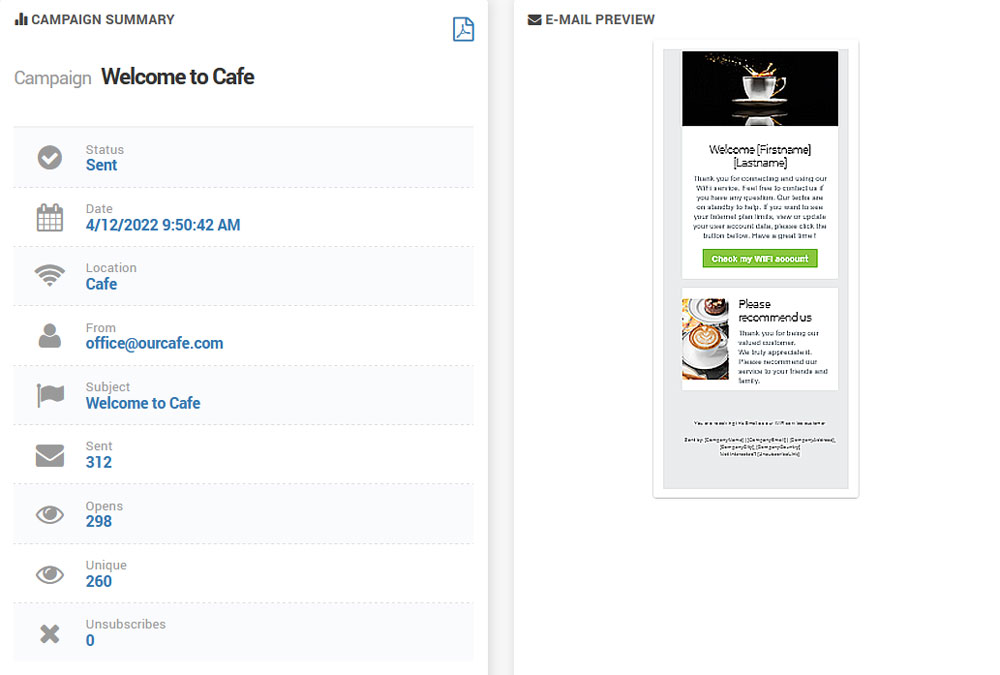
When an email campaign is sent you will get a Campaign summary on the same page.
Campaign Summary shows Status, Date, Location, From, Subject, total number of Sent emails, number of Opens, number of Unique users, and number of Unsubscribes.

 Email Campaign