
Users
The Users panel is used to create and manage user, voucher, and device accounts. You can assign internet plans, configure access limits, import accounts from CSV files, review generated batches, and remove expired or unused accounts.
All Users
Go to Users > All Users to view all created accounts.
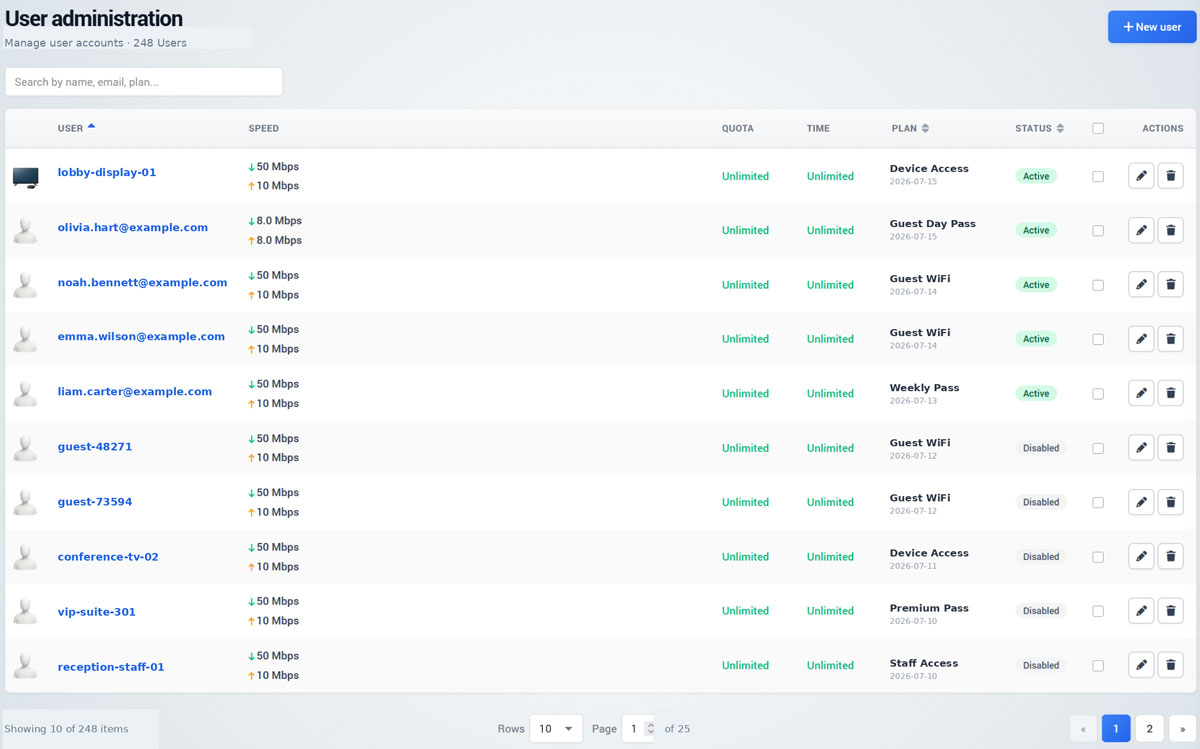
The table displays:
Username or device identifier
Download and upload speed
Remaining bandwidth quota
Remaining connection time
Assigned internet plan
Account status
Edit and delete actions
Use the search field to find accounts by username, email address, or internet plan. Click the Edit icon to modify an account or the Delete icon to remove it.
Create a New User Account
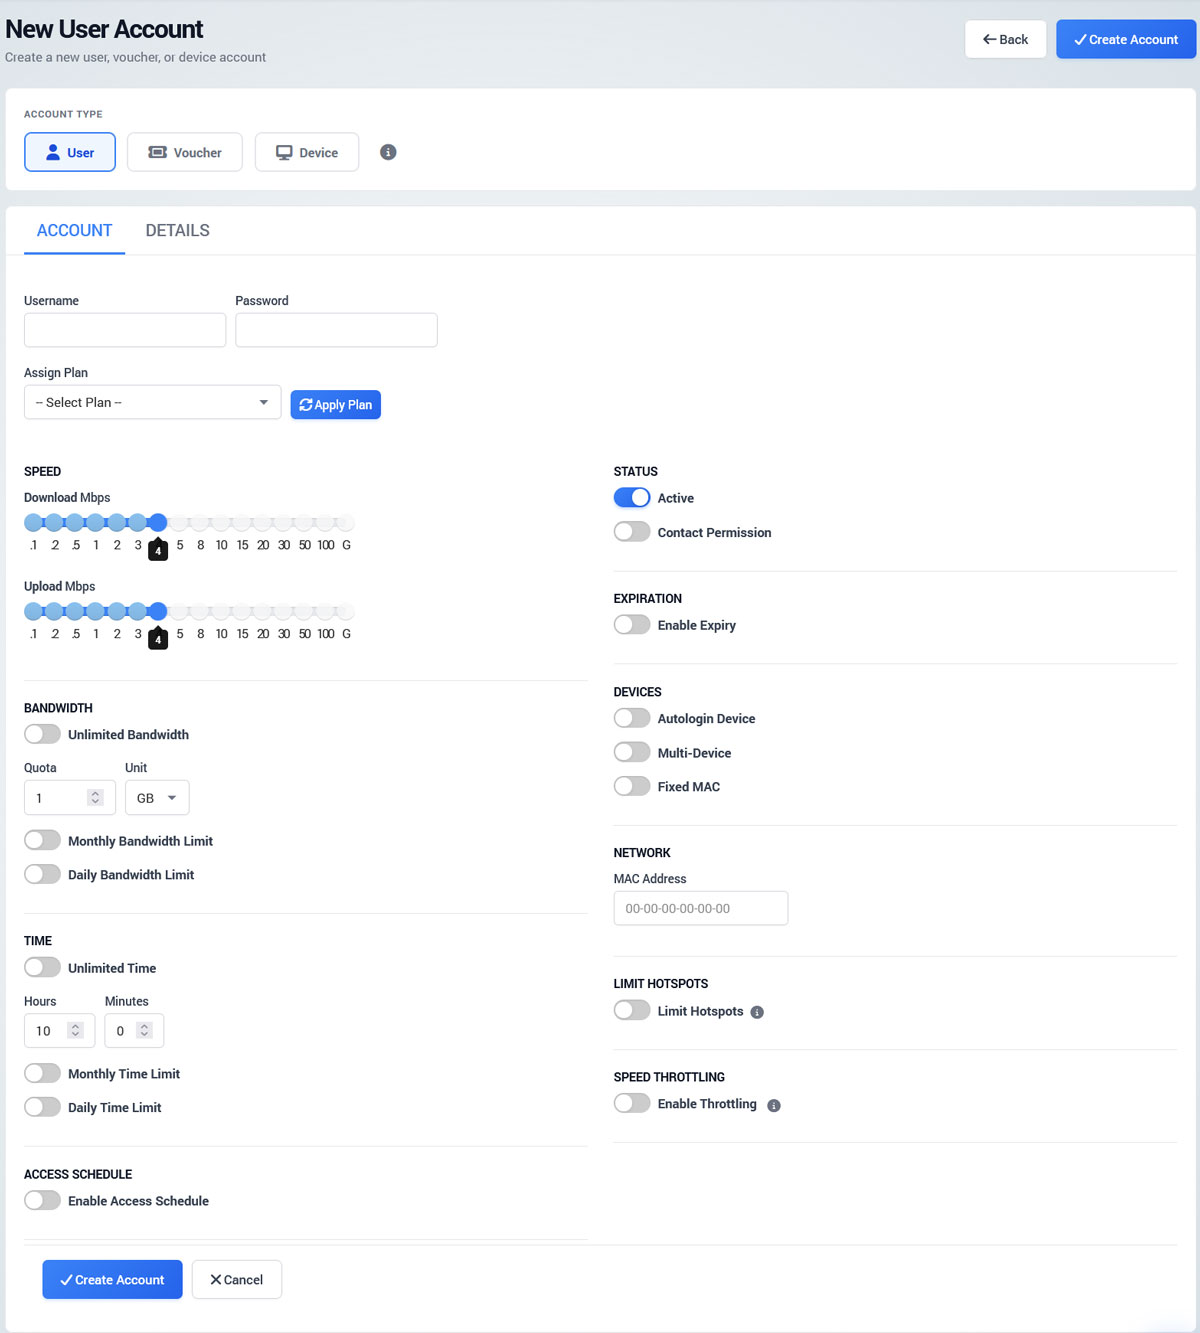
Go to Users > New User.
Select User as the account type.
Enter the username and password.
Select an internet plan and click Apply Plan to load its default settings.
Adjust the speed, bandwidth quota, time limit, expiration, access schedule, and device options when required.
Click Create Account.
The Details tab can be used to enter additional contact or account information.
User Account Settings
Speed controls the maximum download and upload rate.
Bandwidth defines the total, monthly, or daily data allowance.
Time defines the total, monthly, or daily connection time.
Access Schedule restricts when the account can connect.
Active enables or disables the account.
Contact Permission records whether the user has agreed to receive marketing messages.
Enable Expiry automatically disables the account on the configured expiration date.
Autologin Device allows the registered device to reconnect automatically.
Multi-Device allows the account to be used on more than one device.
Fixed MAC restricts the account to the configured MAC address.
Limit Hotspots restricts the account to selected WiFi locations or hotspots.
Speed Throttling reduces the connection speed after the configured usage threshold is reached.
Create a Voucher Account
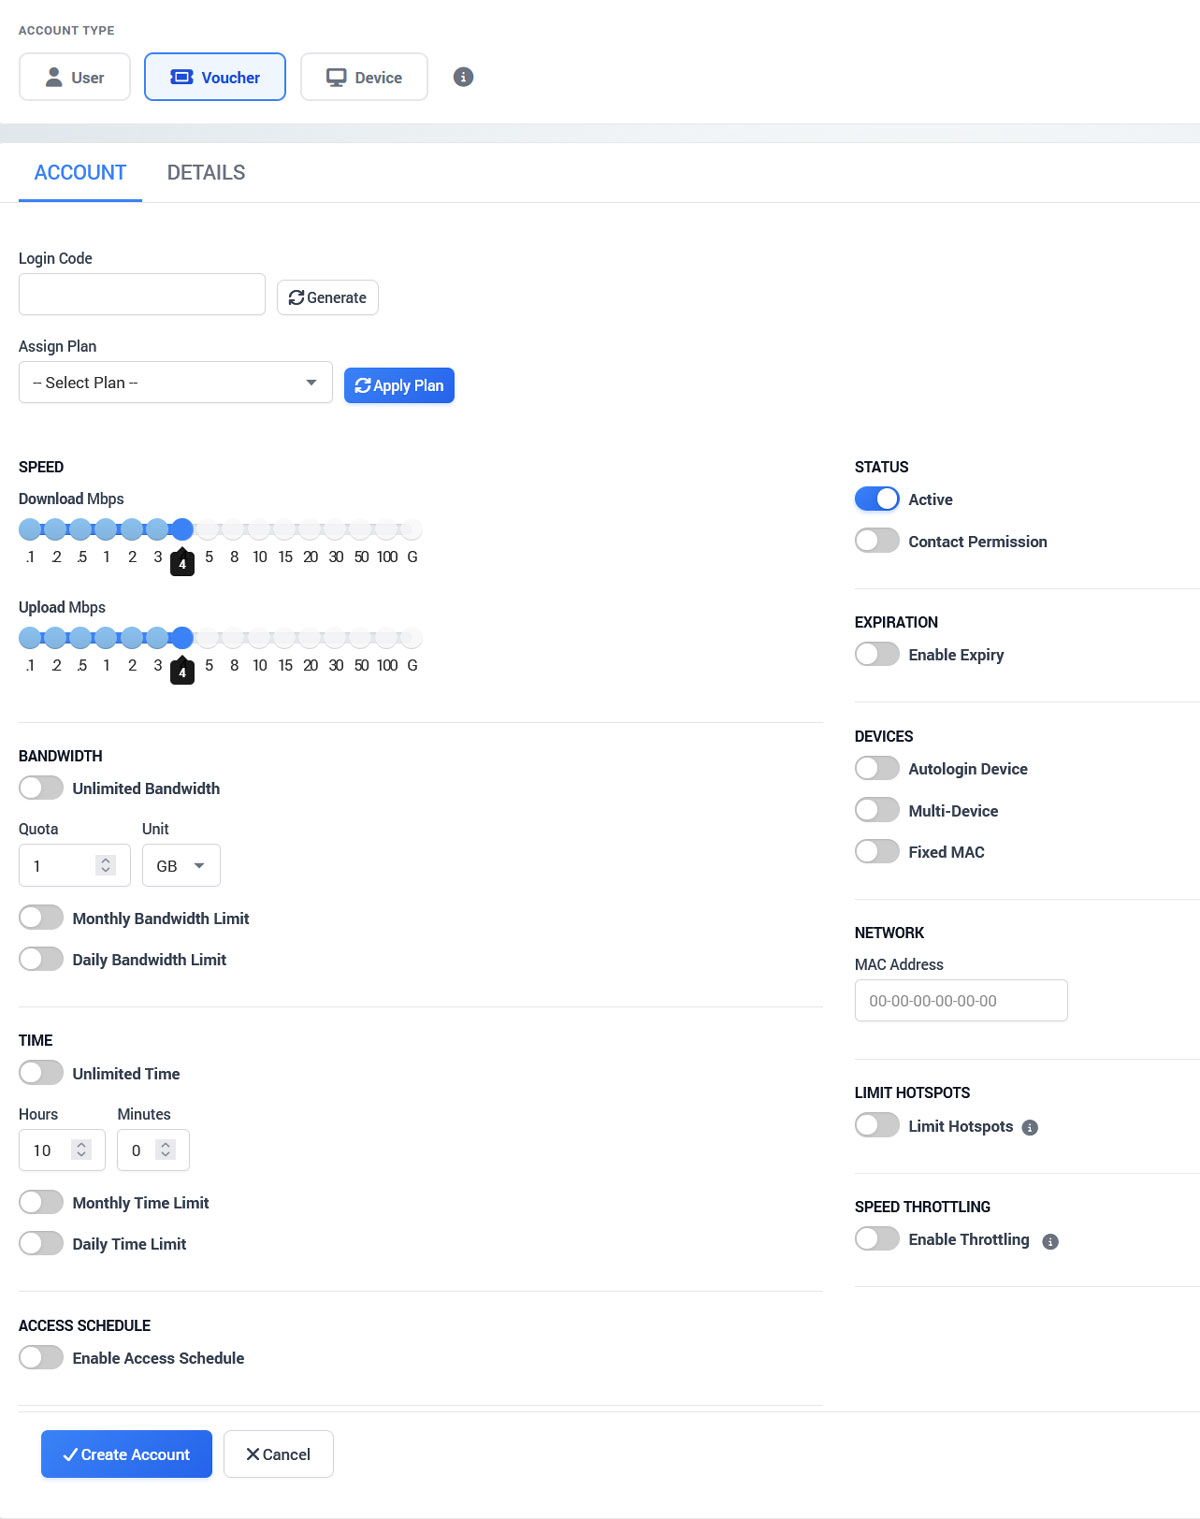
Go to Users > New User.
Select Voucher.
Enter or generate the voucher code.
Select and apply an internet plan.
Configure the access limits and expiration settings.
Click Create Account.
Guests use the voucher code on the splash page to receive internet access.
Create a Device Account
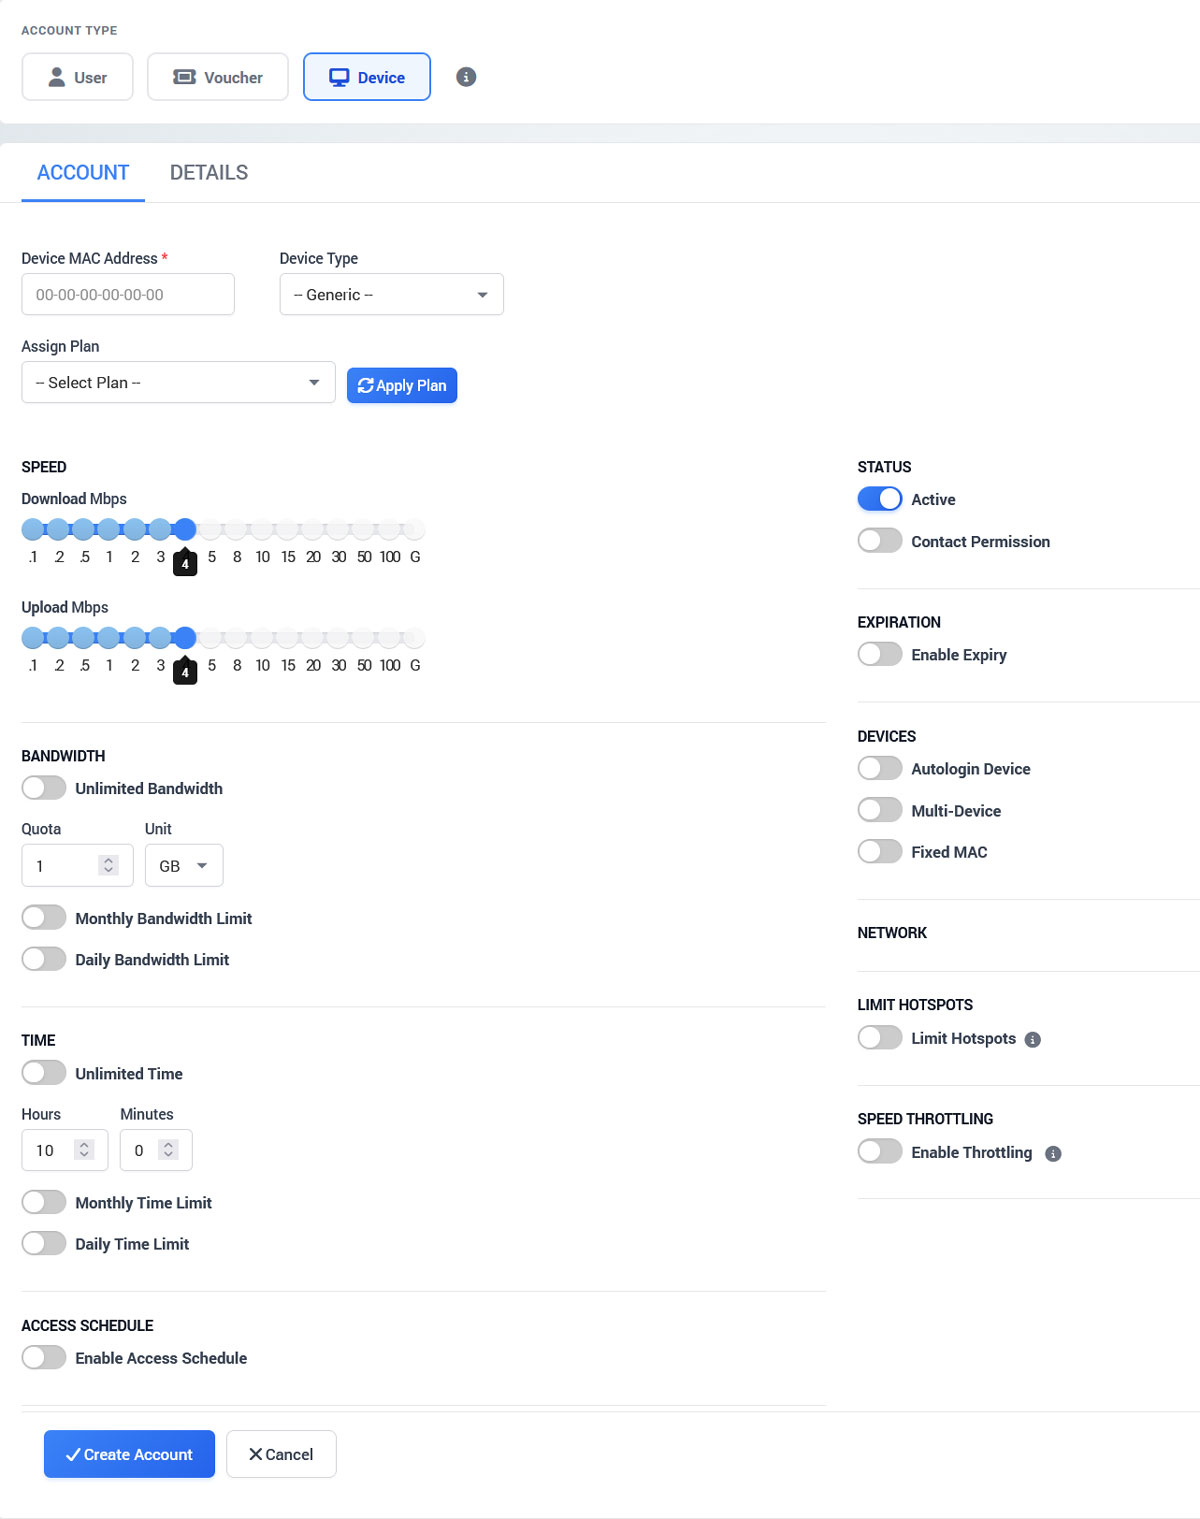
Device accounts are intended for devices that cannot complete a standard captive portal login, such as Smart TVs, printers, cameras, POS terminals, or IoT devices.
Go to Users > New User.
Select Device.
Choose the device type.
Enter the device MAC address.
Select the required internet plan.
Click Create Account.The device is authenticated automatically using its MAC address.
Create Multiple Accounts
Go to Users > Create to generate multiple user, voucher, or device accounts.
Select the required account type.
Choose an internet plan.
Enter the number of accounts to create.
Select the account generation type.
Configure optional expiration, location, and ticket appearance settings.
Click Create.
Autogenerate
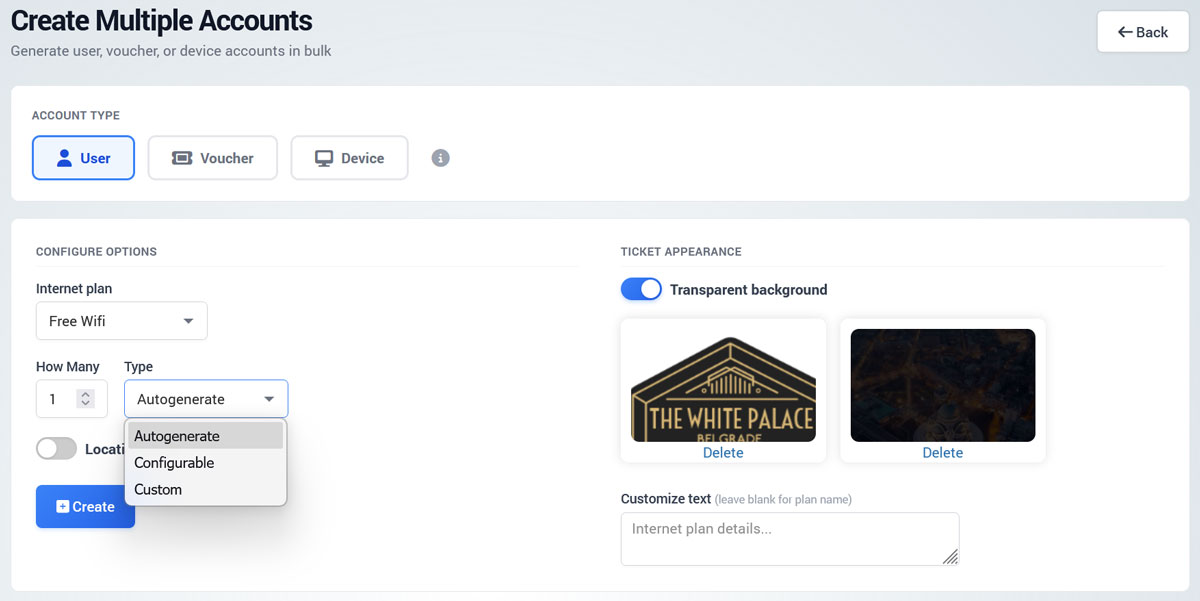
Select Autogenerate when the system should create random usernames, passwords, or voucher codes automatically.
Enter the required number of accounts and click Create.
Configurable
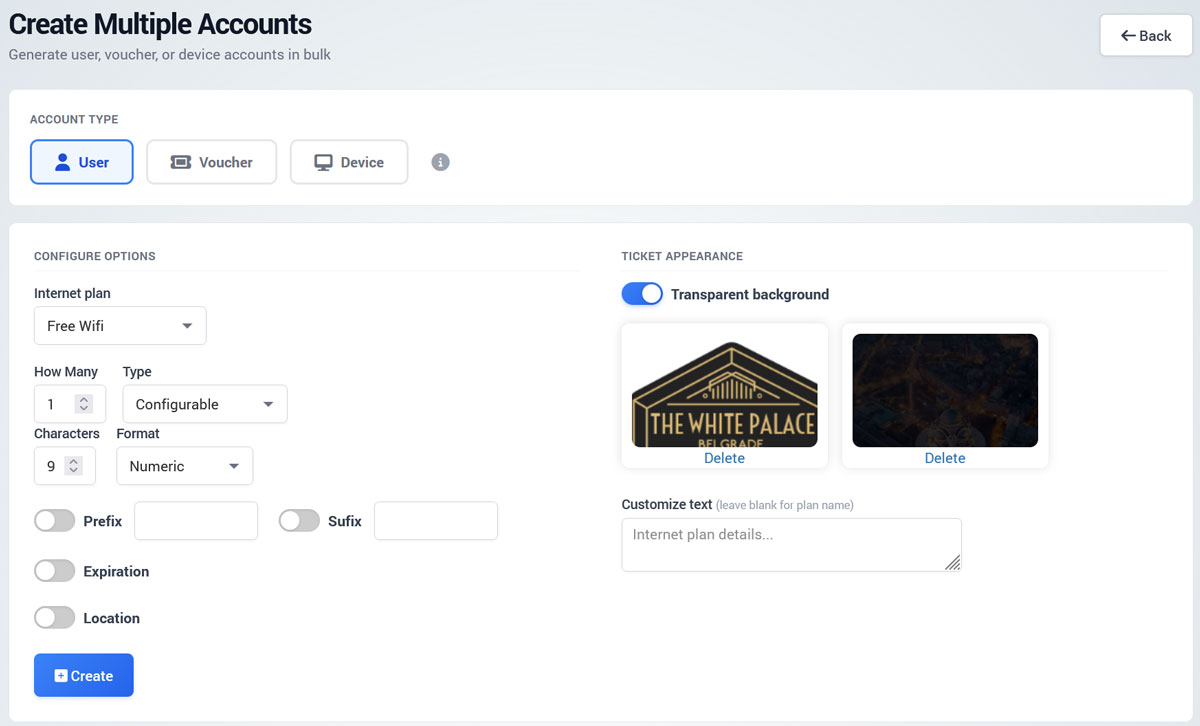
Select Configurable to control how the credentials are generated.
You can configure:
Number of characters
Numeric or alphanumeric format
Username or code prefix
Username or code suffix
Expiration
WiFi location
Click Create after configuring the required format.
Custom
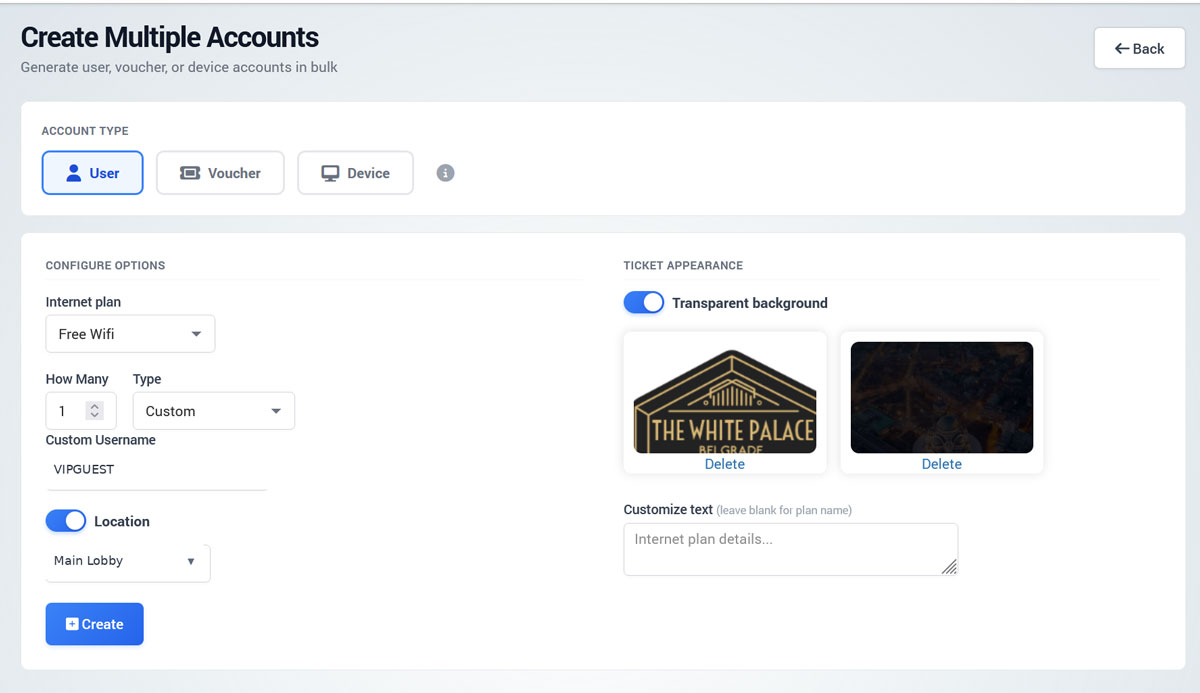
Select Custom when you need to enter a specific username or voucher code.
Select Custom.
Enter the required username or voucher code.
Optionally assign the account to a specific location.
Click Create.
Create Device Accounts
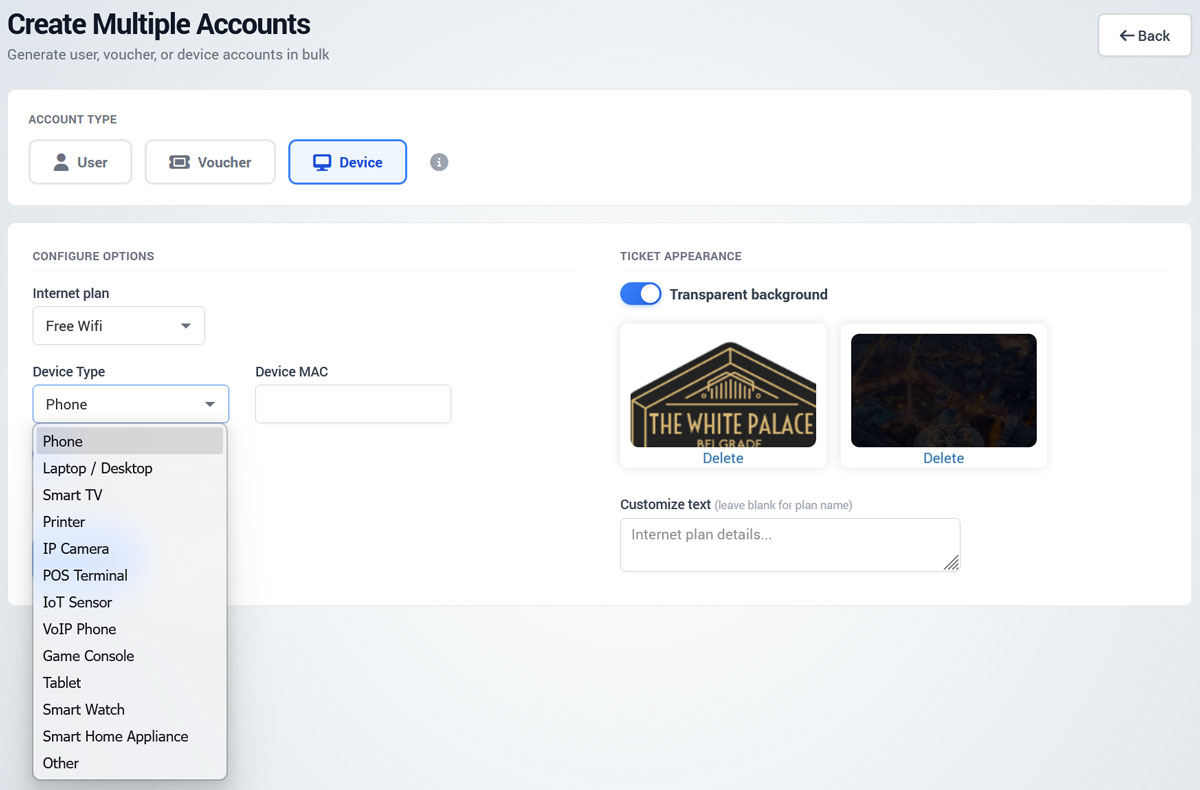
Select Device to register a device that should connect without entering credentials.
Select the internet plan.
Choose the device type.
Enter the device MAC address.
Click Create.
Supported device categories include phones, computers, Smart TVs, printers, IP cameras, POS terminals, IoT sensors, VoIP phones, game consoles, tablets, smart watches, and smart home appliances.
Ticket Appearance
The Ticket Appearance section controls how printed or exported account tickets are displayed.
You can:
Use a transparent background
Upload a logo
Upload a background image
Add custom ticket text
Leave the custom text field empty to display the internet plan name automatically.
Batch
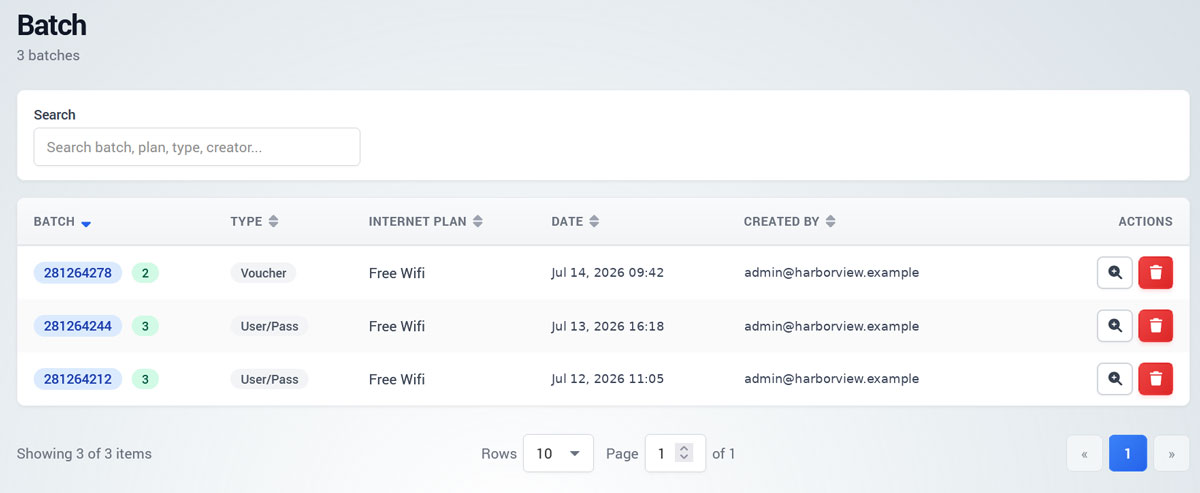
Go to Users > Batch to review previously generated account batches.
The list displays the batch number, account type, internet plan, creation date, administrator, and number of generated accounts.
Use the search field to find a batch by its number, plan, type, or creator.
Click the View icon to open the batch details. Click the Delete icon to remove the batch record.
Import Users
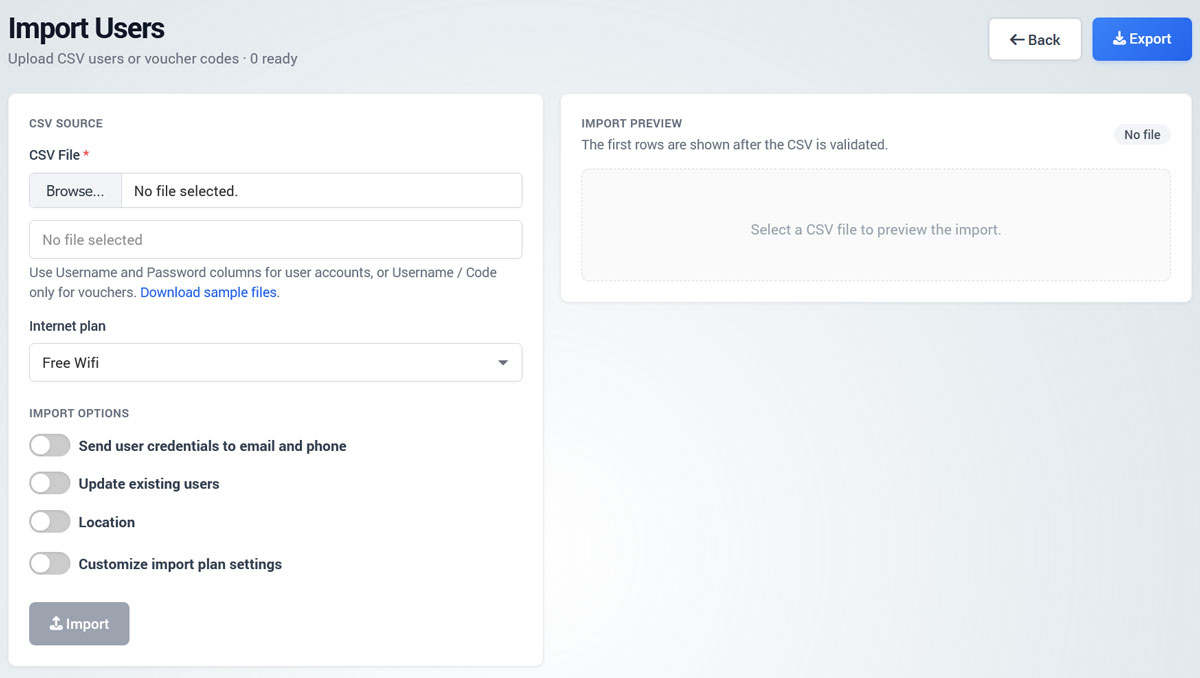
Go to Users > Import to create or update accounts from a CSV file.
Download the provided sample CSV file.
Enter user accounts using the Username and Password columns.
For vouchers, use the Username or Code column.
Select the completed CSV file.
Choose the internet plan.
Enable the required import options.
Review the import preview.
Click Import.
Available options include sending credentials by email or phone, updating existing accounts, assigning a location, and customizing imported plan settings.
The Export button can be used to export existing account data.
Delete Users
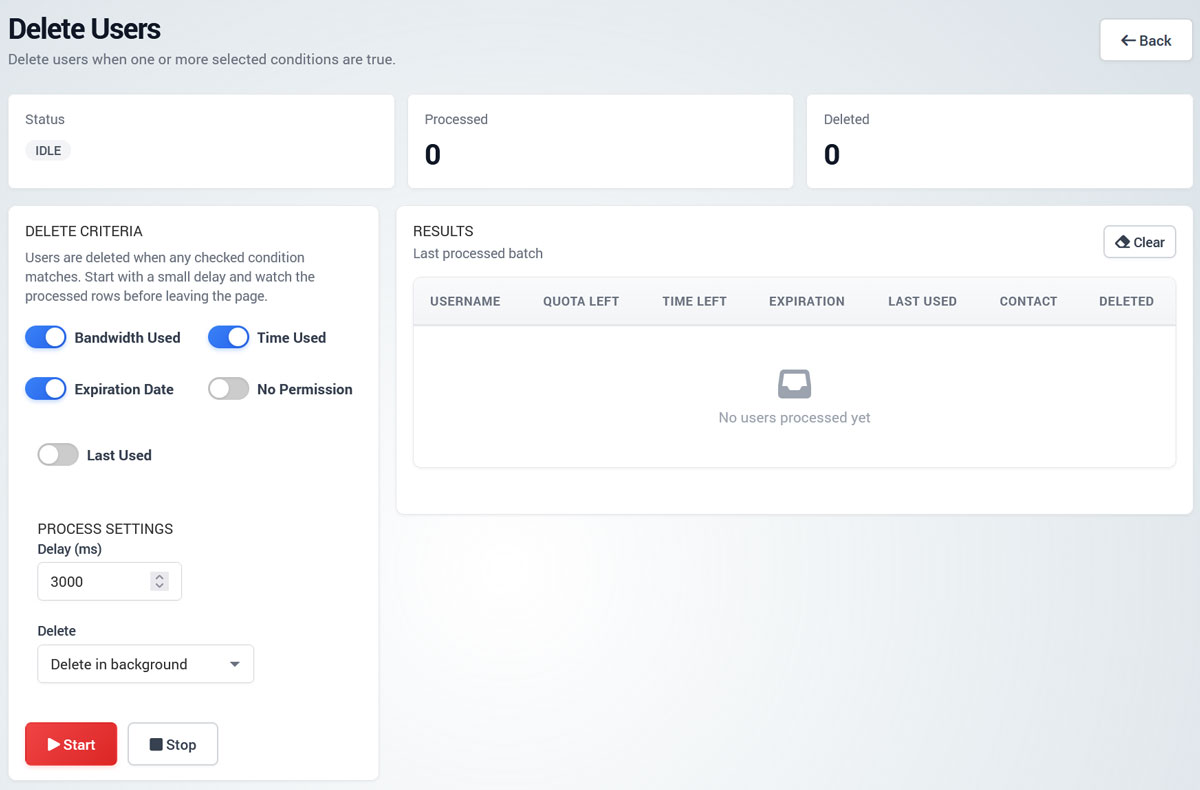
Go to Users > Delete to remove accounts that match selected conditions.
Accounts can be selected based on:
Used bandwidth quota
Used connection time
Expiration date
Missing access permission
Last-used date
A user is selected when any enabled condition matches.
Enable the required deletion criteria.
Set the processing delay.
Select the deletion mode.
Click Start.
Review processed and deleted accounts in the Results table.
Click Stop to interrupt the operation. Deleted accounts cannot be restored.