
Help Desk
The Help Desk provides a built-in way to collect, track, and manage WiFi support requests.
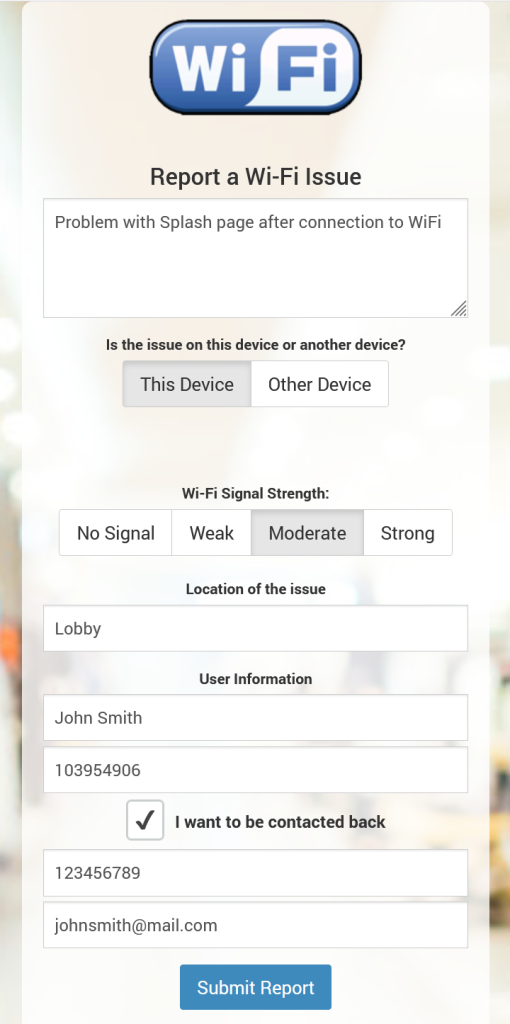
Guests can report connectivity problems directly through the Splash Page, while administrators can review tickets from the WiFi Hotspot dashboard together with available device, hotspot, location, and user information.
How Help Desk Works
A typical Help Desk workflow is:
The guest connects to the WiFi network.
The Help Desk option is available on the Splash Page.
The guest reports a WiFi problem.
A Help Desk ticket is created.
The administrator reviews the reported issue and available connection details.
The ticket status is updated while the problem is investigated.
The ticket is marked Solved or Rejected when processing is complete.
Keeping the support request inside WiFi Hotspot gives administrators useful network and user context without requiring the guest to describe every technical detail manually.
Enable Help Desk on a Splash Page
To make Help Desk available to WiFi visitors:
Open the required Splash Page.
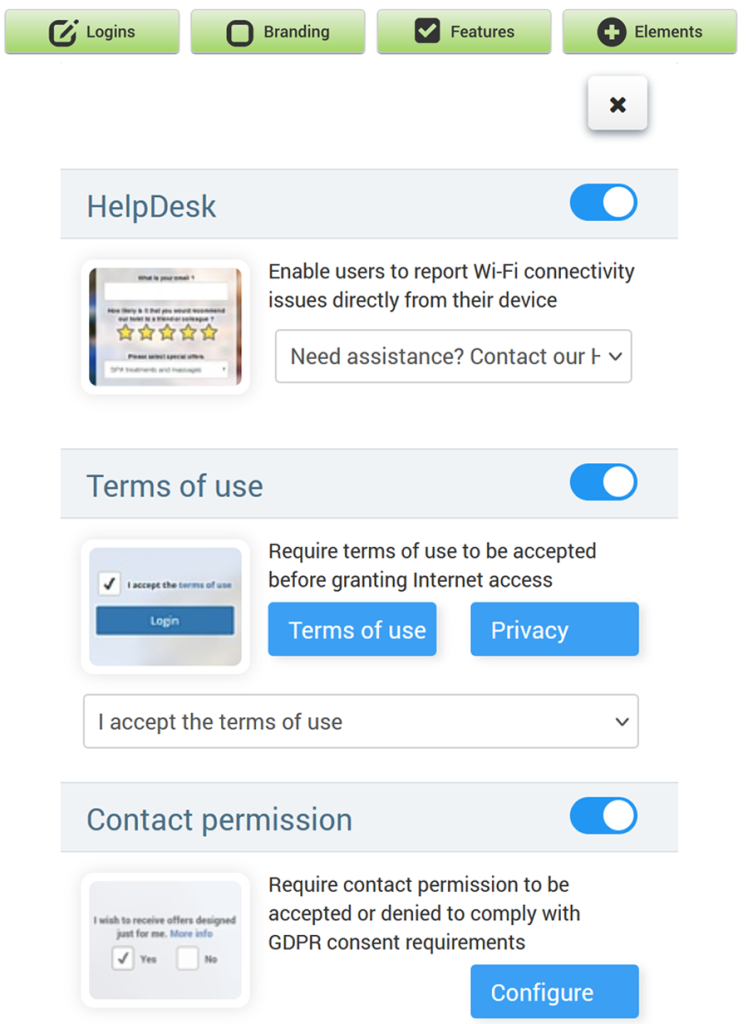
Select the Features tab.
Add or enable the Help Desk feature.
Save the Splash Page.
Connect a test device and verify that the Help Desk option is available.
Enable Help Desk only on Splash Pages where visitors should be able to submit support requests.
Help Desk Tickets
Submitted issues are available in the Help Desk section of the WiFi Hotspot dashboard.
Administrators can use the ticket information to understand:
What problem was reported
When the ticket was created
Current ticket status
User information
Device MAC address
Signal strength
Hotspot information
Location, area, or room
Whether the user requested contact
This provides a centralized record of guest WiFi support issues.
Create a New Ticket
Administrators can also create a Help Desk ticket from the dashboard when a problem is reported through another channel.
When creating a ticket, enter the available information and click Save.
Not every field needs to be entered manually when the information is unavailable, but providing more context can make troubleshooting easier.
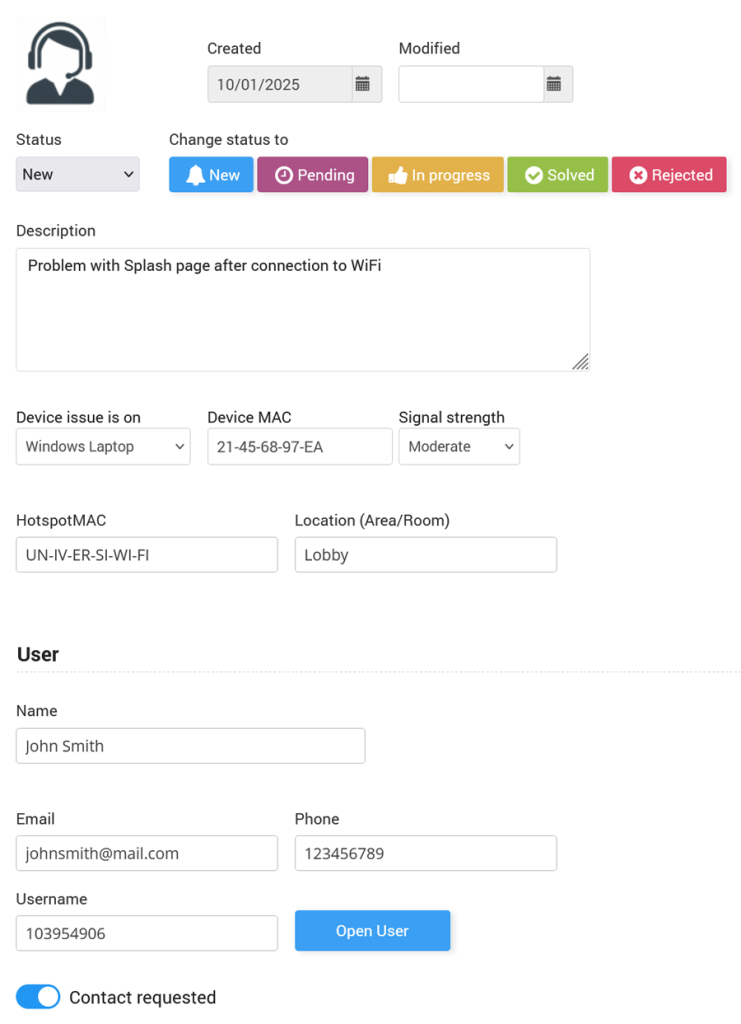
Created and Modified
The ticket displays:
Created – Date when the ticket was created.
Modified – Date when the ticket was last updated.
These fields help administrators track how long an issue has been open and when it was last processed.
Ticket Status
Each Help Desk ticket has a status that represents its current stage.
Available statuses include:
New – A newly created or reported issue.
Pending – The ticket is waiting for additional information or further action.
In progress – The issue is currently being investigated.
Solved – The reported problem has been resolved.
Rejected – The ticket has been closed without further processing.
Use the status buttons to keep the ticket current as troubleshooting progresses.
A simple workflow can be:
New → In progress → Solved
or, when additional information is required:
New → Pending → In progress → Solved
Description
Use the Description field to record the reported issue and relevant troubleshooting information.
A useful description can include:
What the user is experiencing
Whether the Splash Page appears
Whether login succeeds
Whether Internet access is available
When the problem started
Troubleshooting already performed
Additional notes from the administrator
Keep the description focused on information that can help diagnose or resolve the issue.
Device MAC
The Device MAC field identifies the client device associated with the support request when this information is available.
The MAC address can help administrators correlate the reported problem with user sessions, authentication information, or network activity.
Signal Strength
The Signal strength field records the reported WiFi signal condition.
For example, a connectivity complaint combined with poor signal strength can indicate a coverage issue rather than an authentication or account problem.
Use this information together with hotspot and location details when troubleshooting wireless connectivity.
Hotspot MAC
The Hotspot MAC field identifies the hotspot associated with the reported issue when available.
This helps administrators determine which network device or WiFi area should be investigated.
It is particularly useful in deployments with multiple hotspots at the same property.
Location, Area, or Room
Use Location (Area/Room) to identify where the guest experienced the problem.
Examples can include:
Hotel Lobby
Room 205
Restaurant
Conference Hall
Pool Area
Reception
Building A
Accurate location information makes it easier to determine whether an issue affects a single visitor, one WiFi coverage area, or an entire location.
User Information
The User section contains information about the person associated with the Help Desk ticket.
Available fields include:
Name
E-mail
Phone
Username
When this information is available, administrators can use it to identify the corresponding WiFi account and review related activity.
Contact Requested
Enable Contact requested when the user has asked to be contacted about the reported issue.
This allows support staff to distinguish tickets that require direct follow-up from issues that only need technical resolution.
When contact is requested, verify that an email address or phone number is available before closing the ticket.
HelpDesk Operator Email
Help Desk notification recipients are configured under:
My Account → E-mail → HelpDesk Operator Email
Configure:
Sender Email
HelpDesk Operator Emails
Multiple operator email addresses can be entered as a comma-separated list.
Use addresses monitored by administrators or support staff responsible for guest WiFi issues.
Troubleshooting a Help Desk Ticket
When reviewing a new ticket, start with the information already available in the report.
A practical troubleshooting sequence is:
Review the problem description.
Check the user and username.
Review Device MAC information.
Check signal strength.
Identify the hotspot.
Review the location, area, or room.
Check related sessions or rejected login information when applicable.
Change the ticket to In progress while investigating.
Contact the user when Contact requested is enabled.
Mark the ticket Solved after confirming that the issue has been resolved.
If the report is invalid or does not require further action, use Rejected instead.
Common WiFi Issues
Help Desk tickets can be useful for investigating issues such as:
Splash Page does not appear
User cannot log in
Account or voucher is rejected
Internet access is unavailable after login
Weak WiFi signal
Frequent disconnections
Slow Internet access
Device cannot reconnect
Problem limited to a specific location or hotspot
Use the information in the ticket together with Sessions, Rejected Logins, and other available analytics when additional troubleshooting is required.
Test the Help Desk
After enabling Help Desk on a Splash Page, test the complete process.
Connect a test device to the guest WiFi.
Open the Splash Page.
Open the Help Desk option.
Submit a test problem.
Open the Help Desk dashboard.
Confirm that the ticket was created.
Review the device, location, hotspot, and user information.
Change the ticket status to In progress.
Verify operator notification settings when configured.
Mark the test ticket Solved.
Testing confirms that both the guest reporting process and administrator workflow operate correctly.