
Create and Manage WiFi Locations
WiFi Locations help you organize hotspots, splash pages, and Internet Plans by physical location, venue area, or business unit.
A location can represent a hotel lobby, restaurant, guest rooms, event area, public venue, café, shopping mall zone, or any other place where guest WiFi access is provided.
From the WiFi Locations page, administrators can:
Create and manage WiFi locations
Assign a default Splash Page to each location
Add one or more hotspots
Assign Internet Plans
Review location status
Edit or delete existing locations
WiFi Locations Overview
The WiFi Locations page shows all configured locations in one place.
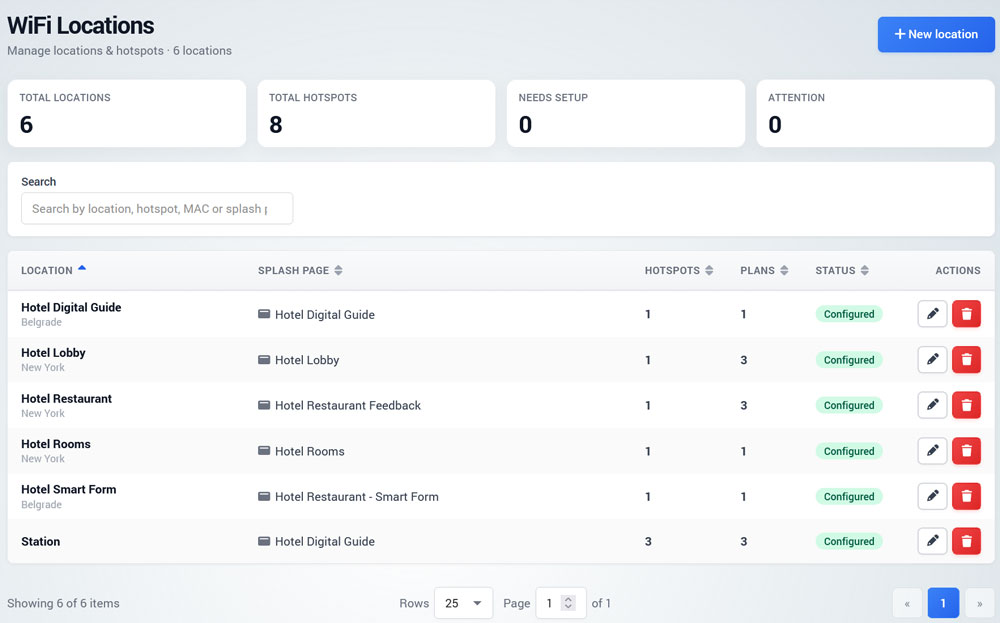
At the top of the page, summary cards display:
Total Locations
Total Hotspots
Needs Setup
Attention
The table below shows each location with its assigned Splash Page, number of hotspots, number of Internet Plans, status, and available actions.
Use the search field to quickly find a location by location name, hotspot, MAC address, or splash page.
Each location can be edited or deleted from the Actions column.
Create a New WiFi Location
To create a new location, click New Location.
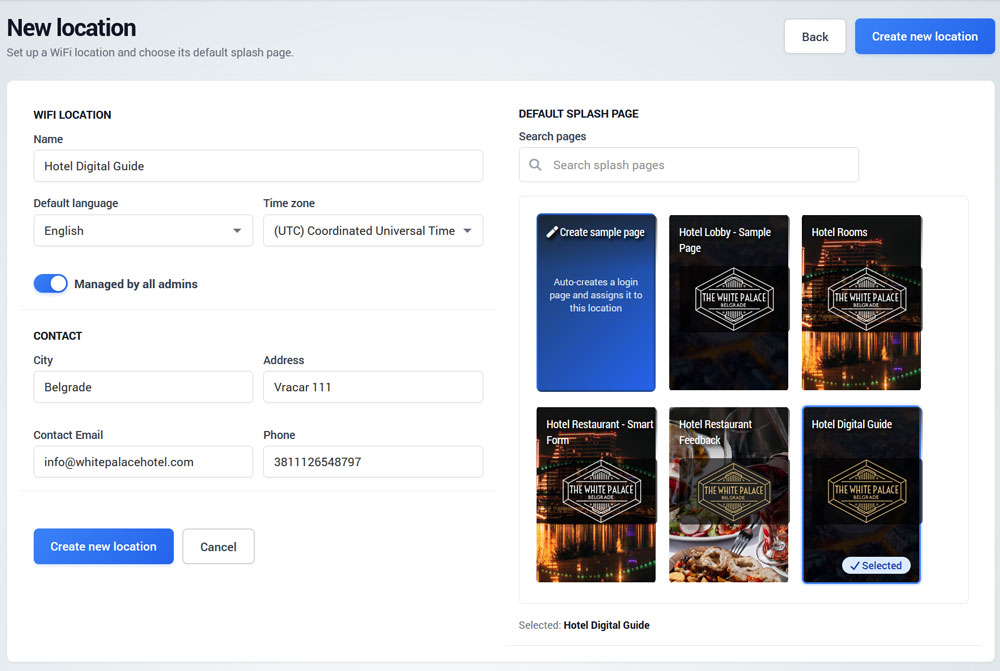
In the WiFi Location section, enter the main location details:
Name – internal location name used in the platform
Default language – language used for the location
Time zone – time zone where the location operates
Managed by all admins – allows all administrators to manage this location
In the Contact section, enter optional location contact details:
City
Address
Contact Email
Phone
On the right side, select the Default Splash Page for the location.
You can choose an existing Splash Page or create a sample page if needed. The selected Splash Page will be assigned as the default login page for this location.
Click Create new location to save the location.
Manage a Location
After a location is created, open it to manage its configuration.
The location page includes summary cards for:
Hotspots
Internet Plans
Licenses
Online Users
The main location page contains three tabs:
Overview
Hotspots
Internet Plans
Use these tabs to manage routers, access plans, and location-specific configuration.
Hotspots
The Hotspots tab lists all hotspots assigned to the selected location.
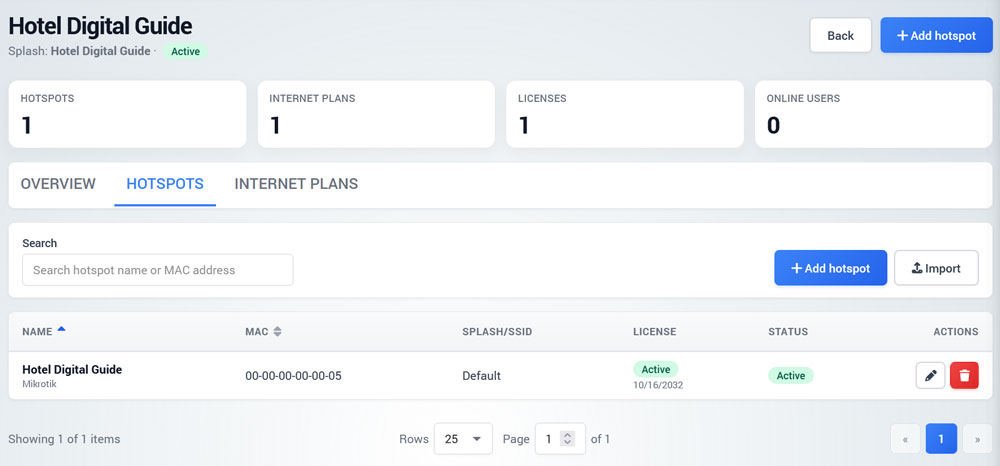
For each hotspot, the table shows:
Hotspot name
MAC address
Splash / SSID
License
Status
Available actions
To add a new hotspot, click Add hotspot.
To import hotspot data, use the Import option if available.
Add or Edit a Hotspot
When adding or editing a hotspot, enter the following details:
Hotspot name
MAC address
Model
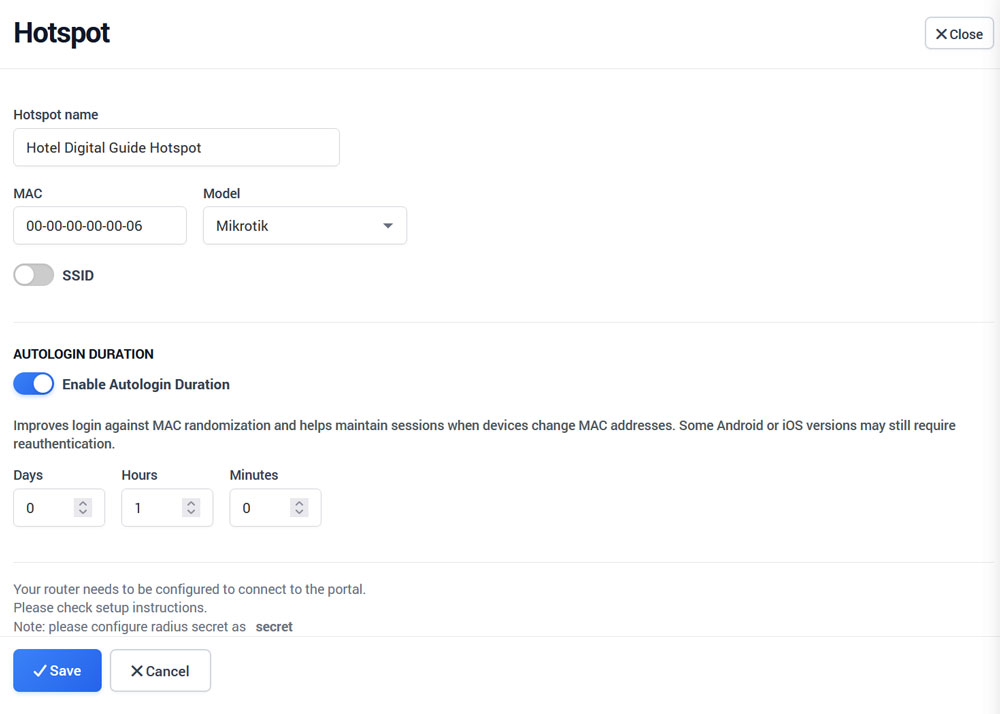
If SSID-based configuration is used, enable the SSID option and configure the required SSID settings.
The router must be configured to connect to the portal. Use the setup instructions for the selected router model and make sure the router uses the correct RADIUS settings and shared secret provided by Antamedia.
Click Save to apply changes.
Autologin Duration
Autologin Duration helps reduce repeated captive portal logins for returning users.
When enabled, an eligible previously authenticated device can reconnect automatically during the configured period according to the Autologin settings.
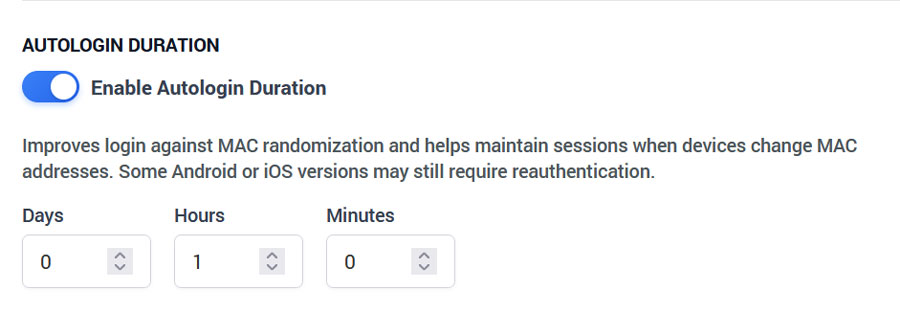
How to enable Autologin Duration
Open the hotspot edit page.
Enable Enable Autologin Duration.
Set the desired duration using:
Days
Hours
Minutes
Click Save.
Example: If you set:
Days: 0
Hours: 1
Minutes: 0
the automatic login will remain valid for 1 hour.
During this period, an eligible returning device can reconnect automatically without repeating the complete captive portal login process.
Recommended usage
For hotels, use a longer duration that matches the guest stay or daily access policy.
For restaurants and cafés, use a shorter duration, such as a few hours or one day.
For public WiFi, use a controlled duration based on your access policy, security requirements, and fair usage rules.
MAC Randomization: On supported MikroTik deployments, WiFi Hotspot handles MAC randomization automatically. With other supported routers and controllers, a changed randomized MAC may be detected as a new device. In these environments, use the MAC Randomization Assistant to allow users to manage outdated device entries when necessary.
Internet Plans
The Internet Plans tab shows all plans assigned to the selected location.
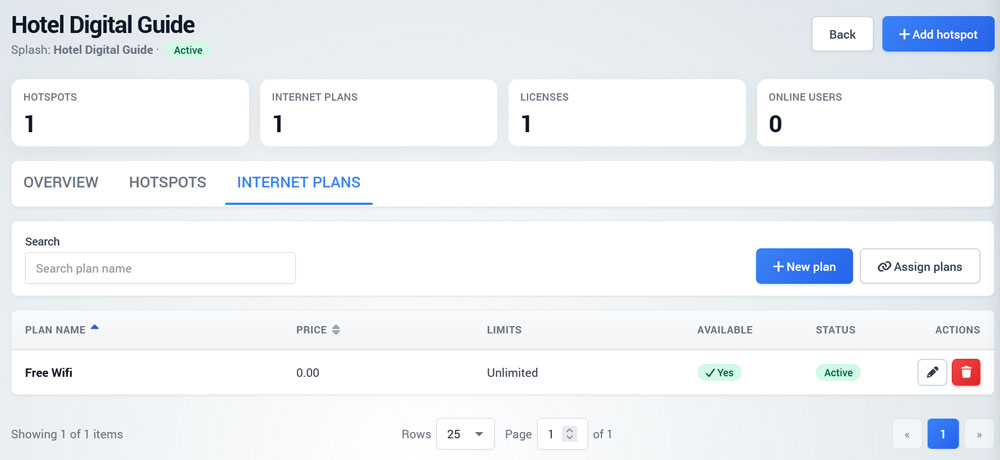
Each plan includes:
Plan name
Price
Limits
Availability
Status
Available actions
You can create a new plan using New plan, or assign existing plans using Assign plans.
Assign Existing Plans to a Location
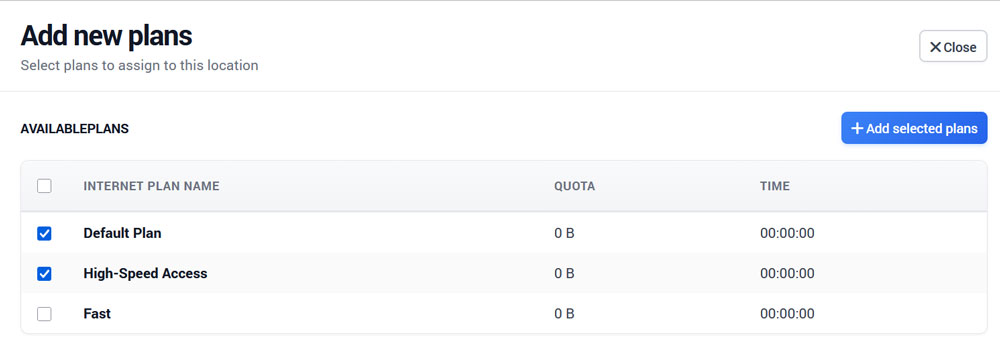
To assign existing Internet Plans to a location:
Open the selected location.
Go to the Internet Plans tab.
Click Assign plans.
Select one or more available plans.
Click Add selected plans.
Assigned plans become available for that location and can be used with the selected Splash Page and hotspot configuration.
Best Practice
Create separate WiFi Locations for different areas or use cases when they require different Splash Pages, Internet Plans, reporting, or access policies.
For example, a hotel can use separate locations for:
Hotel Lobby
Hotel Rooms
Hotel Restaurant
Digital Guide access
Smart Form campaigns
Event or conference areas
This makes it easier to manage guest access, apply different plans, track usage, and keep reporting organized.