 ZBT
ZBT
Please select a model and download HotspotOS.
DownloadHotspotOSConfigurationTroubleshoot
Please reset the AP / WiFi router to factory settings to avoid problems with some previous configuration.
Connect your computer to ZBT device web interface.
Go to the Firmware upgrade section.
Navigate to the location where the HotspotOS for your model is downloaded and press Open.
Press the Firmware Update button.
Click Upload to complete the HotspotOS installation.
The HotspotOS installation procedure can take a few minutes.
During this process, you will see information about the processing.
Reconnect LAN cable or Disable/Enable NIC card in order to get new valid IP address in 10.200.0.x range from router.
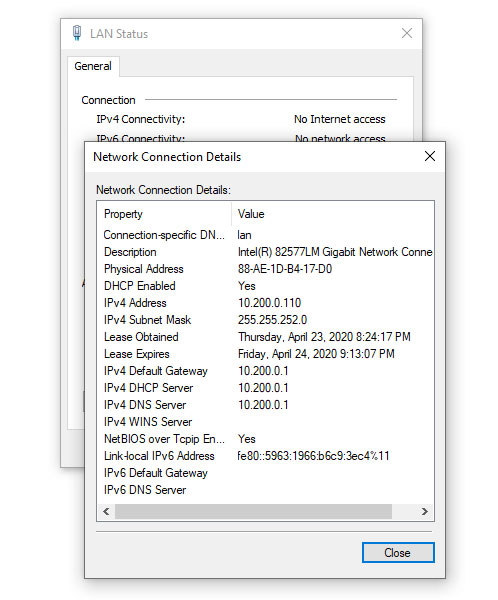
Start your browser and in URL field type http://10.200.0.1:8089/ to login to HotspotOS.
Username: admin
Password: admin
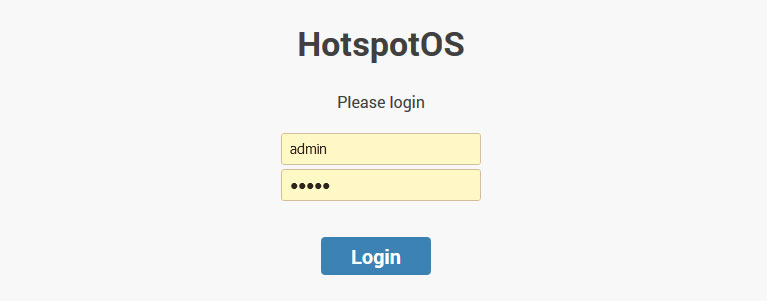
Press the Login button to access to Status tab.
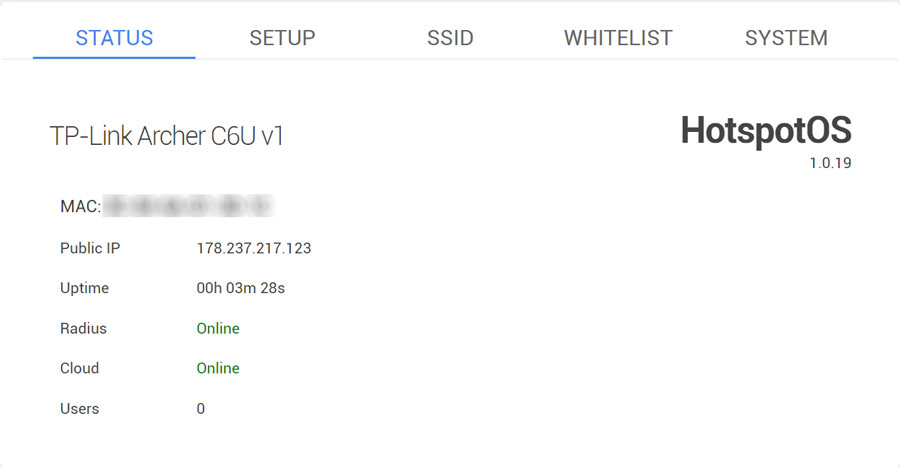
On the HotSpotOS Status page, you can check AP MAC address, Public IP, device Uptime, Radius and Cloud status, and a number of users connected to AP.
The MAC address of your AP will be used in the SignUp process.
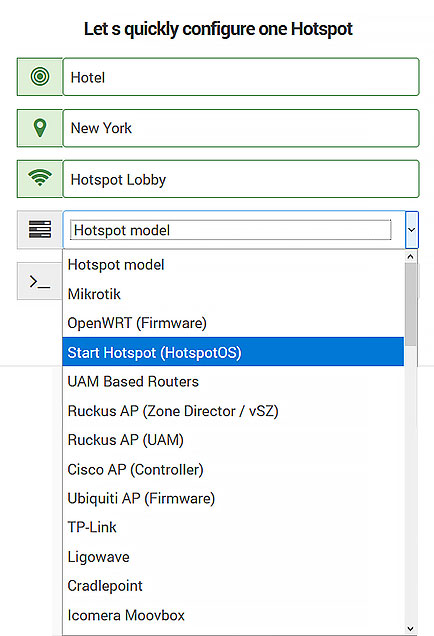
During SignUp, after typing HotSpot name, select as HotSpot model HotspotOS, and add your MAC address from the Status tab.
From the Setup page configure your AP.
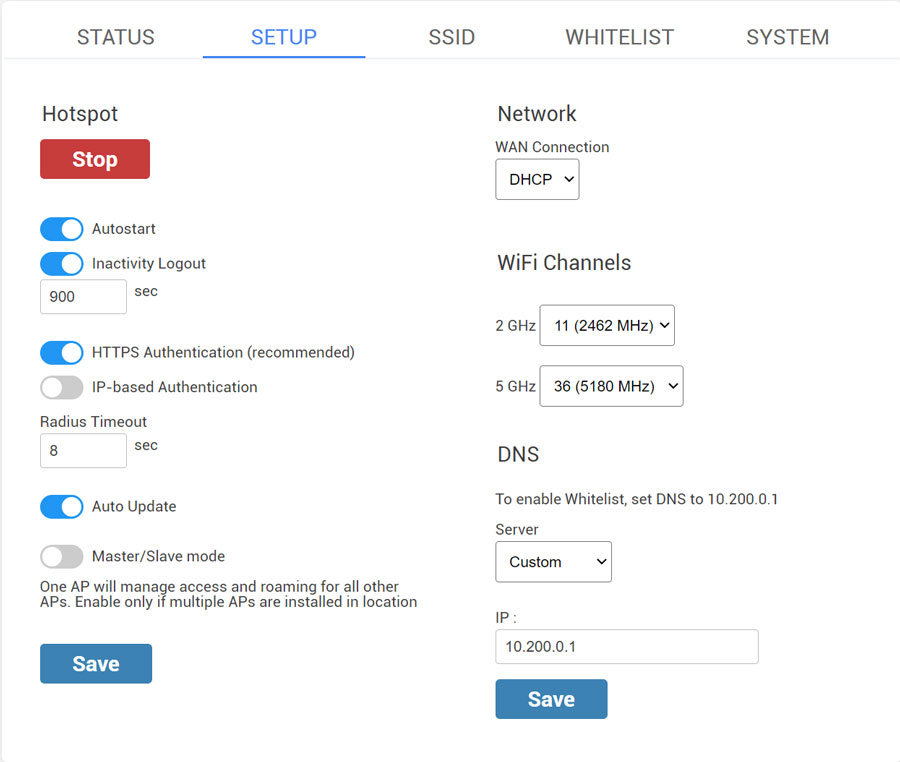
The Hotspot is started and the Autostart and Inactivity Logout options are active by default.
Inactivity Logout is set to 900 sec. Inactivity period defines how long will the device stay logged-in without activity. This prevents repeated logins if the connection temporarily breaks.
IP-based Authentication is used to switch AP domain ap.wifihotspot.io to 10.200.0.1
It is recommended to disable this option to avoid issues with https-based websites.
Radius Timeout – 8sec
Auto Update – enabled
Master/Slave mode
One AP will manage access and roaming for all other APs.
Enable only if multiple APs are installed in a location.
By default as Network WAN Connection is set DHCP, but you can choose network protocol based on your needs. Our recommendation is to use DHCP Network Protocol.
WiFi channels – Eleven channels are designated in the 2 GHz range, spaced 5 MHz apart from each other. Those eleven channels in the spectrum are allowed anywhere in the world.
DNS – Custom
IP – 10.200.0.1
Save changes.
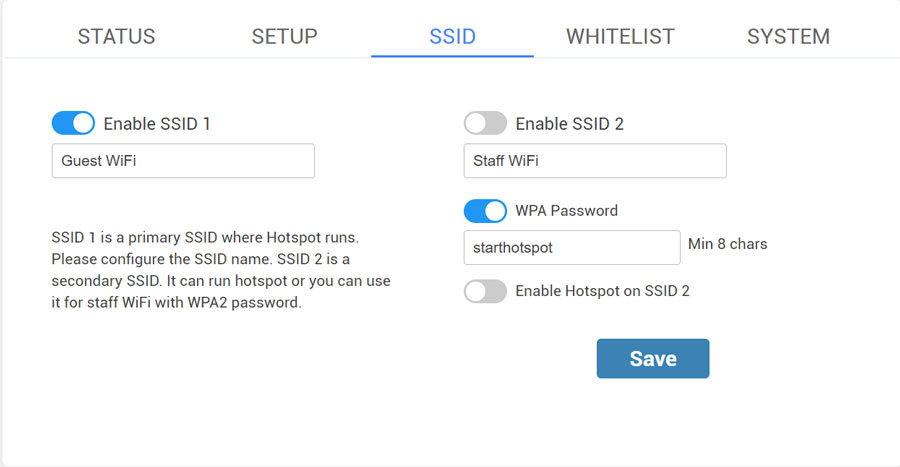
From the SSID tab, you can Enable SSID 1 and 2.
Configure the SSID name and enable it.
Secondary SSID 2 is mostly used for staff WiFi with WPA2 password but you can also enable Hotspot on it.
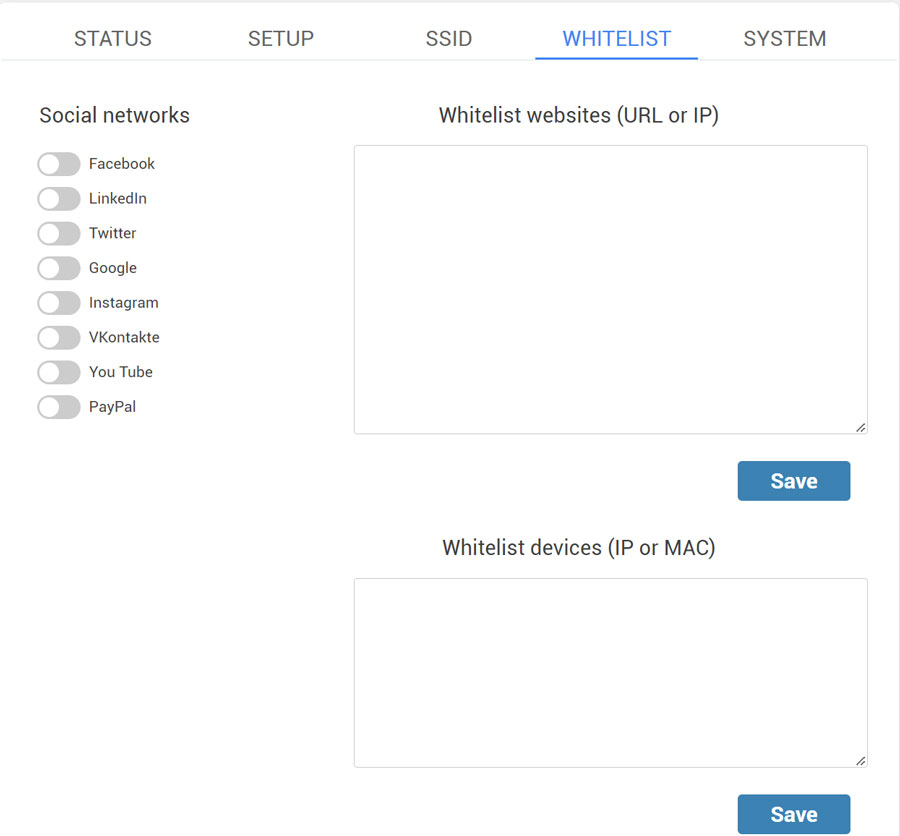
If you want to use Social network login feature or Paypal as payment gateway, enable it on the Whitelist tab and Save changes.
You can also whitelist websites based on URL, IP, or MAC.
From the System tab, you can flash HotspotOS image and change the Admin password.
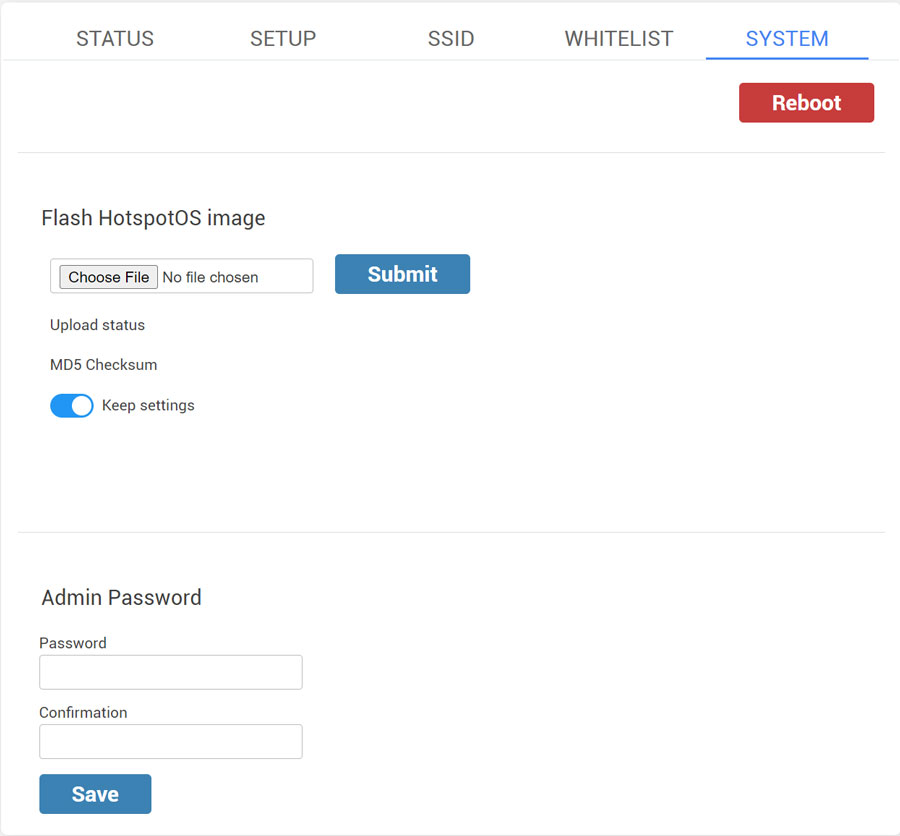
When you finish setup, restart the AP / WiFi router to apply changes.
ZBT HotspotOS Download
ZBT ZBT-WD323
Download HotspotOS
Installation and recovery:
The easiest way to install (and recover) the router, is to use the web interface provided by the bootloader (Breed).
While the interface is in Chinese, it is easy to use.
First, in order to access the interface, you need to hold down the reset button for around five seconds.
Then, go to 192.168.1.1 in your browser.
Click on the second item in the list on the left to access the recovery page.
The second item on the next page is where you select the firmware.
Select the menu item containing “Atheros SDK” and “16MB” in the dropdown close to the buttom, and click on the button at the bottom to start installation/recovery.
ZBT WE1226
Download HotspotOS
ZBT APE522II
Download HotspotOS
Installation using the webinterface:
Plug a computer to any LAN port of the device.
Hold the reset button.
Power on the device while holding the reset button for at least 15 seconds.
Set your computer ipv4 settings to 192.168.1.2 for the IP, and 255.255.255.0 for the subnet mask.
Open 192.168.1.1 in your web browser and upload HotspotOS using the web interface.
Do not disconnect the device now! Doing so could eventually brick it.
Wait 90 seconds for the device to finish the flashing procedure, it will automatically restart.
You can now reload the web page and start configuring HotspotOS.
ZBT CPE102
Download HotspotOS
ZBT WA-05
Download HotspotOS
ZBT WE2026
Download HotspotOS
Installation through bootloader webserver:
– With the power unplugged press and hold reset button.
– Plug power and hold reset button until LED starts to blink.
– Install HotspotOS image using web interface on 192.168.1.1.
ZBT WE826 B0/T 16M
Download HotspotOS
Installation using the webinterface:
Plug a computer to any LAN port of the device.
Hold the reset button.
Power on the device while holding the reset button for at least 15 seconds.
Set your computers ipv4 settings to 192.168.1.2 for the IP, and 255.255.255.0 for the subnet mask.
Open 192.168.1.1 in your web browser and upload HotspotOS using the web interface.
Do not disconnect the device now! Doing so could eventually brick it.
Wait 90 seconds for the device to finish the flashing procedure, it will automatically restart.
You can now reload the web page and start configuring HotspotOS.
ZBT WE826 B0/T 32M
Download HotspotOS
Installation using the webinterface:
Plug a computer to any LAN port of the device.
Hold the reset button.
Power on the device while holding the reset button for at least 15 seconds.
Set your computers ipv4 settings to 192.168.1.2 for the IP, and 255.255.255.0 for the subnet mask.
Open 192.168.1.1 in your web browser and upload HotspotOS using the web interface.
Do not disconnect the device now! Doing so could eventually brick it.
Wait 90 seconds for the device to finish the flashing procedure, it will automatically restart.
You can now reload the web page and start configuring HotspotOS.
ZBT WE826-E
Download HotspotOS
In order to install HotspotOS the first time or recover the router, you can use the web-based recovery system.
Keep the reset button pressed during boot and access 192.168.1.1 in your browser when your computer obtains an IP address.
Upload the HotspotOS to install it or start the recovery process.
ZBT WR8305RT
Download HotspotOS
While the router is running, Wifi suddenly stops working. SSID is being broadcasted, clients are disconnected and not able to re-connect.
Restarting the Wifi service does not fix the issue.
Only a full router reboot fixes the issue.
ZBT WE1326
Download HotspotOS
Do not keep settings, for sysupgrade please use the -n option.
– Two LEDs for 2.4 GHz and 5 GHz Wi-Fi do not work.
– The power LED is not GPIO controllable
ZBT WE3526
Download HotspotOS
OEM easy installation
Reset the router to factory defaults if it has been previously configured.
Browse to https://192.168.1.1/Upgrade.asp
Upload .bin file to the router
Wait for it to reboot
Telnet to 192.168.1.1 and set a root password, or browse to https://192.168.1.1
ZBT WG2626 v03
Download HotspotOS
With Lan cable connected to computer, follow the “recovery mode method” – hold the reset button and plug in power. Wait for about 10sec.
Instead of showing the default router web admin interface, “192.168.1.1” on the browser will bring up a “firmware recovery mode” interface in Chinese (only).
SSH won’t work.
An instruction on lte-hacks in 2018/8 was based on a pandorabox based stock firmware. From 2019/8 the stock firmware seems to be based on some version of OpenWrt. So the “firmware recovery mode” screen is a bit different now 2019/8.
Don’t panic if you can’t read Chinese. You just need to recognize these few words/phrases.
固件恢复模式 = firmware recovery mode .
恢复 = recovery.
备份 = backup
To play safe, press 备份 to backup the stock firmware first. The filename seemed to be set to “eeprom.bin” . The file size for this 20190809 stock version was just 65.5k.
Press 恢复 to “recover” the eeprom.bin file to the router. As usual, this process takes a while and any interruption will brick your router.
It will show some messages in Chinese.
FYI, 重启中=rebooting, 重启=reboot, 等候=wait, 完成=done
Note: The allnet wrt1200ac version (April 2016), named wg2926, has stock firmware working (14.07) but broken repositories, so no packages could be installed. So a sysupgrade may help (to be tested).
ZBT WG3526 32M
Download HotspotOS
OEM easy installation
Note: Reset router to factory defaults if it has been previously configured.
Browse to https://192.168.1.1/Upgrade.asp
Upload .bin file to the router
Wait for it to reboot
Telnet to 192.168.1.1 and set a root password, or browse to https://192.168.1.1
ZBT WG3526 16M
Download HotspotOS
OEM easy installation
Note: Reset the router to factory defaults if it has been previously configured.
Browse to https://192.168.1.1/Upgrade.asp
Upload .bin file to the router
Wait for it to reboot
Telnet to 192.168.1.1 and set a root password, or browse to https://192.168.1.1