The following manual helps you configure your Whitelabel portal and enable free SSL provided by Cloudflare.
1. Open your Cloudflare account https://www.cloudflare.com/
2. Add and configure a website that will be used as your Whitelabel portal. For this example, we will use wifihotspot.io
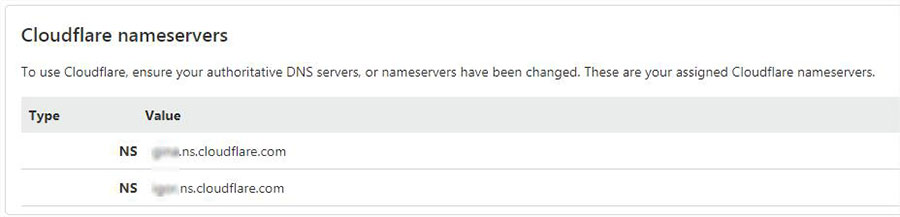
3. Cloudflare will give you nameservers to update in registar where you purchased your domain, for example:
Here is an example of nameservers setup in GoDaddy registrar:
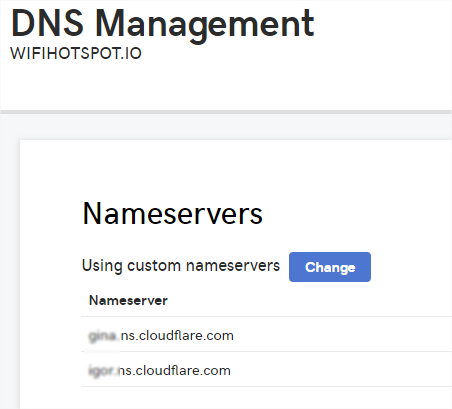
4. Once updated, all your traffic will go through Cloudflare.
5. Configure DNS records as on image.

Make sure that A record for the .domain is redirected to 40.117.190.72 and Proxied (important). The proxied setting will allow SSL verification.
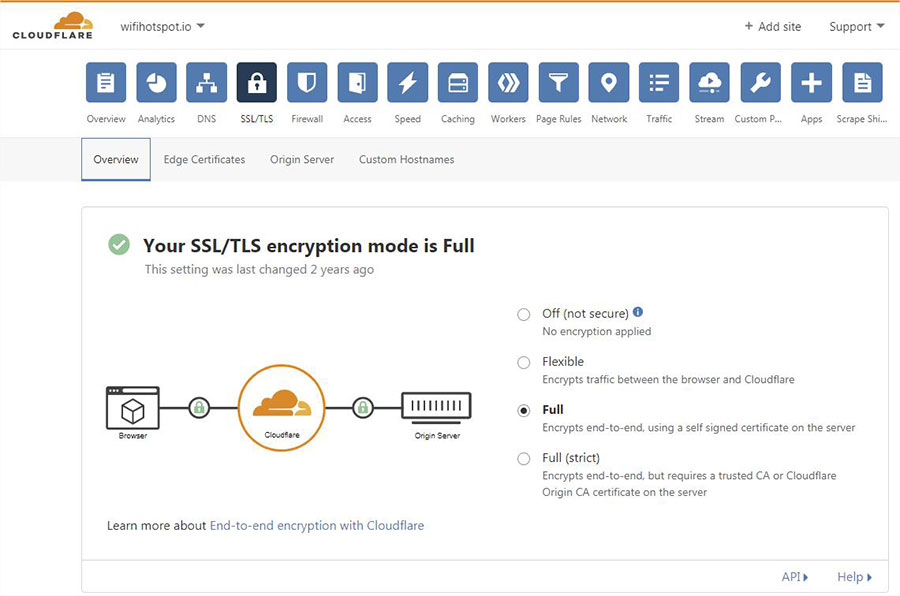
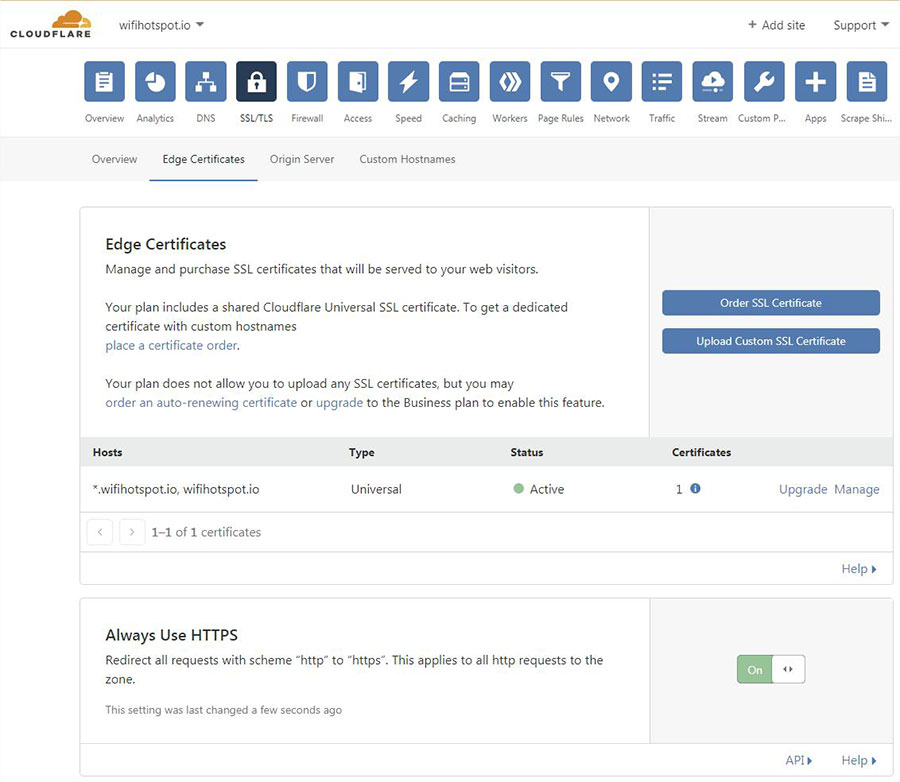
6. SSL (Secure Socket Layer) is the standard security technology for establishing an encrypted link between a web server and a browser. This secure link ensures that all data transferred remains private. Millions of websites use SSL encryption every day to secure connections and keep their customer’s data safe from monitoring and tampering.
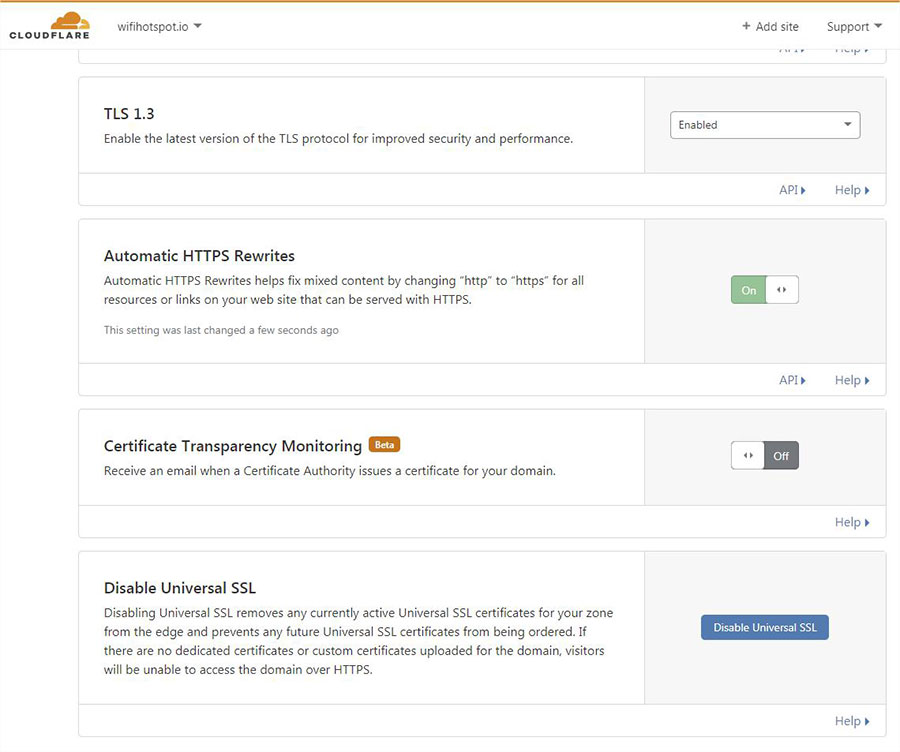
Configure the rest of the settings in SSL tab.

7. You can refresh your browser and get your domain secured with a Universal SSL certificate provided by Cloudflare.
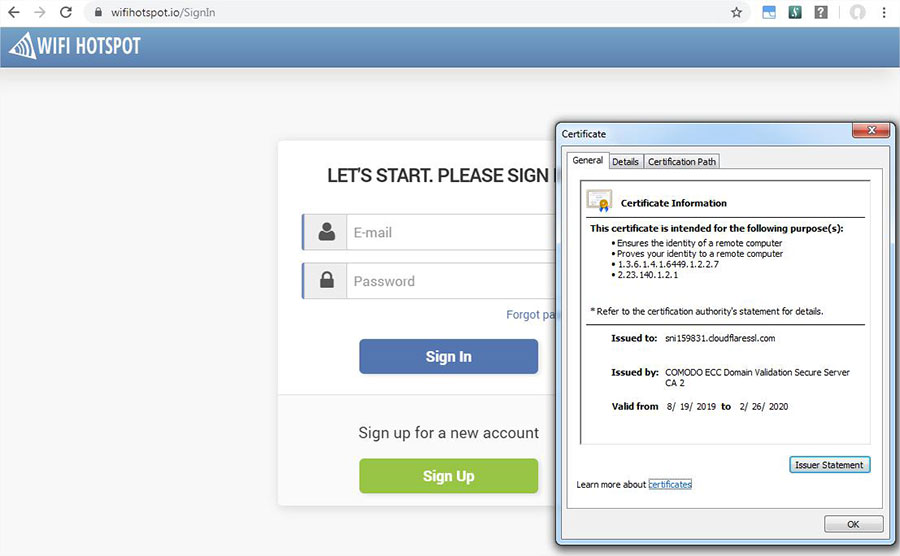
Please be aware that depending on your DNS provider it can take up to 48 hours for the DNS entry changes to propagate.
You can verify that the DNS propagation is working as expected by using
http://digwebinterface.com
Whitelist
Users with Whitelabel solution will need to add the following domains in the AP/ router whitelist: