Teltonika
This article describes the installation and configuration steps for Teltonika APs. Our test was performed with Teltonika RUT240 AP.
Open the web browser and go to 192.168.1.1 to login to the Teltonika WebUI.
Username: admin
Password: admin
Teltonika routers can be configured using the Hotspot option, like any other UAM based device.
Be sure and as Hotspot model select UAM based routers during WiFi location configuration on the Cloud WiFi portal.
Configuration
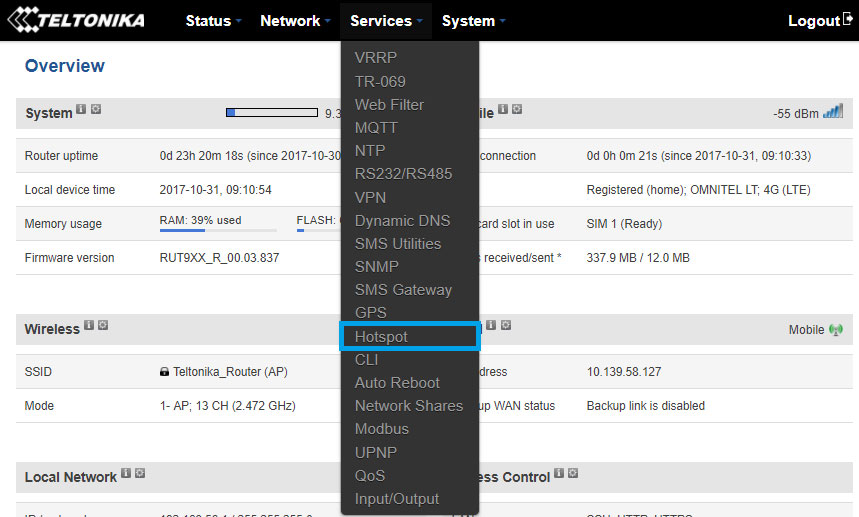
To enable and configure the Hotspot, go to the Services tab and click on the Hotspot section.
Once you’re there, click the Edit button located next to the Hotspot instance.
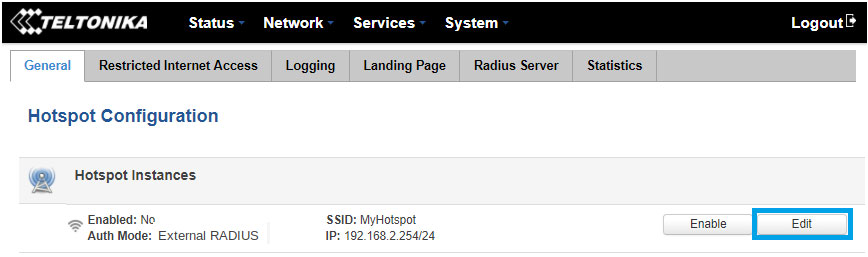
After this, you will be redirected to Wireless Hotspot Configuration window.
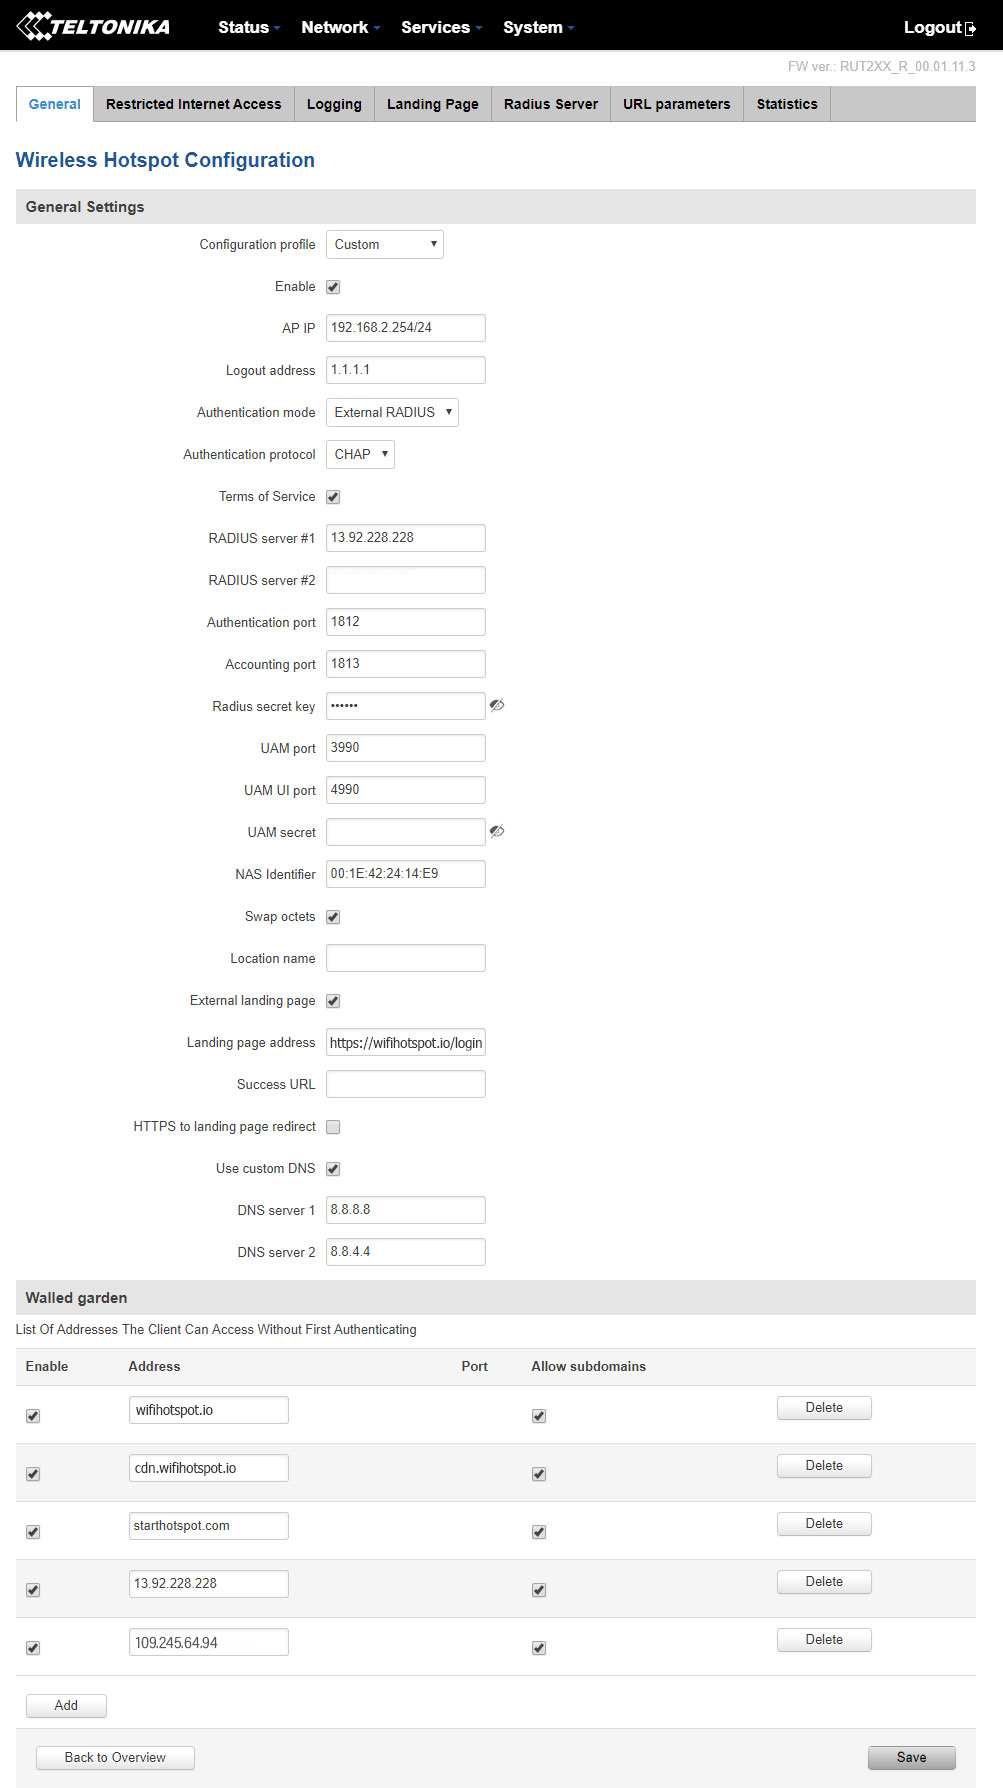
Other details should be the same as at the screen bellow.
Configuration profile: Custom
Enable: Enabled
Logout address: 1.1.1.1
Authentication mode: External radius
Authentication protocol: CHAP
Terms of service: Enabled
Radius server #1: 13.92.228.228
Authentication port:1812
Accounting port:1813
Radius server #2: 109.245.64.94
Authentication port: 1882
Accounting port: 1883
Radius secret keys: Contact our office
UAM port: 3990
UAM port: 4990
NAS Identifier: Set your router MAC address in format 00-00-00-00-00-00
Swap octets: Enabled
External Landing page: Enabled
Landing page address: https://wifihotspot.io/login
HTTPS to landing page redirect: Disabled
Use custom DNS: Enabled
DNS server 1: 8.8.8.8
DNS server 2: 8.8.4.4
In the Walled garden section add following domains and Save changes.
antamedia.net
app.antamedia.net
app.antamedia.com
wifihotspot.io
static.cloudflareinsights.com
13.92.228.228
109.245.64.94
91.150.99.187
ocsp.sectigo.com
ocsp.usertrust.com
ocsp.comodoca.com
crl.sectigo.com
crl.usertrust.com
crl.comodoca.com
crt.sectigo.com
crt.usertrust.com
crt.comodoca.com
*.apple.com
*.sectigo.com
*.usertrust.com