Peplink
This guide provides step-by-step instructions for configuring the Peplink Controller. Follow these steps to enable secure and efficient WiFi Hotspot management for your network.
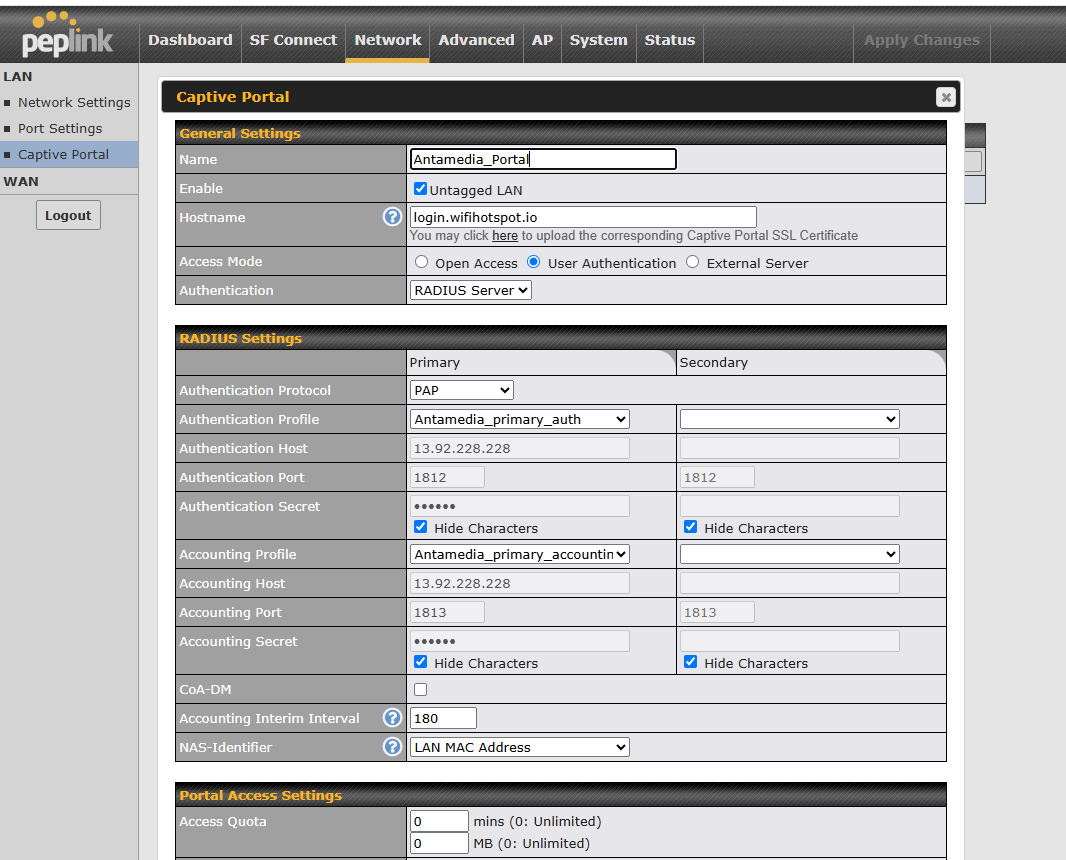
Configure the Captive Portal Settings
Login to the Peplink Web UI and navigate to Network > Captive Portal.
Enter login.wifihotspot.io as the Hostname, and then select User Auth for the access mode.
As Authentication select RADIUS server.
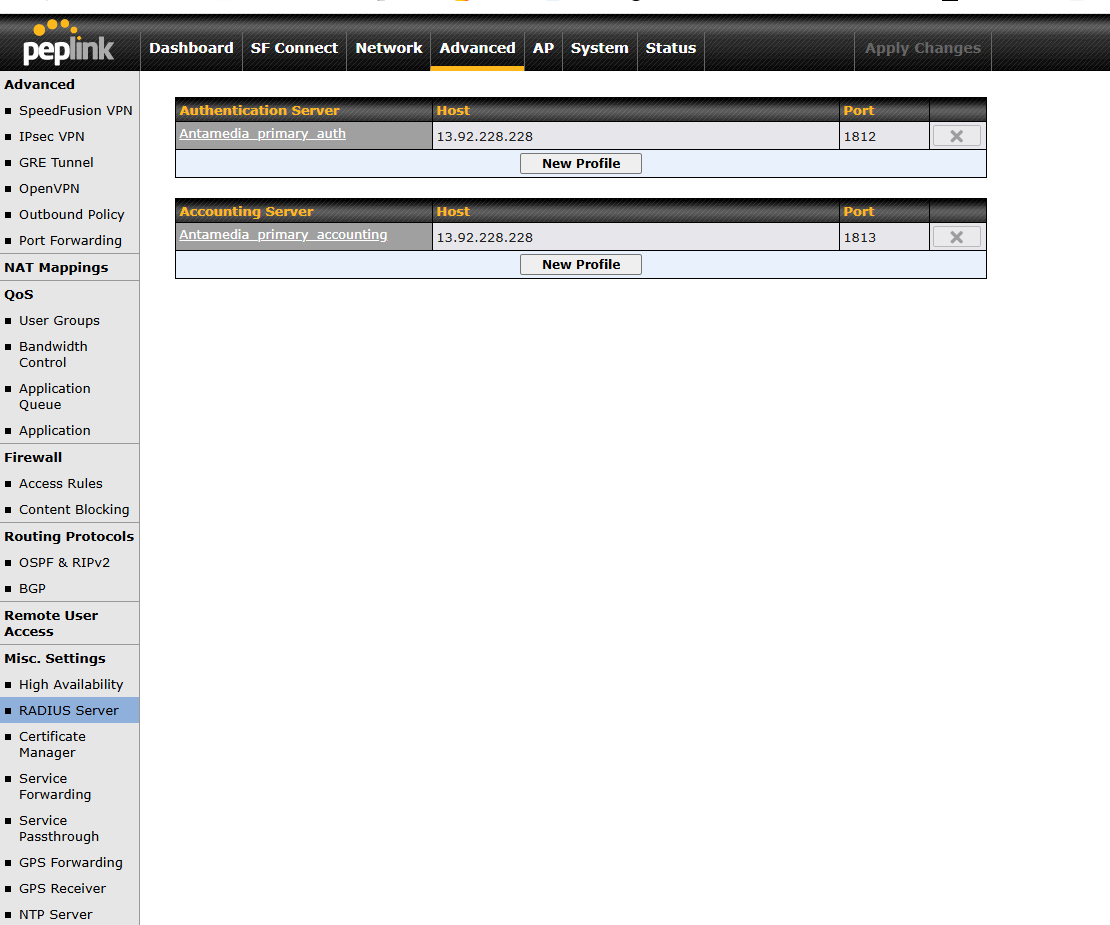
Configure RADIUS Servers
Before proceeding with the RADIUS Settings, ensure that you have configured the RADIUS servers.
Go to: Advanced > Misc Settings > RADIUS Server to set up both Accounting and Authentication RADIUS servers.
Create New Profiles for each server type.
Authentication Server Configuration:
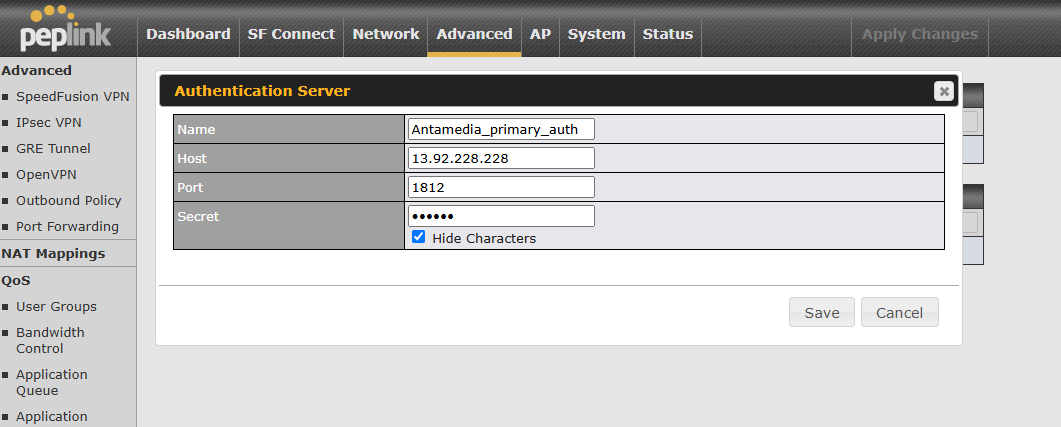
Click New Profile and fill in the following parameters:
Americas
Name: Auth-server
Host: 13.92.228.228
Port: 1812
Europe & Global
Name: Auth-server
Host: 109.245.64.94
Port: 1812
Shared Secret: (Please contact our office for the shared secret)
Accounting Server Configuration:
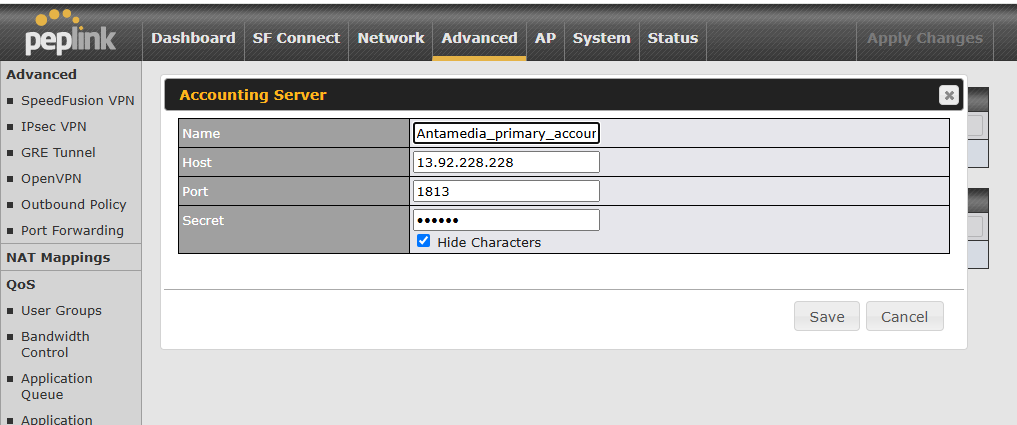
Click New Profile and enter the following details:
Americas
Name: Acc-server
Host: 13.92.228.228
Port: 1813
Europe & Global
Name: Acc-server
Host: 109.245.64.94
Port: 1813
Shared Secret: (Please contact our office for the shared secret)
RADIUS Settings
Continue with the RADIUS settings as shown in the first image.
Authentication Protocol: Select PAP.
Choose the previously configured Authentication and Accounting servers.
Set the Accounting Interim Interval to 180.
For NAS Identifier, select the LAN MAC address.
Portal Access Settings
In the Allowed Networks section, whitelist the following domains:
antamedia.net
app.antamedia.net
app.antamedia.com
wifihotspot.io
static.cloudflareinsights.com
13.92.228.228
109.245.64.94
91.150.99.187
ocsp.sectigo.com
ocsp.usertrust.com
ocsp.comodoca.com
crl.sectigo.com
crl.usertrust.com
crl.comodoca.com
crt.sectigo.com
crt.usertrust.com
crt.comodoca.com
*.apple.com
*.sectigo.com
*.usertrust.com
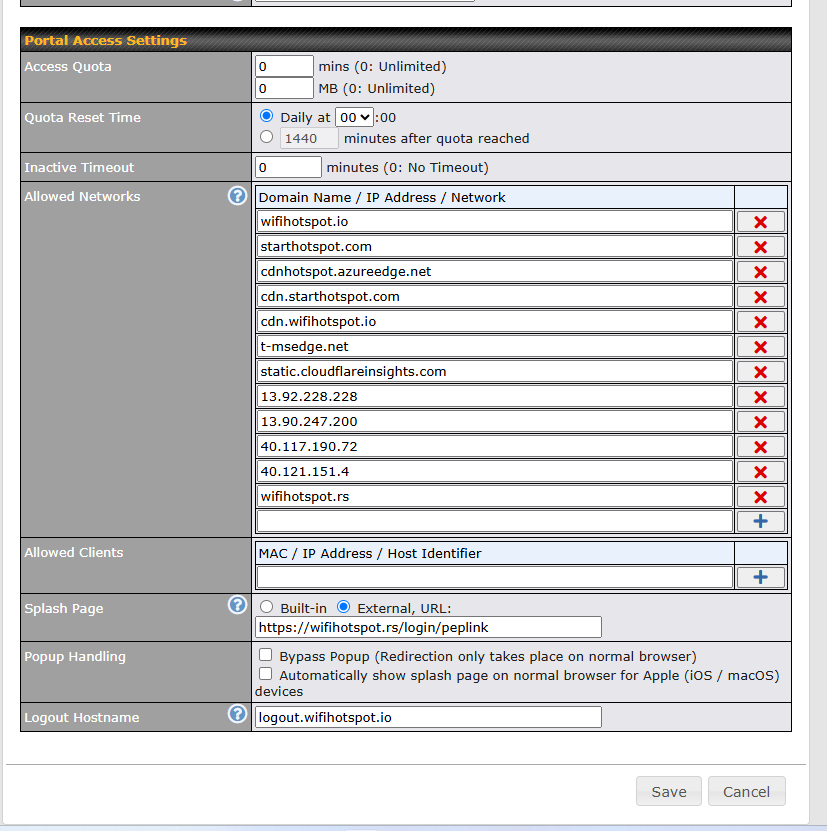
Splash Page Configuration
In the Splash Page section, select External URL and enter the following URL:
https://wifihotspot.io/login/peplink
Logout Settings
Set the Logout Hostname to:
logout.wifihotspot.io.
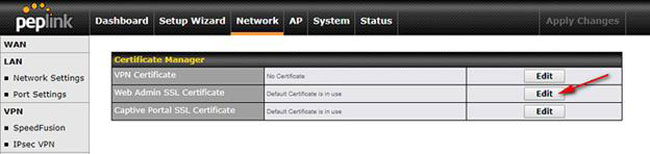
Import the private key and SSL certificate
Log into the web admin of your router and navigate to Network / Misc Settings / Certificate Manager
Click on the Edit button at Web Admin SSL Certificate.
A new window will pop up.
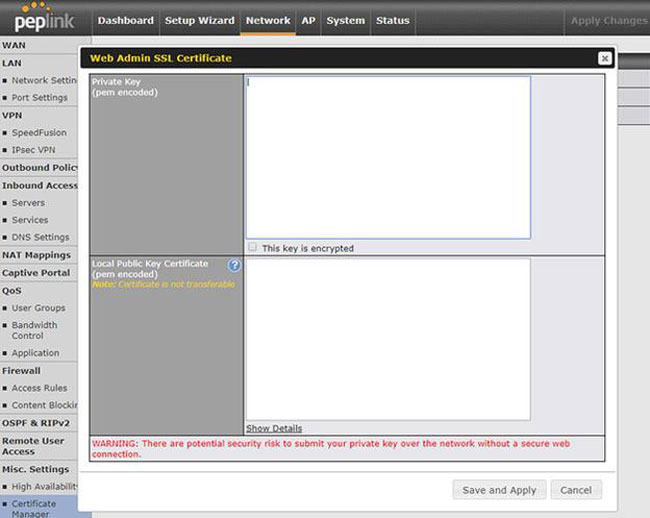
Use notepad to view the private key file.
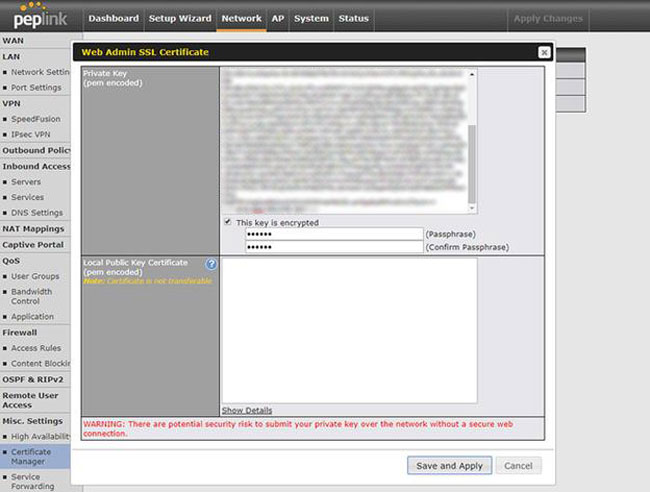
Copy and paste the private key file’s content to the Private Key field.
Ensure you enable This key is encrypted, and put in the correct password.
Use notepad to view the self-signed certificate file
Copy and paste the self-signed certificate file’s content to the Local Public Key Certificate field.
Click Save and Apply button to upload the private key and self-signed certificate to the Peplink router.