Campaigns feature helps delivering targeted video and image ads to the WiFi customer. After completing the Marketing campaign form on a Splash page, a new page with video or image ad will appear on the customer device.
Having seen a video/image advertisement, a guest will be offered to connect to the Internet and visit the web page with a special offer.
Start Hotspot Cloud WiFi system enables you to set one or multiple video/image ads which can be rotated each time the guest is connected.
For each Marketing campaign, you will get analytics which includes the number of displayed video advertisements, click-through rates, how successful the campaign is, with PDF reports for the manager.
Click for Shopping Mall Marketing Campaign demo
Click for Airport Marketing Campaign demo
Click for Metro Marketing Campaign demo
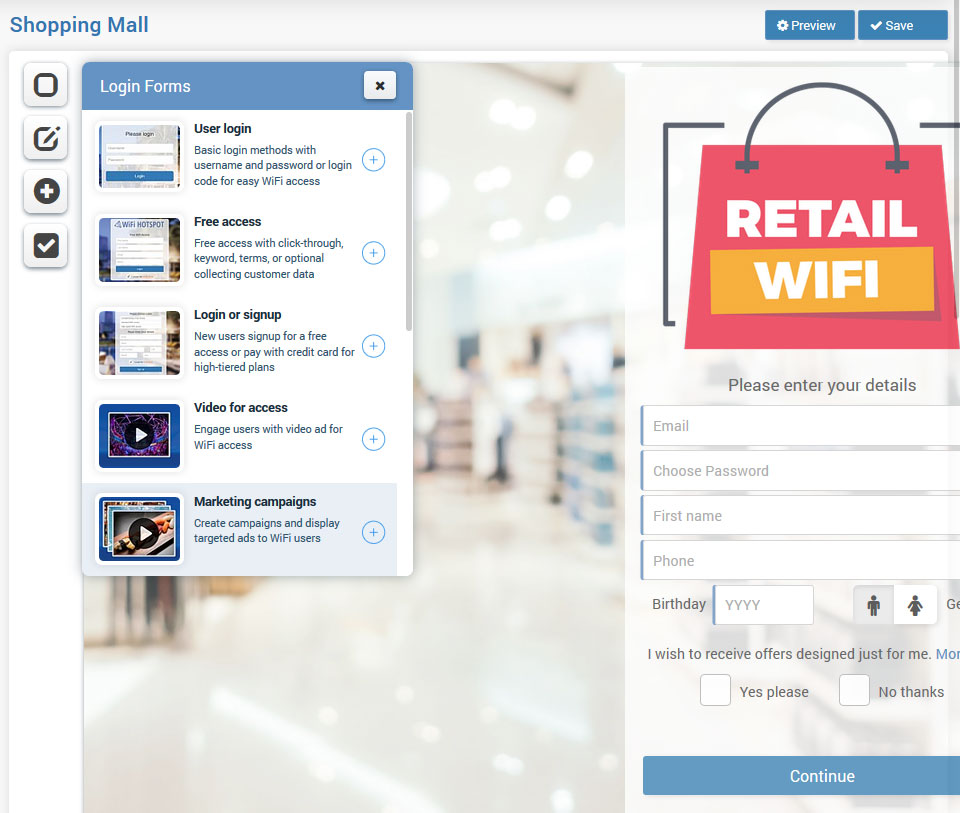
In the following example, we will show you how to create a WiFi Marketing Campaign for Shopping mall. Of course, the same instructions can be applied for the WiFi Marketing Campaigns created for different industries and facilities like Airports, Restaurants, Hotels & Resorts, Hospitals…
Create Ads
Go to the Marketing – Ads page.
Press on the New button to add new content.
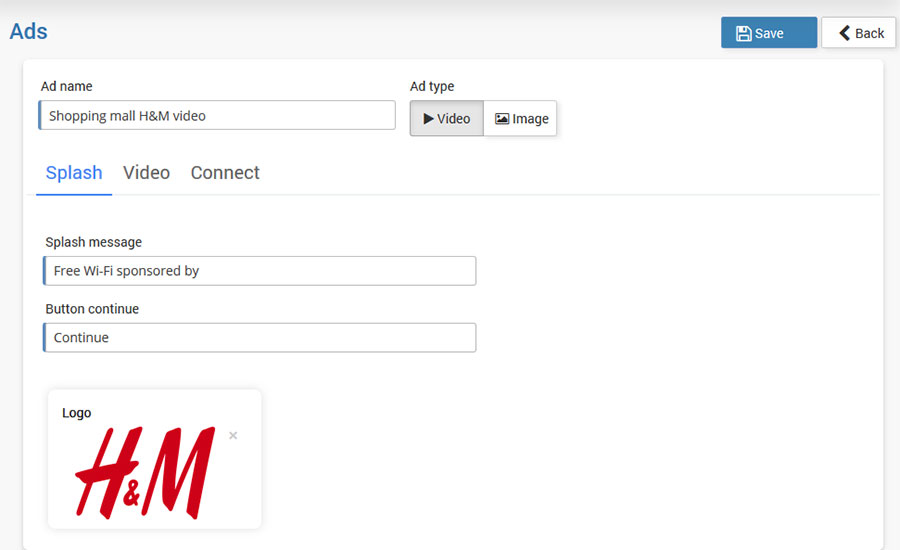
Set Ad Name and select Ad Type: Video or Image.
From Splash page section set Splash message, Button continue text and Logo.
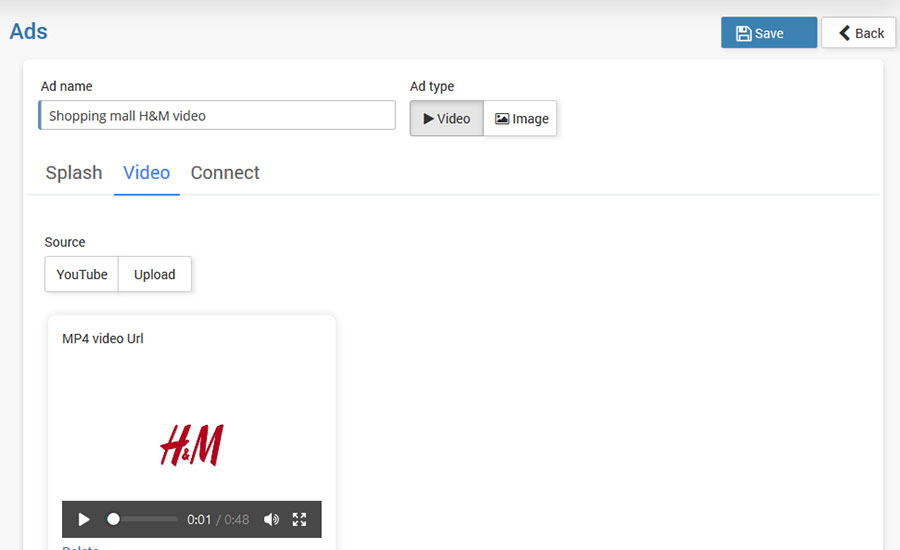
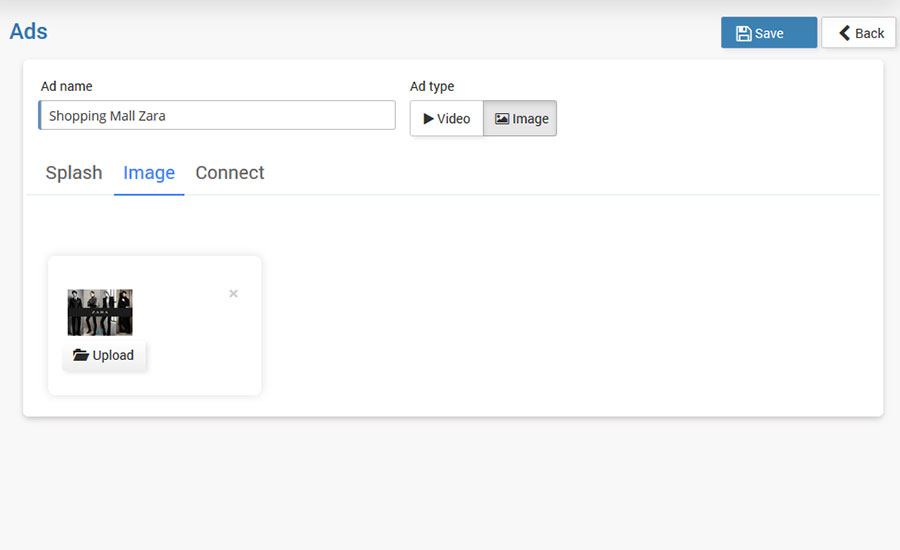
Set media in Video / Image section and location from which it will be loaded.
For Video ad:
Select source: YouTube URL or Upload file.
Please whitelist Youtube domains in your AP/Router.
For Image ad:
Image file must be uploaded.
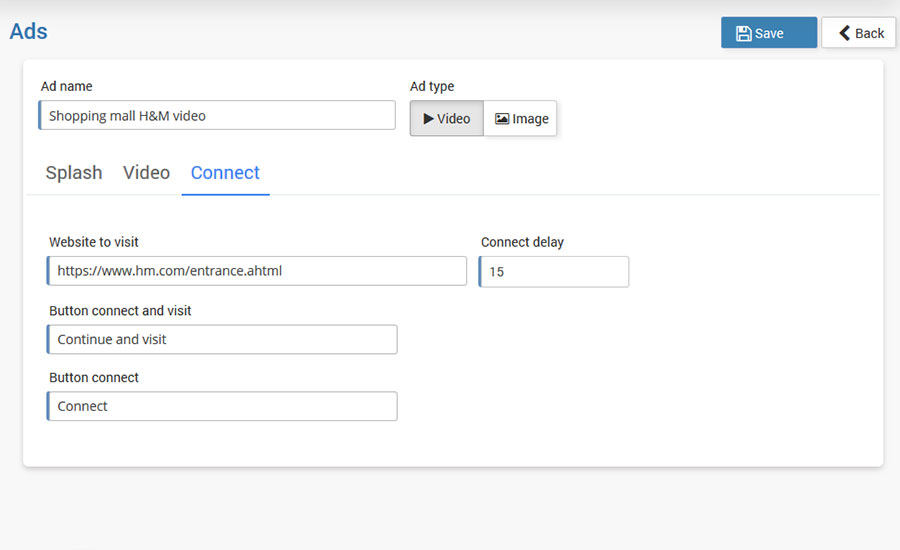
 From the Connect section specify Website to visit, Connect delay time interval, Button connect and visit and Button connect text.
Create a Campaign
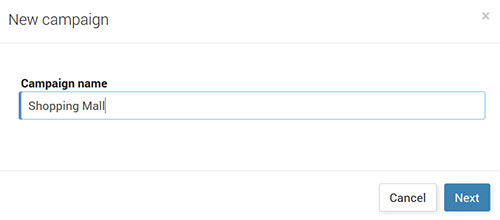
To create new Campaign go to the Marketing – Campaigns page and click +New Campaign button.
Set the Campaign Name and press Next button.
From new window select WiFi location in which campaign will appear, specify campaign Start Date / End Date and set it to be Active.
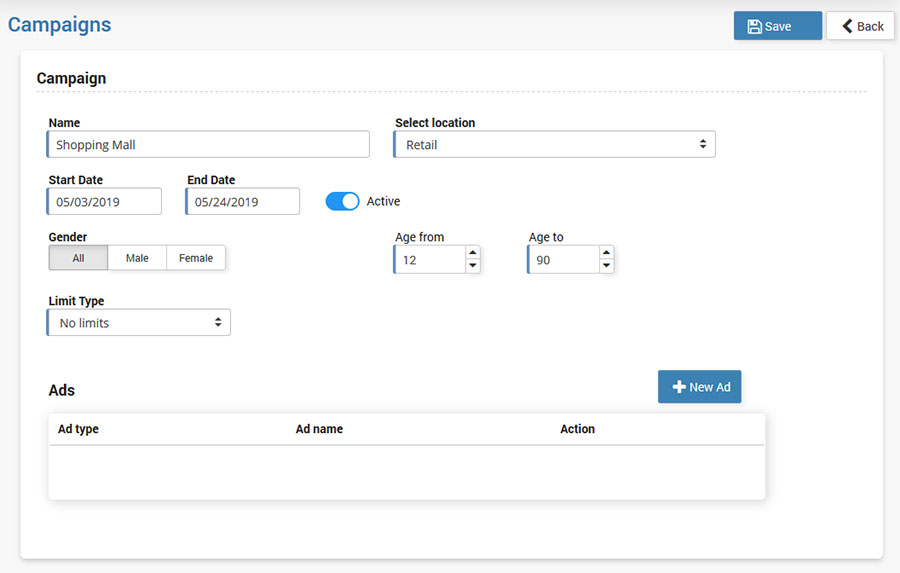
Select Gender (All, Male, Female), Age From / To for which ad will be loaded and specify Limit Type between No Limits, Impressions or Budget.
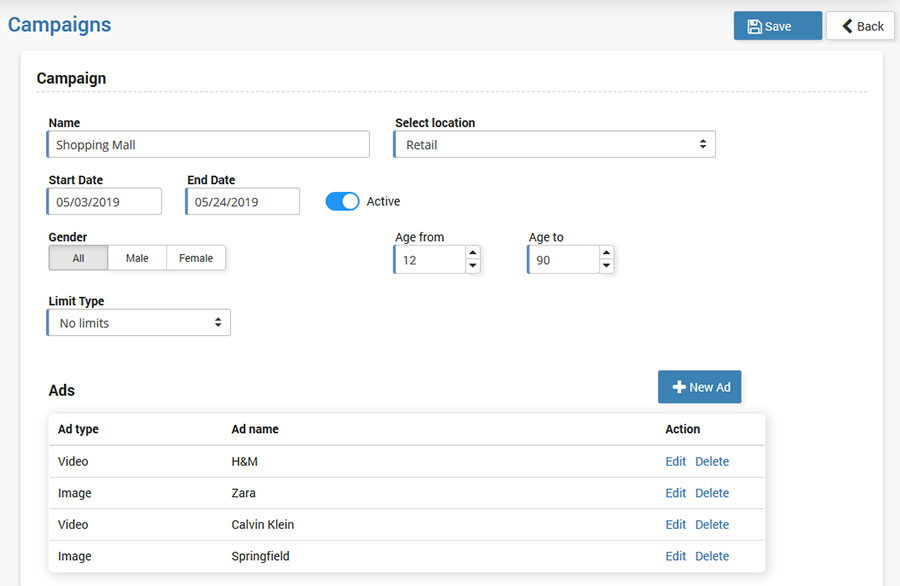
When Campaign rules are set, it is time to specify which Ads will be included in Campaign.
Press on +New Ad button and select between available Image, Video or App Install.
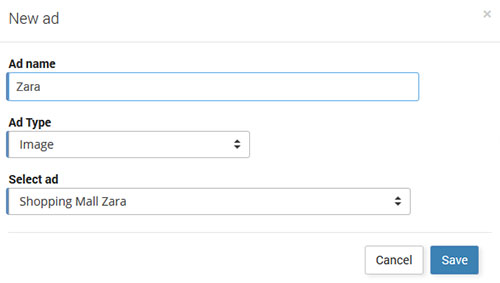
Depending from Ad type you can select an ad from an available image or video ads.
When you finish with adding Ads which will be used for Campaign press Save button.
Set Campaign on the Splash page
Go to the Splash page section and select desired ( or create new) Splash page.
Select Marketing Campaigns as the Login form.
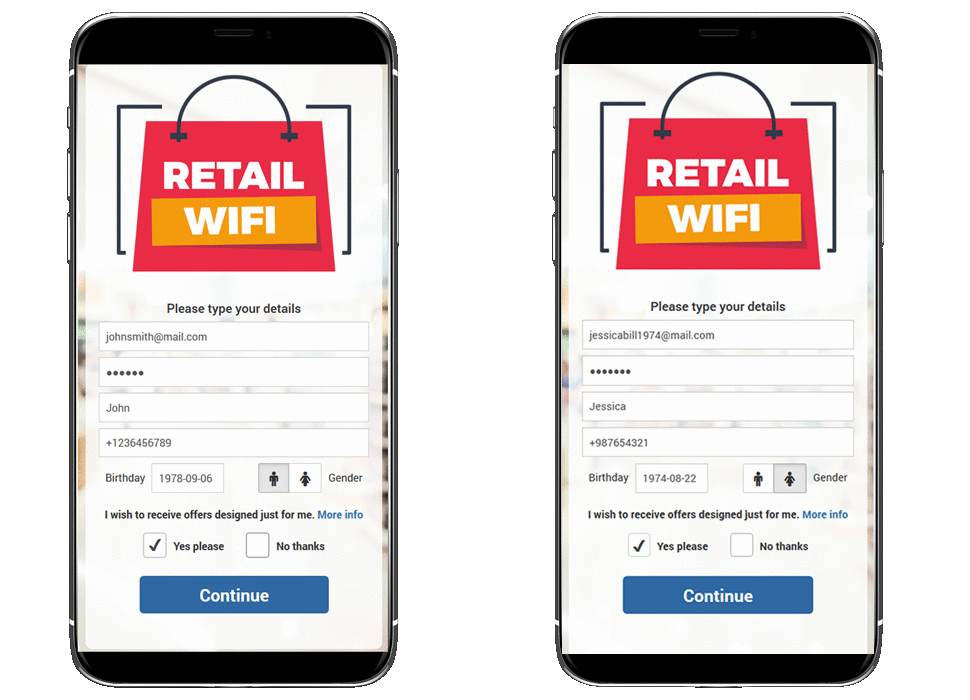
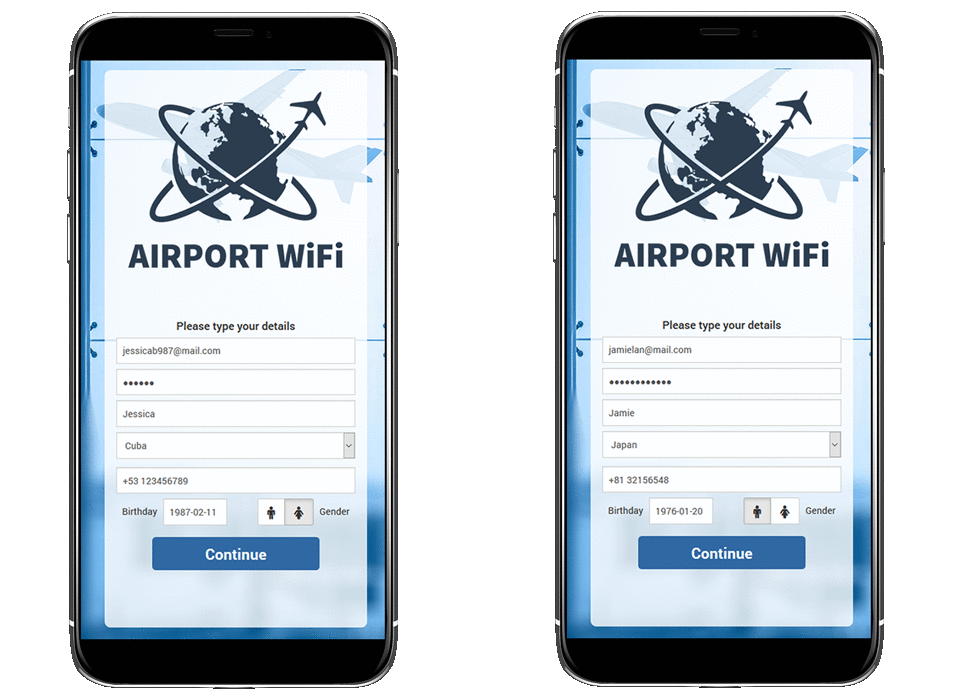
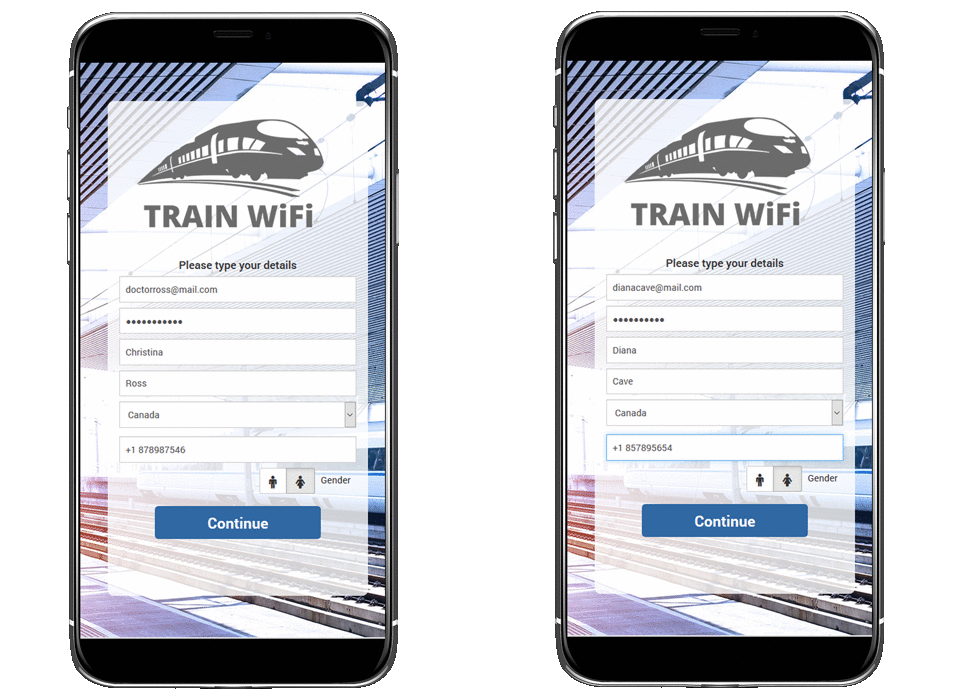
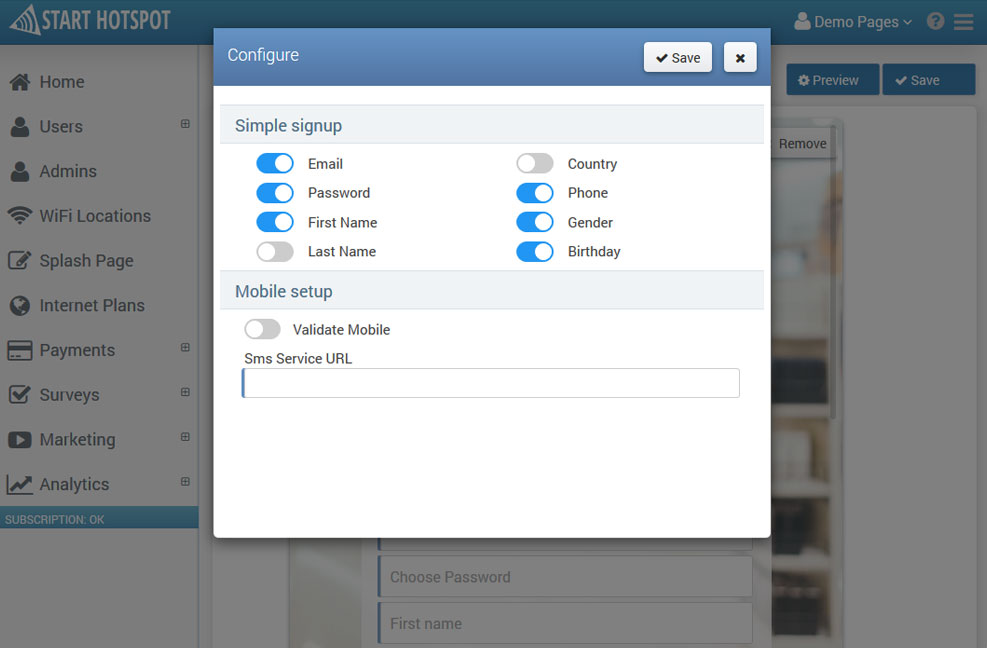
Click Settings button and configure customer details which will be required in the signup process. In addition, can be used Mobile Setup and Validate mobile using Sms service URL.
Press on Save button to apply changes.
Ranking from basic data to advanced analytics, Start Hotspot system offers a thorough insight into visitors behaviour.
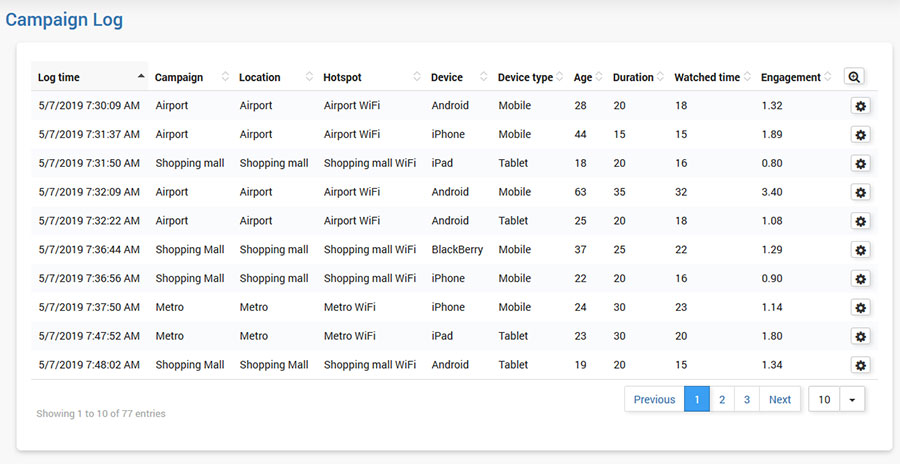
Campaign Log
From Campaign Log panel are visible all loaded Campaigns over the portal.
Campaigns can be sorted and searched based on the following details: Log time, Campaign name, Location, Hotspot, Device, Device Type, Age, Duration, Watched time and Engagement.
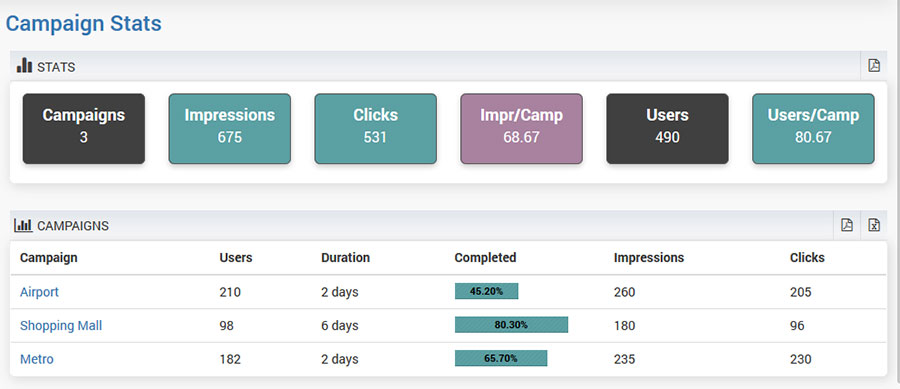
Campaign Stats
Campaign Stats panel provide statistic details with the total number of Campaigns, number of Impressions, number of Clicks, number of impressions per campaign Impr/Camp, number of Users, number of users per campaign Users/Camp.
Campaigns panel give information for current Marketing Campaigns.
Campaign summary contains statistical details for specific Campaign: Campaign name, Start and End date, Location, number of Ads, Gender, Age-range, Limited by, number of Users, number of Impressions and Clicks with Conversion and Ads list
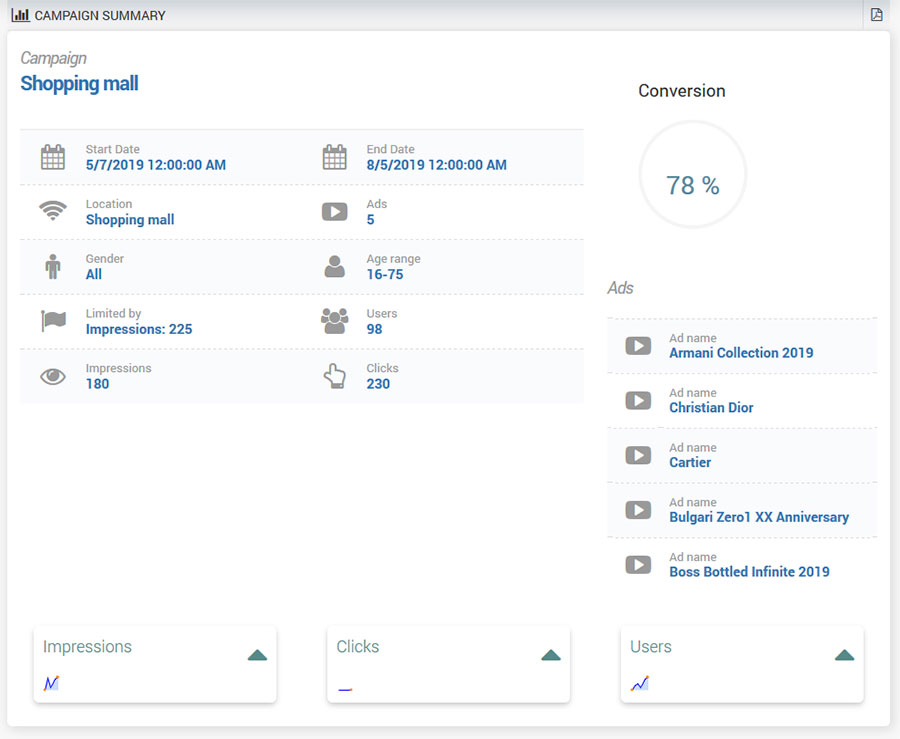
![]()
Statistics details can be exported to PDF format for detailed analyze.
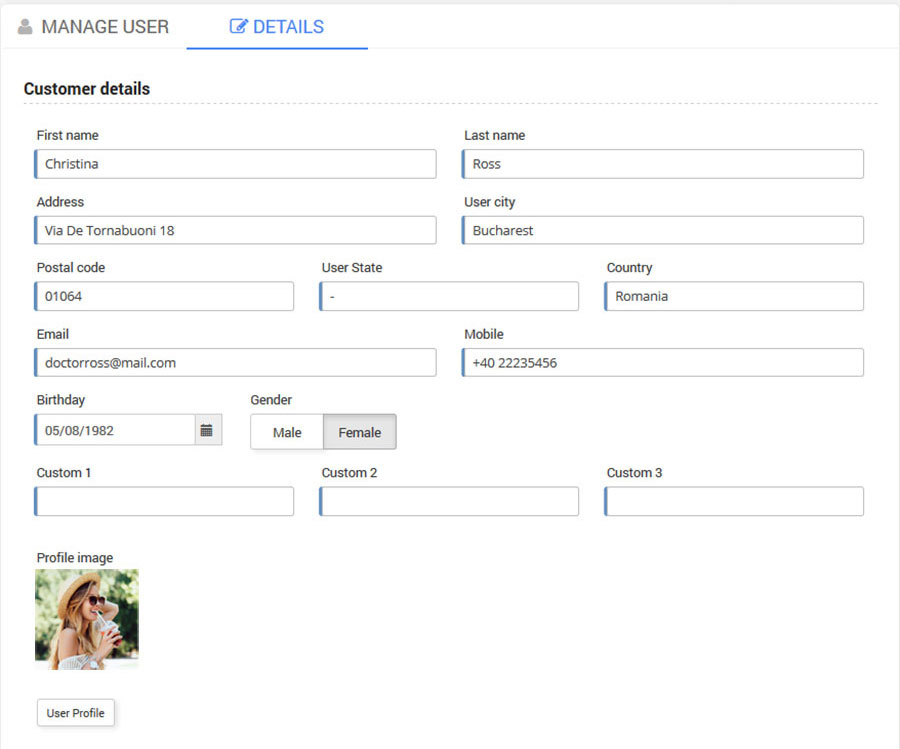
Collected user data are available from Users panel.

User account Details tab contain customer personal information and create a valuable addition to the rest of the user account options. User Details include a customer First name and Last name, Address, City, Postal code, State, Country, Email addresses, Mobile number, Birthday, Gender and Profile image if social media account is used for account creation.