 Linksys
Please select a model and download HotspotOS.
DownloadHotspotOSConfigurationTroubleshoot
Please reset the AP / WiFi router to factory settings to avoid problems with some previous configuration.
Connect your PC LAN using the cable to the router Ethernet port.
Set the static IP address in 192.168.1.x range
In the address bar of the web browser, enter 192.168.1.1 and login using admin as username and admin as password.
From the Administration menu go to the Firmware Upgrade section.
Navigate to the location where the HotspotOS for your model is downloaded and press on Open. Click Apply to start the installation process.
The HotspotOS installation procedure can take a few minutes.
During this process, you will see information about the processing.
Reconnect LAN cable or Disable/Enable NIC card in order to get new valid IP address in 10.200.0.x range from router.
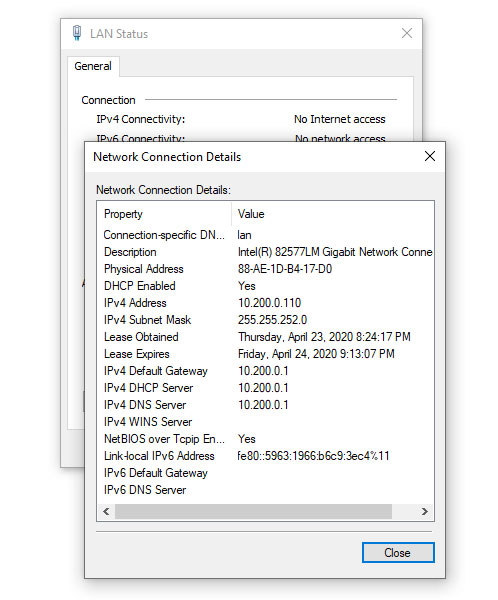
Start your browser and in URL field type http://10.200.0.1:8089/ to login to HotspotOS.
Username: admin
Password: admin
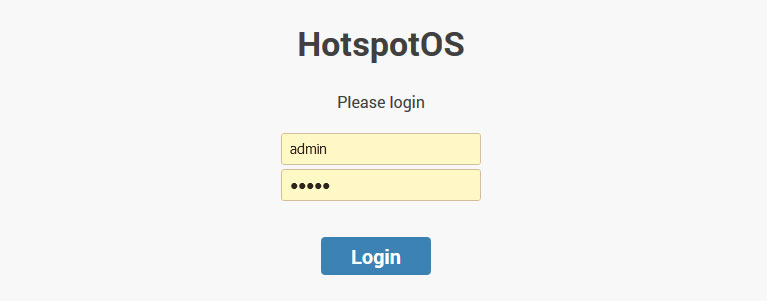
Press the Login button to access to Status tab.
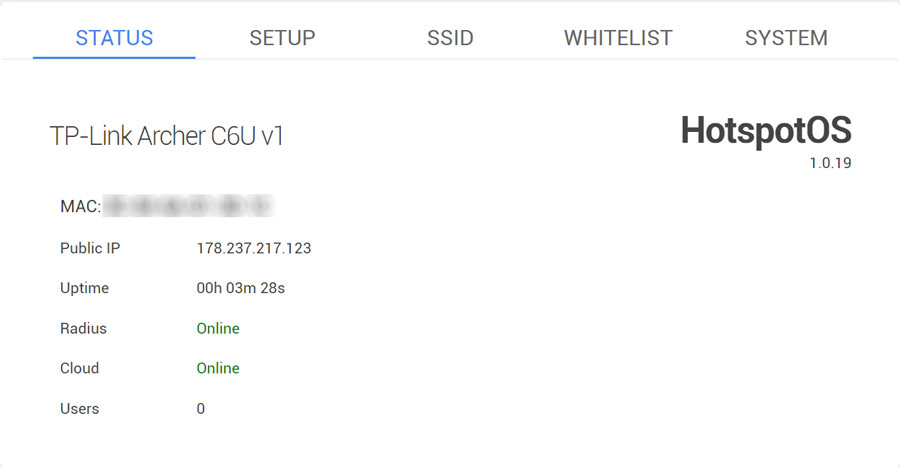
On the HotSpotOS Status page, you can check AP MAC address, Public IP, device Uptime, Radius and Cloud status, and a number of users connected to AP.
The MAC address of your AP will be used in the SignUp process.
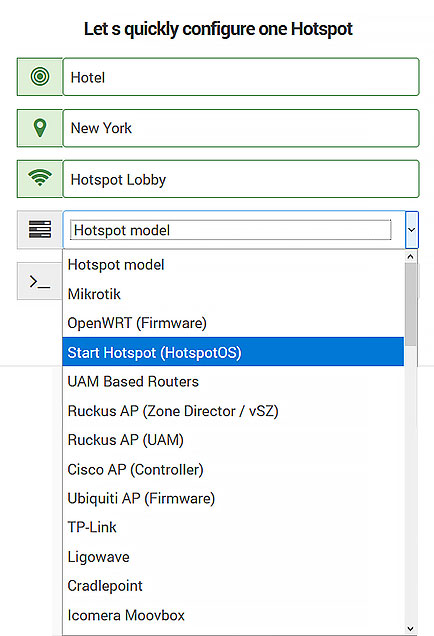
During SignUp, after typing HotSpot name, select as HotSpot model HotspotOS, and add your MAC address from the Status tab.
From the Setup page configure your AP.
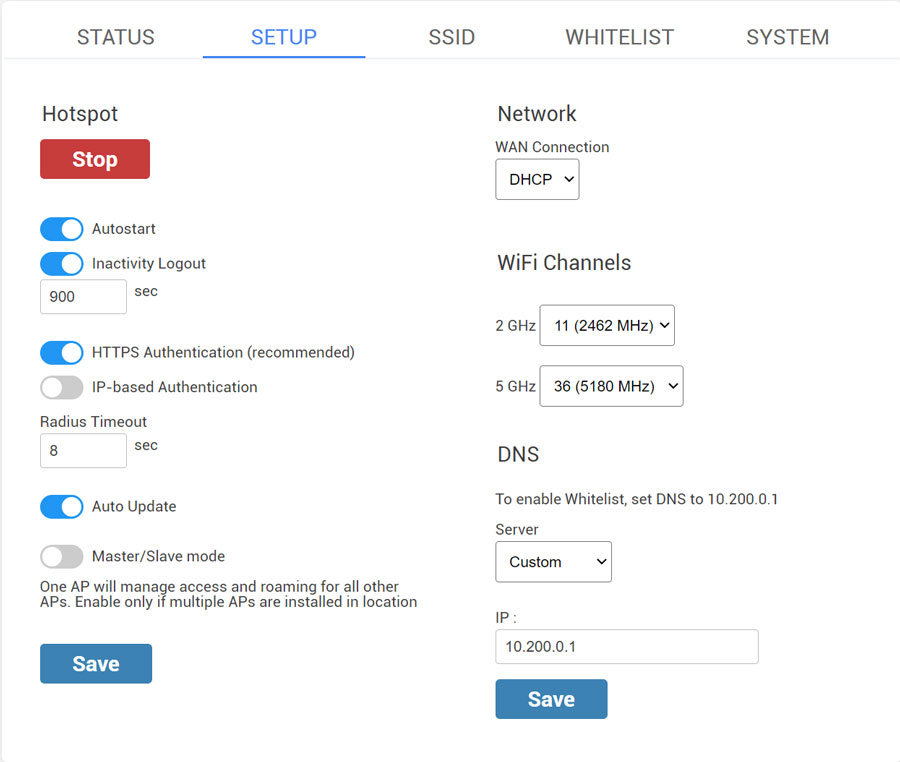
The Hotspot is started and the Autostart and Inactivity Logout options are active by default.
Inactivity Logout is set to 900 sec. Inactivity period defines how long will the device stay logged-in without activity. This prevents repeated logins if the connection temporarily breaks.
IP-based Authentication is used to switch AP domain ap.wifihotspot.io to 10.200.0.1
It is recommended to disable this option to avoid issues with https-based websites.
Radius Timeout – 8sec
Auto Update – enabled
Master/Slave mode
One AP will manage access and roaming for all other APs.
Enable only if multiple APs are installed in a location.
By default as Network WAN Connection is set DHCP, but you can choose network protocol based on your needs. Our recommendation is to use DHCP Network Protocol.
WiFi channels – Eleven channels are designated in the 2 GHz range, spaced 5 MHz apart from each other. Those eleven channels in the spectrum are allowed anywhere in the world.
DNS – Custom
IP – 10.200.0.1
Save changes.
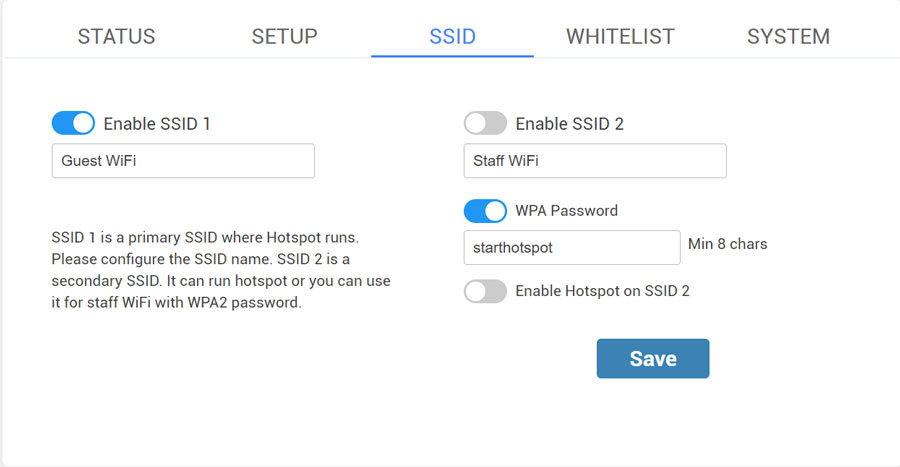
From the SSID tab, you can Enable SSID 1 and 2.
Configure the SSID name and enable it.
Secondary SSID 2 is mostly used for staff WiFi with WPA2 password but you can also enable Hotspot on it.
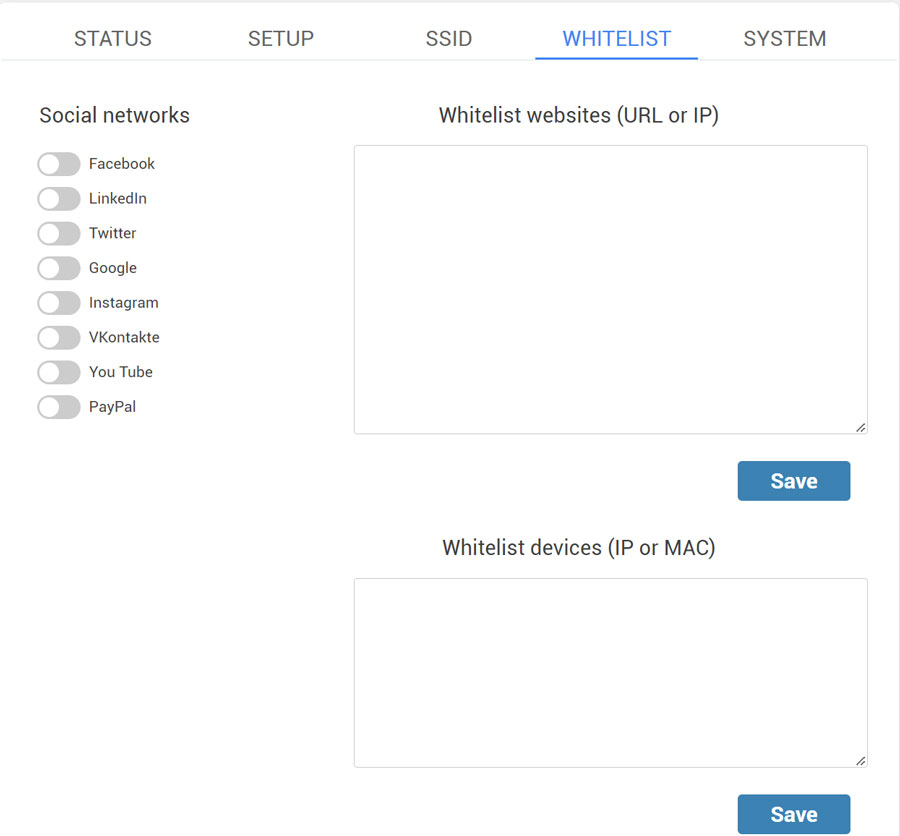
If you want to use Social network login feature or Paypal as payment gateway, enable it on the Whitelist tab and Save changes.
You can also whitelist websites based on URL, IP, or MAC.
From the System tab, you can flash HotspotOS image and change the Admin password.
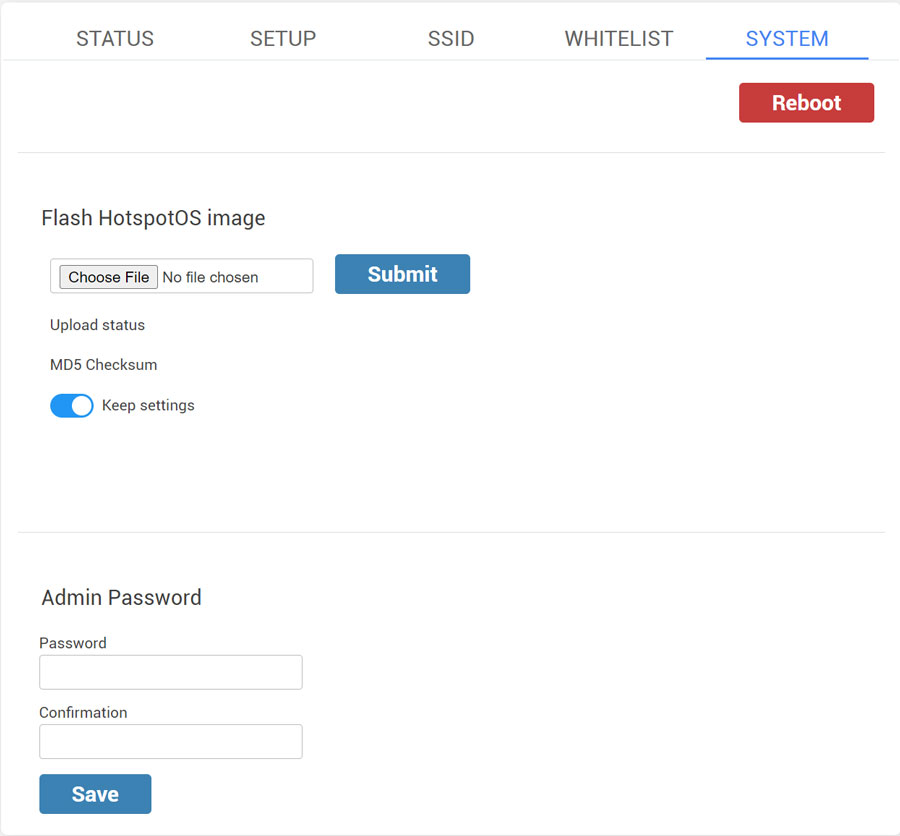
When you finish setup, restart the AP / WiFi router to apply changes.
Linksys HotspotOS Download
Linksys E1700
Download HotspotOS
Download HotspotOS Sysupgrade
HotspotOS can be installed from the standard Linksys web GUI, just upload the sysupgrade image.
If you get the error “Incorrect firmware file”, then you need to downgrade your current Linksys firmware.
Linksys Firmware 1.0.00 (FW_E1700_v1.0.00.081_20131220.bin) is known to work, link: https://downloads.linksys.com/downloads/firmware/FW_E1700_v1.0.00.081_20131220.bin
Linksys E5600
Download HotspotOS
Flash factory image through GUI.
This device has 2 partitions for the firmware called firmware and alt_firmware. To successfully flash and boot the device, the device should have been running from alt_firmware partition.
To get the device booted through alt_firmware partition, download the OEM firmware from Linksys website and upgrade the firmware from web GUI.
Once this is done, flash the HotspotOS Factory firmware from web GUI.
Linksys EA6350 v3 (civic)
Download HotspotOS
Install via Web UI:
– Attach to a LAN port on the router.
– Connect to the Linksys Smart WiFi Page (default 192.168.1.1) and login
– Select the connectivity tab on the left
– In the manual update box on the right
– Select browse, and browse to
hotspotos-ipq40xx-linksys_ea6350v3-squashfs-factory.bin
– Click update.
– Read and accept the warning
– The router LED will start blinking. When the router LED goes solid, you can navigate to 10.200.0.1:8089 to your new HotspotOS installation.
Linksys EA7300 v1
Download HotspotOS
Flash factory image through GUI.
You should flash the default Linksys firmware first.
It will boot from Linksys partition A.
Then flash Linksys firmware again, it will boot from partition B.
After that flash HotspotOS, it will be on partition A.
HotspotOS won’t boot if on partition B.
Linksys EA7300 v2
Download HotspotOS
Flash factory image through GUI.
You should flash the default Linksys firmware first.
It will boot from Linksys partition A.
Then flash Linksys firmware again, it will boot from partition B.
After that flash HotspotOS, it will be on partition A.
HotspotOS won’t boot if on partition B.
Linksys EA7500 v2
Download HotspotOS
Flash factory image through GUI.
You should flash the default Linksys firmware first.
It will boot from Linksys partition A.
Then flash Linksys firmware again, it will boot from partition B.
After that flash HotspotOS, it will be on partition A.
HotspotOS won’t boot if on partition B.
Linksys EA8100 v1
Download HotspotOS
This device is very similar to the EA7300 v1/v2 and EA7500 v2.
Upload the generated factory image through the factory web interface.
You should flash the default Linksys firmware first.
It will boot from Linksys partition A.
Then flash Linksys firmware again, it will boot from partition B.
After that flash HotspotOS, it will be on partition A.
HotspotOS won’t boot if on partition B.
Linksys EA8100 v2
Download HotspotOS
This device is very similar to the EA7300 v1/v2, EA7500 v2, and EA8100 v1.
Upload the generated factory image through the factory web interface.
You should flash the default Linksys firmware first.
It will boot from Linksys partition A.
Then flash Linksys firmware again, it will boot from partition B.
After that flash HotspotOS, it will be on partition A.
HotspotOS won’t boot if on partition B.
Linksys EA8300
Download HotspotOS
Installation Through OEM GUI:
Reset to factory defaults.
Power up the router and wait for it to boot, The white, LINKSYS light will be on solid when the router is booted and ready.
Open a browser and navigate to https://192.168.1.1/
Do not hit “Next” but instead proceed to “Manual configuration”.
On the “Internet connection is down” screen, after confirming that the “Login” button is to “log in to your router without Internet access”, click the “Login” button.
On the “Sign In” screen, enter the password, then click “Sign In”, the default is admin.
On the “Smart Wi-Fi Tools” screen, select “Connectivity”
On the “Connectivity” screen, in the “Manual” section, choose the hotspotos-ipq40xx-generic-linksys_ea8300-squashfs-factory.bin file using the file-picker window.
Once you have confirmed you have selected the proper HotspotOS factory.bin file, click “Start”.
The firmware will upload, the router will reboot. HotspotOS Web Admin should be running at this point with default https://10.200.0.1:8089 .
Linksys EA8500 v1
Download HotspotOS
OEM easy installation
Warning, before installing HotspotOS the fist time:
If the currently running linksys firmware is 1.1.4.169978 install (at least) 1.1.4.169978 twice to make sure the primary and the secondary partition have a compatible format install (at least) 1.1.4.169978 once to make sure that the secondary/backup partition is compatible with HotspotOS as well some users have reported that 1.1.4* versions do not boot, so installing a 1.1.3* firmware may be needed.
Note:
Reset the router to factory defaults if it has been previously configured.
Browse to https://192.168.1.1/Upgrade.asp
Upload hotspotos-ipq806x-generic-linksys_ea8500-squashfs-factory.bin file to the router
Wait for it to reboot
Note:
It’s possible that the more recent stock firmware may have changed the interface so that the above link (https://192.168.1.1/Upgrade.asp) no longer works. On version 1.1.7.182977 for example, in the stock WebUI, you have to go to Connectivity → Basic (tab) → Router Firmware Update → Manual Update → Choose File.
Linksys RE6500
Download HotspotOS Initramfs
Download HotspotOS Sysupgrade
The official firmware does checks on the image and rejects non-linksys images so it can’t be used to flash HotspotOS.
To install HotspotOS follow these steps:
1 Download initramfs-kernel.bin and sysupgrade.bin
2 Set up a TFTP server. Have it host the initramfs file but rename it to um_factory_fw.bin
3 There won’t be time to do a DHCP exchange so configure the TFTP server (or the host running the server) to have a 192.168.1.100 address on a 255.255.255.0 subnet.
4 Connect with an ethernet cable and power the RE6500 on. Immediately after receiving power the RE6500 will make a TFTP request and boot the um_factory_fw.bin into memory. This will effectively boot a live version of HotspotOS. You will know that you did it right if the extender has both the white and orange LEDs on after it is done booting, resulting in a milky white led with a distinct orange hue. The original firmware never lights them at the same time. The individual LEDs can also be observed through the front grille.
5 Use HotspotOS’s web interface at 10.200.0.1:8089 and login with admin/admin. From here you can flash the sysupgrade image.
6 Don’t forget to shut down the TFTP server or you’ll just load the initramfs image again!
7 After rebooting the extender you should now have HotspotOS running from the device.
Linksys WRT1200AC
Download HotspotOS
OEM install
Login to Linksys WebUI (Default IP: 192.168.1.1; Password: admin).
Connectivity → Manual Update.
Select factory image hotspotos-mvebu-cortexa9-linksys_wrt1200ac-squashfs-factory.img
Once flash completes, router will reboot.
Linksys WRT3200ACM
Download HotspotOS
OEM install
Login to Linksys WebUI (Default IP: 192.168.1.1; Password: admin).
Connectivity → Manual Update.
Select factory image hotspotos-mvebu-cortexa9-linksys_wrt1200ac-squashfs-factory.img
Once flash completes, router will reboot.
Linksys WRT32X
Download HotspotOS
OEM install
Login to Linksys WebUI (Default IP: 192.168.1.1; Password: admin).
Connectivity → Manual Update.
Select factory image hotspotos-mvebu-cortexa9-linksys_wrt1200ac-squashfs-factory.img
Once flash completes, router will reboot.