This article describes installation and configuration steps for WiFi LigoWave routers.
Check how to setup and connect LigoWave router with Cloud WiFi platform in this detailed video manual.
Please reset LigoWave router to factory settings to avoid problems with some previous configuration.
Connect your computer by network cable to the LAN port.
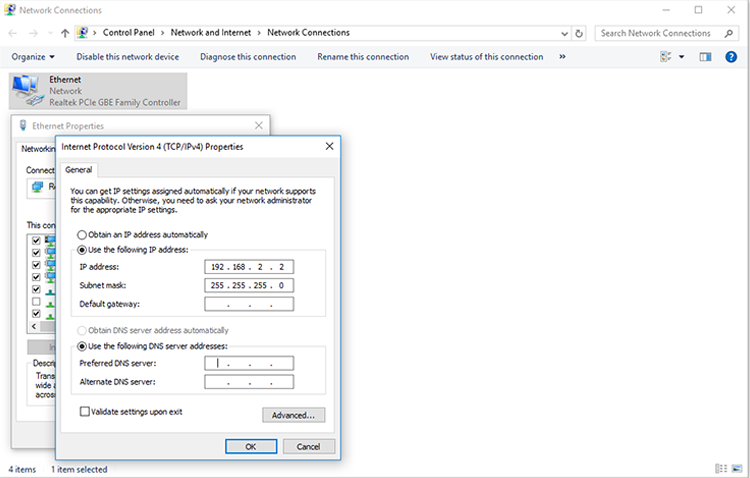
Go to your computer Local Network Connection Properties.
Select Internet Protocol Version 4 (TCP/IP 4) then press on Properties.
Set IP address in 192.168.2.x range (be sure not to set 192.168.2.66, this IP address is reserved for communication with the router)
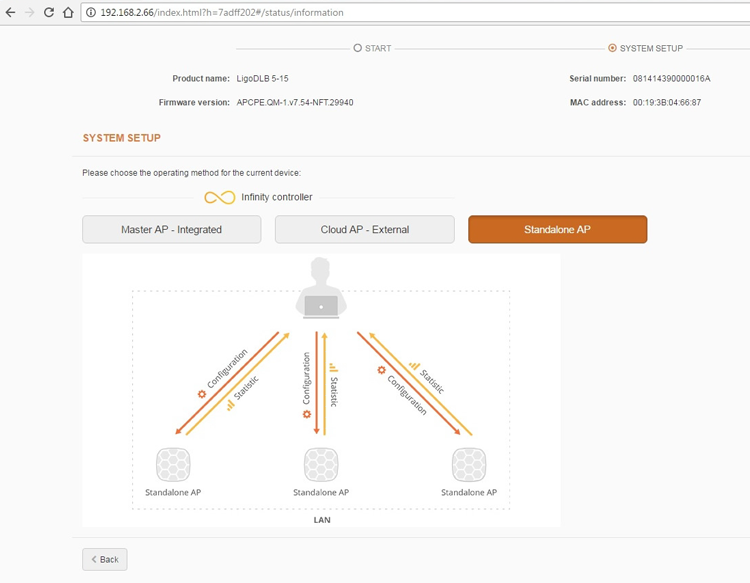
Go to the browser and in URL field type 192.168.2.66
Default login details are:
Username : admin
Password : admin01
Accept User Agreement if it appears and proceeds with the setup with selecting Operating Country and press on Next.
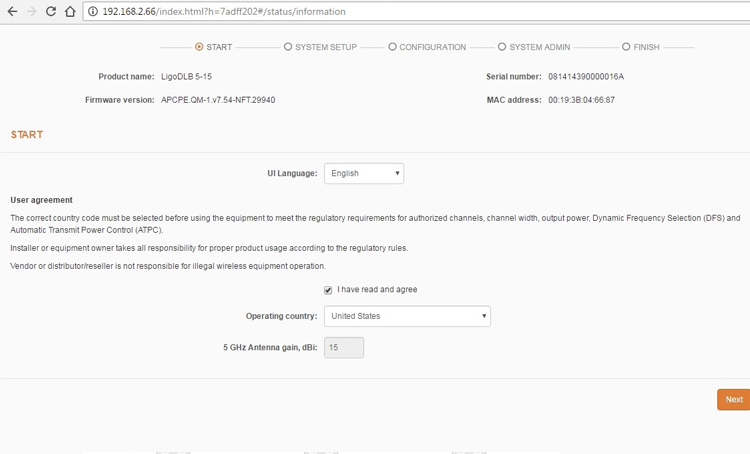
In next window select to use LigoWave as Standalone AP and press on Finish.
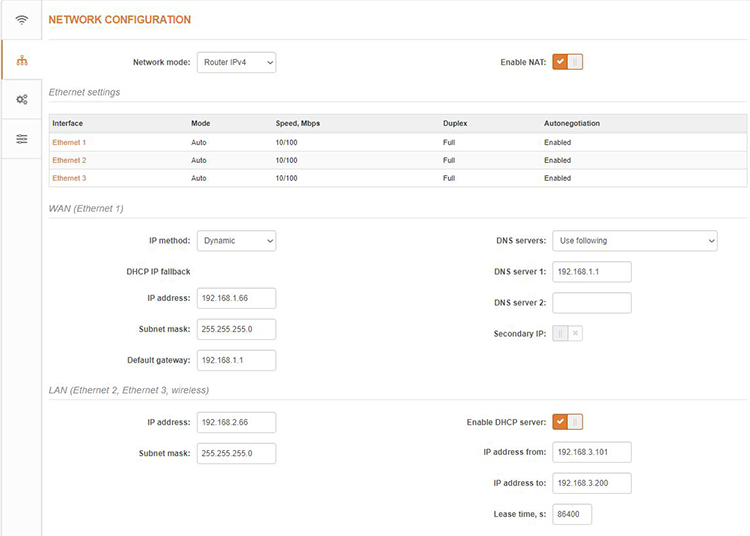
The router will reset and when the page is reloaded go to the Settings panel Network Configuration section.
Select Network mode: Router IPV4 and configure WAN (eth0) IP method: Dynamic, DNS servers.
Obtain automatically in IP address field use address over which your LigoWave device connects to the Internet.
From Status: Device section you can check the installed software version.
From Status panel Statistics section see MAC address written on Interface counters for Wired eth0.
Here it is shown in format XX-XX-XX-XX-XX-XX.
We will need this information in XX-XX-XX-XX-XX-XX format for future setup and for StartHotspot portal setup of your device MAC address.
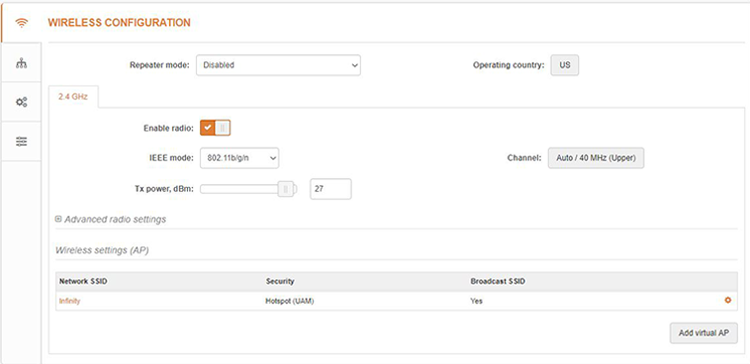
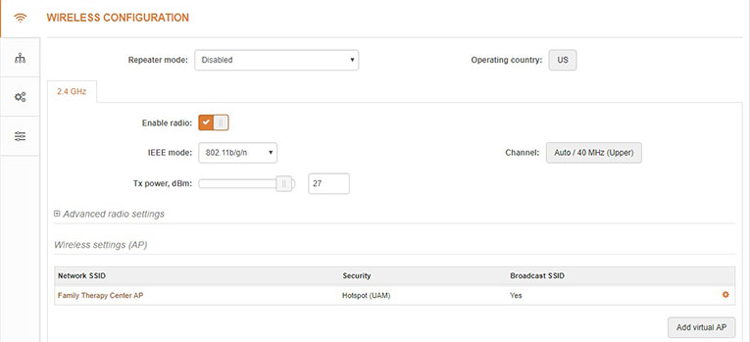
We will now go back to the Settings panel Wireless Configuration section.
Under Network SSID click on configuration wheel button.
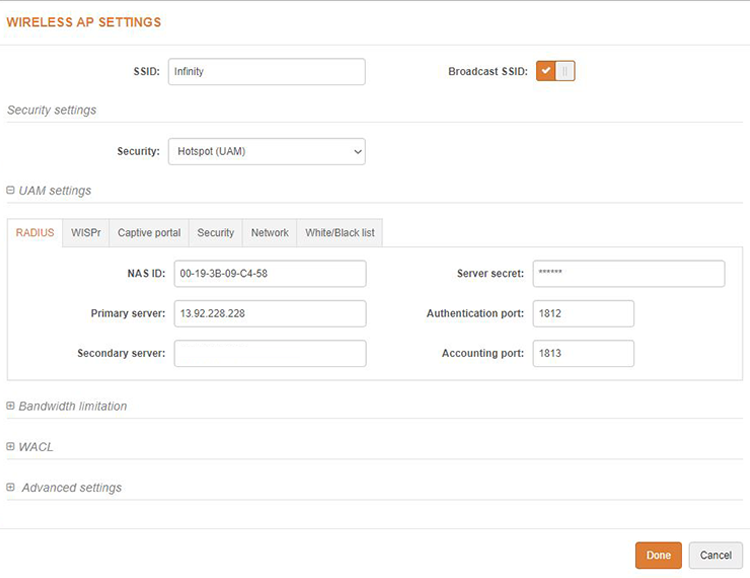
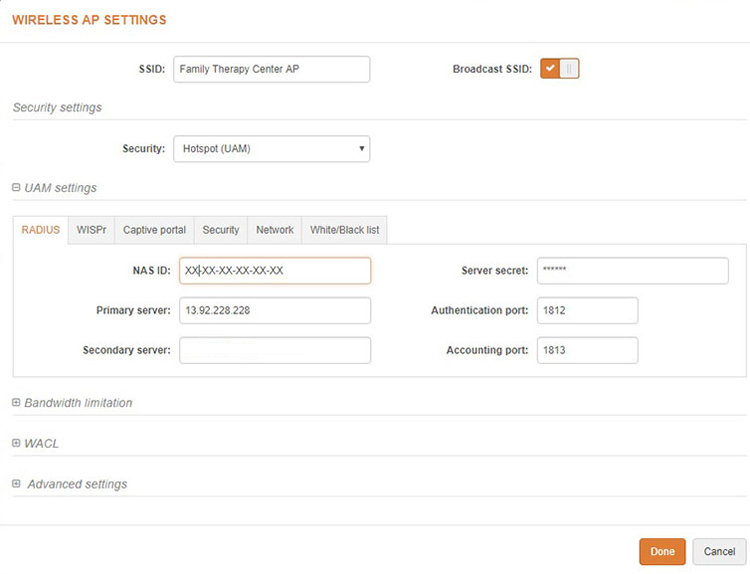
Here you should set your SSID name and activate Broadcast SSID.
In Security Settings select Network SSID“HotSpot (UAM)”.
In Radius section set as NAS ID your device MAC address in XX-XX-XX-XX-XX-XX format.
Other details should be same as at the screen bellow.
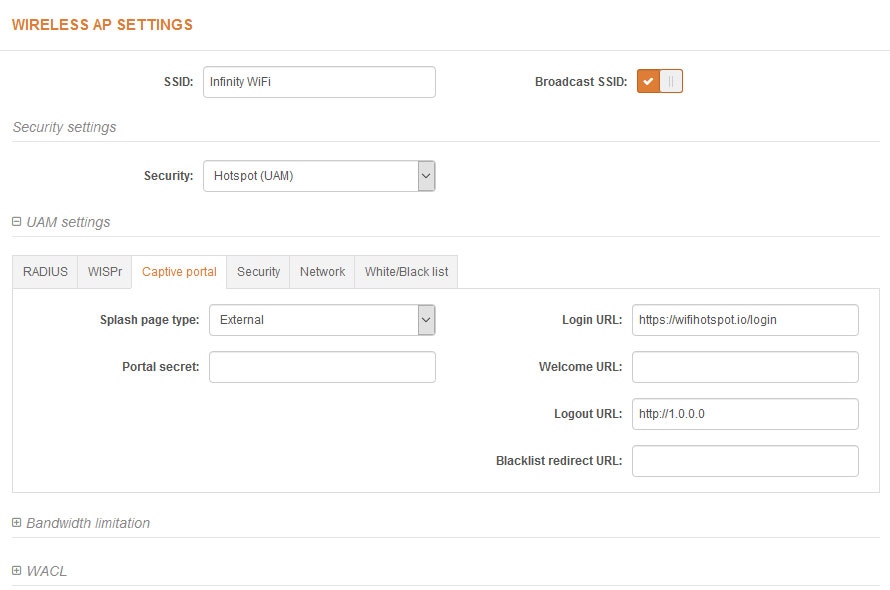
At Captive portal section select External as Splash page type.
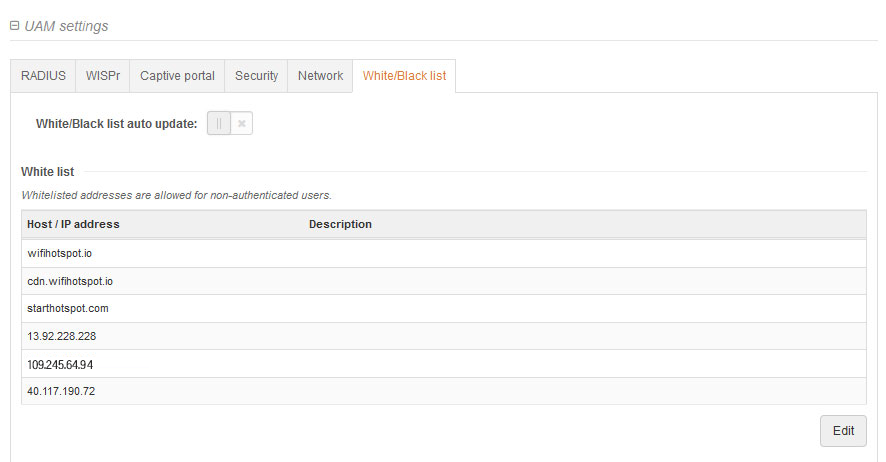
Go to White / Blacklist tab and add the following domains:
Disconnect your computer wired cable from the router.
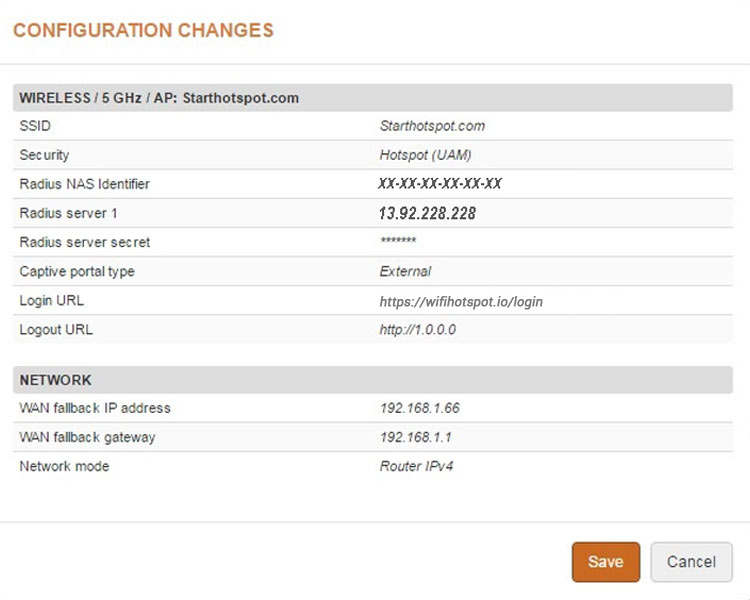
From Configuration Changes window select to Save changes.
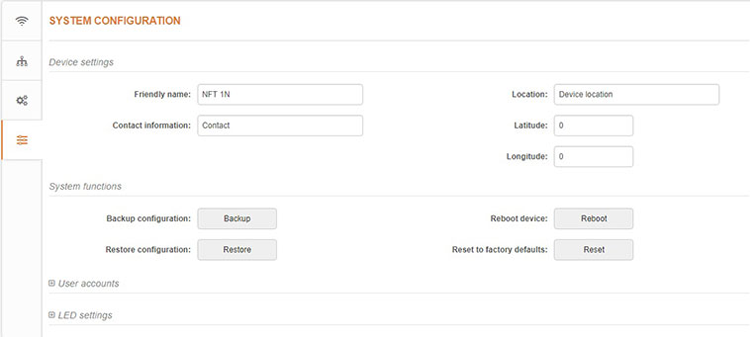
Go to the Setup / System Configuration.
From Configuration Changes window select to Save changes.
For the next step, you should set Identity of your router.
In order to check correct MAC address please go to Configuring Parameters.
From Status panel Statistics section see MAC address written on Interface counters for Wired eth0.
Here it is shown in format XX-XX-XX-XX-XX-XX.
We will need this information in XX-XX-XX-XX-XX-XX format for future setup and for Cloud WiFi portal setup of your device MAC address.
At this page please locate NAS ID and set router MAC address, which should be same as eth0 (Ethernet 1).
Press the Done button and on the next page click on Save Changes.

 LigoWave Configuration