
Juniper Mist Cloud Controller
Setting up a custom guest portal page with Juniper Mist involves creating a captive portal and configuring parameters for the RADIUS server for authentication. Here are the steps you can follow:
Access your Juniper Mist account through the Mist Cloud Portal.
Create a WLAN
If you haven’t already, create a new WLAN by navigating to Networks / WLAN / Create WLAN.
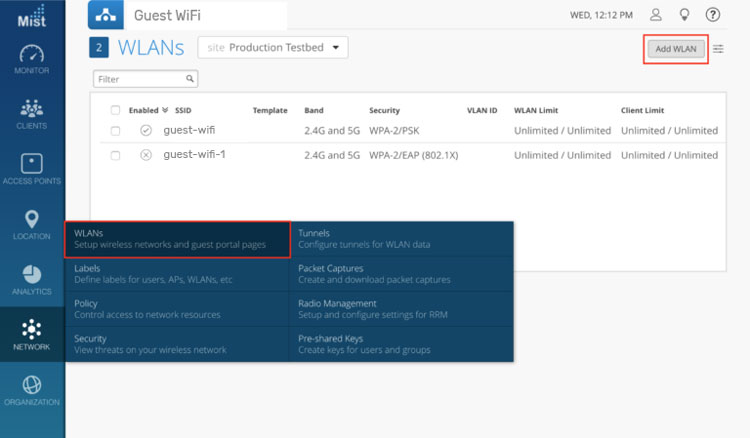
SSID Name: Set the SSID name (e.g., “Guest WiFi”).
WLAN Type: Select Guest Access or Open depending on your requirements.
Configure Captive Portal
Go to Network and navigate to SSID.
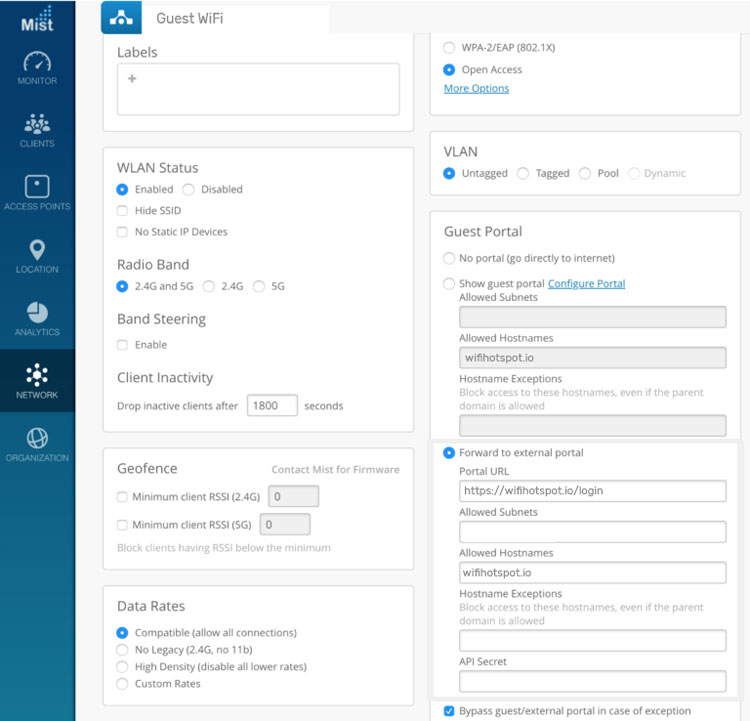
Set the Portal URL:
URL: https://wifihotspot.io/login
In Captive Portal Type, choose External Captive Portal.
RADIUS Server Configuration
Configure the RADIUS server to authenticate users who access the guest Wi-Fi:
Navigate to the WLAN Settings / RADIUS Server section.
Americas RADIUS Server: 13.92.228.228
Europe & Global RADIUS Server: 109.245.64.94
Authentication Port: 1812
Accounting Port: 1813
You should set the shared secret for both RADIUS servers (contact our office for shared secret).
Enable Accounting
In the RADIUS configuration, enable accounting to track user sessions and bandwidth.
Make sure that the Accounting Port is set to 1813.
Configure Authentication Method
Use a Guest or Open WLAN with External Captive Portal when configuring WiFi Hotspot. User authentication is then handled through the captive portal and RADIUS configuration.
Do not enable WPA2-Enterprise unless your deployment is specifically designed to use 802.1X authentication.
Test Captive Portal
Connect a test device to the SSID and verify that the captive portal redirects to the specified URL (https://wifihotspot.io/login).
Complete the login process using the credentials created in the WiFi Hotspot portal and authenticated via the RADIUS server.
These steps should guide you through setting up your own guest portal page with Juniper Mist.