Flashing the firmware using the TFTP server ( Trivial File Transfer Protocol ) is done if you cannot access the web-based setup page to do the upgrade or to fix non-working (bricked) routers.
Please note, different devices require a different setup. On some router models, instead TFTP server it is required to install TFTP client, set the different static IP address, etc…
Before firmware upgrade, be sure and check online instructions for your specific router model.
In this guide, we will revert from currently installed DD-WRT firmware to the OpenWRT firmware on TP-Link router (TP-Link WR 841 ND in this example).
The installation of OpenWrt firmware is device specific.
Procedures for specific devices should be found in the OpenWrt wiki.
See OpenWrt Table of Hardware for available procedures.
On some specific TP-Link devices the only way to upgrade firmware image is to use TFTP server. TP-Link WR 841 ND is one of these models.
Configure PC with static IP address 192.168.0.66 .
Download standalone TFTP server from this link.
Download factory firmware for your model and rename it, for example
“openwrt-ramips-mt76x8-tl-wr841n-v13-squashfs-tftp-recovery.bin”
to
“tp_recovery.bin”
Place it in TFTP server directory, which should be by default in C:/Program Files(x86)/Tftpd32
Connect PC with one of LAN ports, press the WPS/Reset button, power up the router and keep the button pressed for around 6-7 seconds, until device starts downloading the file.
After that you will see progress in the TFTP Server Tab and wait until it completes.
Router will download file from server, write it to flash and reboot.
Do not power off the router, give it some time to update firmware and boot up.
When TP-Link firmware is installed, you can proceed with router setup as instructed below.
Connect your computer by network cable to the LAN port.
Go to the web browser and access to router configuration using default IP address e.g 192.168.0.1.
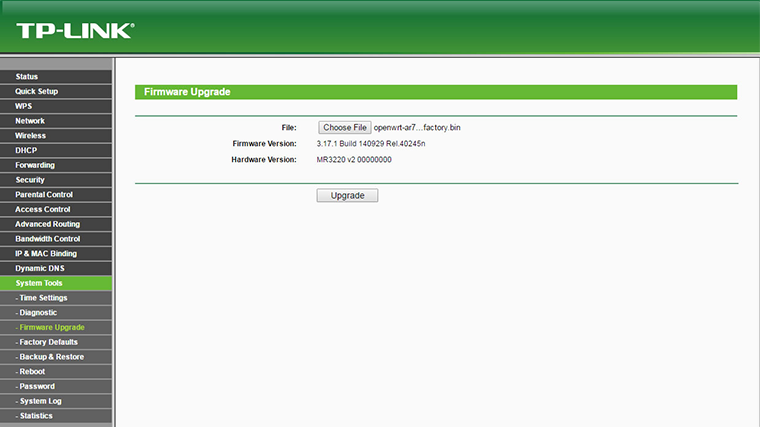
From System Tools find Firmware Upgrade.

Click on Choose File.
Navigate to the location where the factory version for your model is downloaded and press on Open.
Press the Upgrade button.
Confirm that you want to upgrade the firmware.
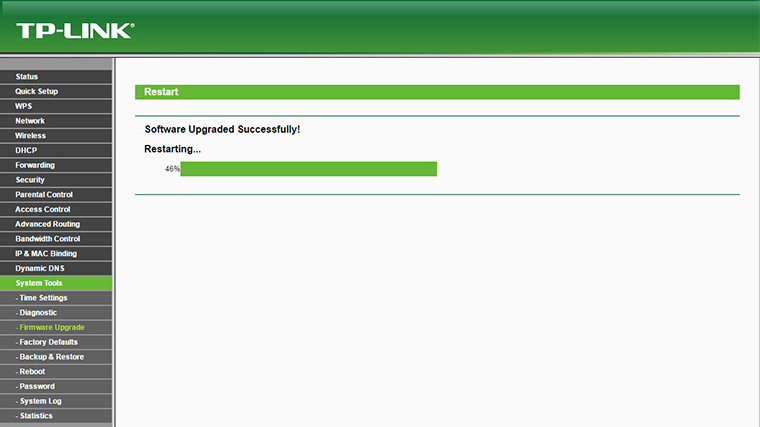
During this process you will see information about processing.
Once when it is finished you will get message Software Upgraded Successfully ! Restarting.
Reconnect LAN cable or Disable/Enable NIC card in order to get new valid IP address in 192.168.45.x range from router.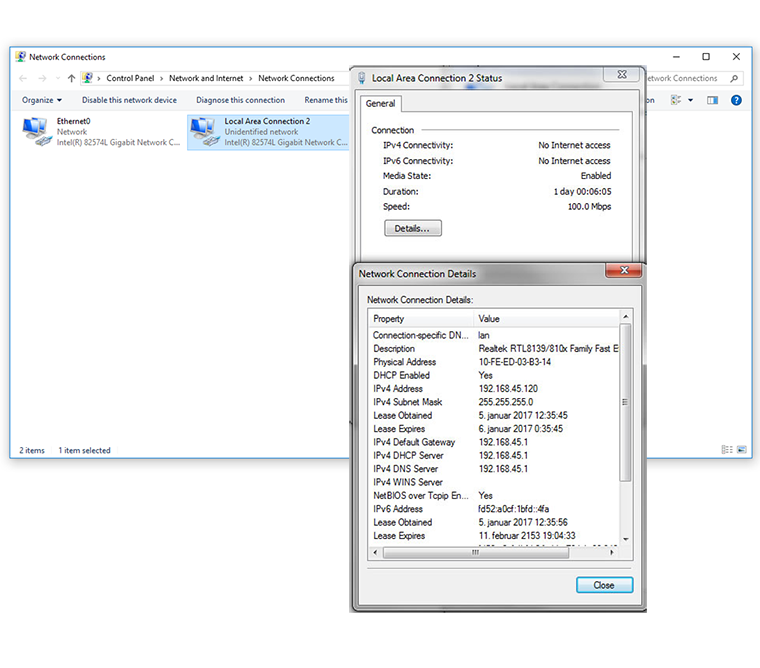
Start your browser and in URL field type http://192.168.45.1:8089
Username : admin
Password : admin
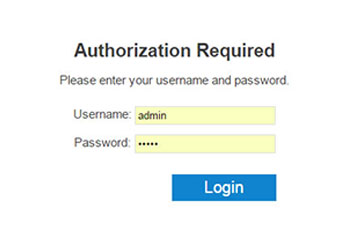
Press Login button to access to Status tab.
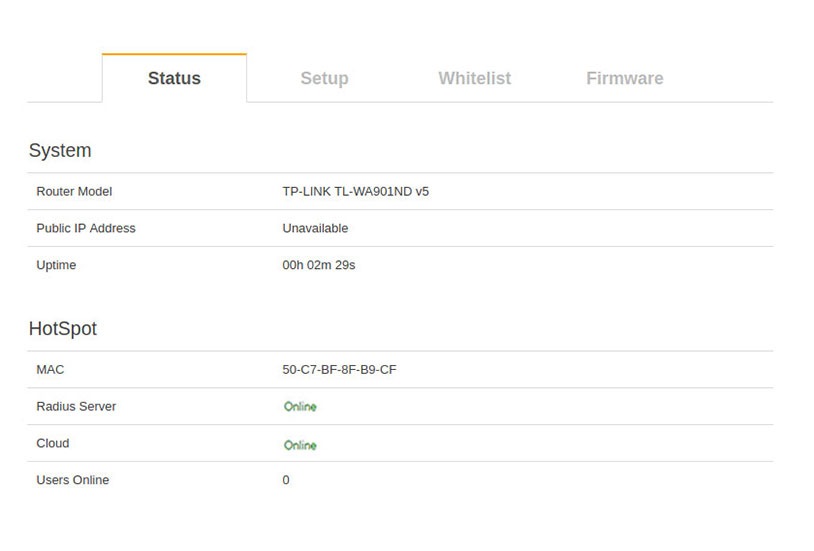
On Status page you will see a MAC address of your OpenWRT router which will be used in the SignUp process.
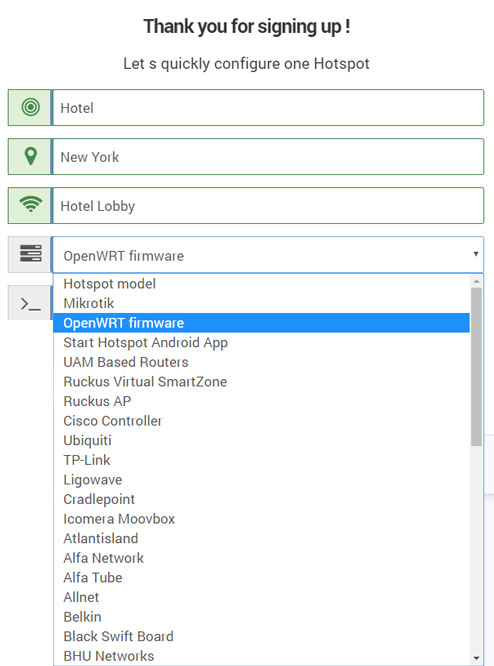
After selecting your HotSpot name, select as HotSpot model OpenWRT, and add your MAC address from Status tab.
From Setup page configure your OpenWRT router.
Be sure and set Autostart option. This option is not active by default.
Here you can set new Administrator password for access to the router setup and configuration. Save changes.
Enable WiFi, set SSID name and click Save.
As DNS Server select Custom and set 192.168.45.1
By default as Network Protocol is set DHCP, but you can choose Network Protocol based on your needs.
Our recommendation is to use DHCP Network Protocol.
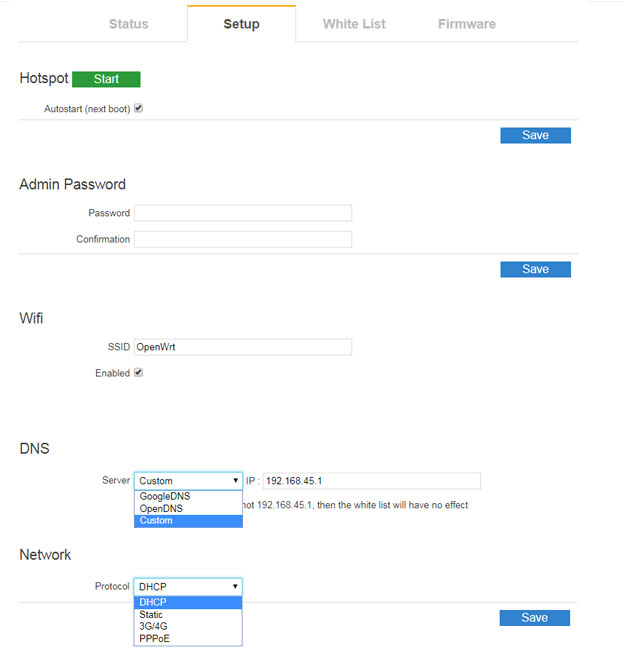 When you finish setup, restart router to apply changes.
In case your device has only one eth port, you will see the Operation mode configuration.
Once you complete all configuration, including networking, SSID, and other options, please switch the Operation mode to the Access point and click the Save button on the bottom of the page.
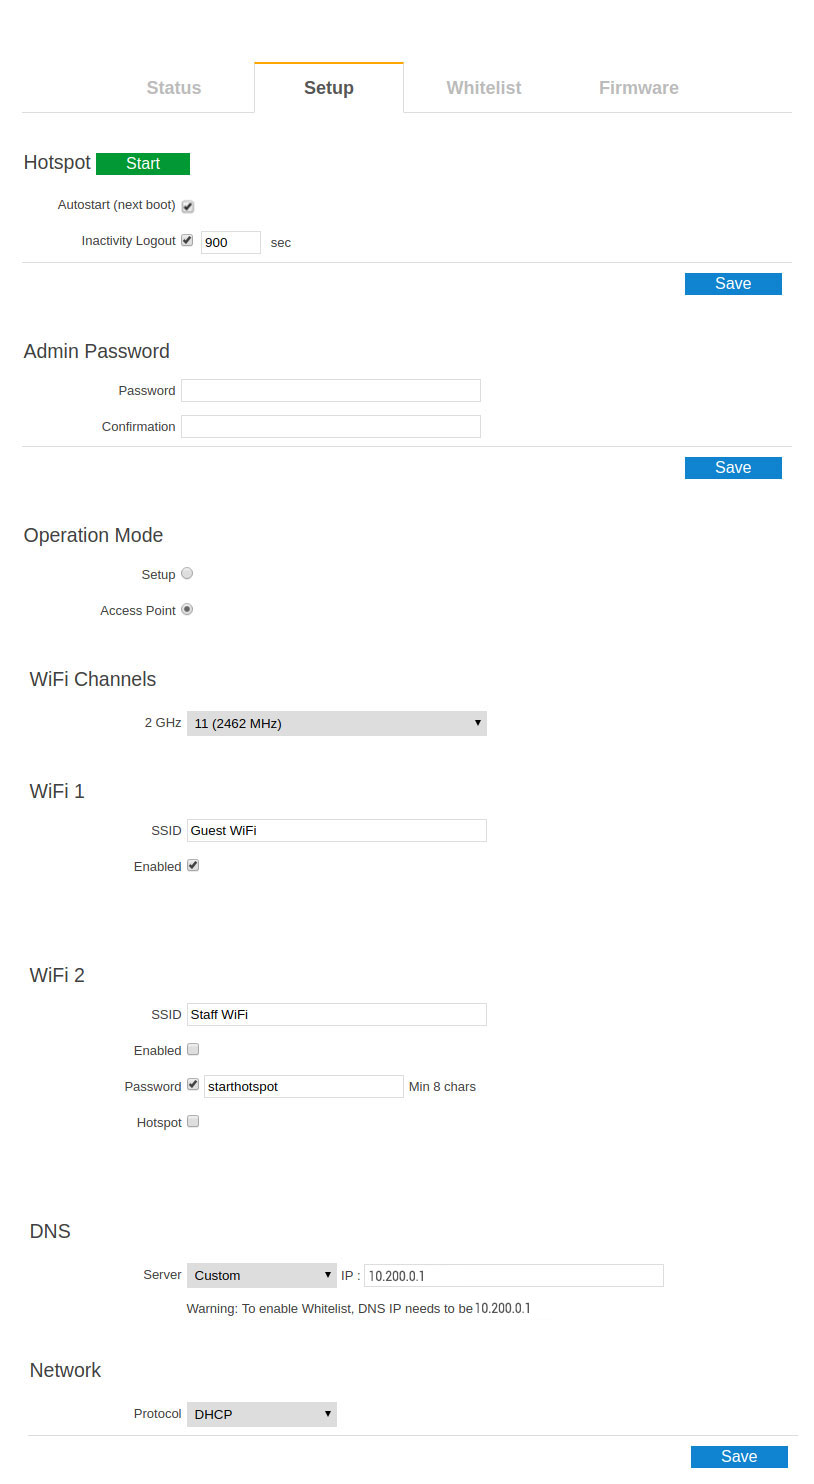
Reboot your AP, disconnect ethernet cable from your PC, connect it to your Internet source (modem, switch etc) and it will be ready for WiFi service.