Learn how to create user
All Users panel give a preview of all Start Hotspot accounts.
For each of the accounts are available details:
Username, E-mail, Download, Upload, and Status, as well as Select field and configuration button from which is possible to edit, delete or to cancel configuration changes.
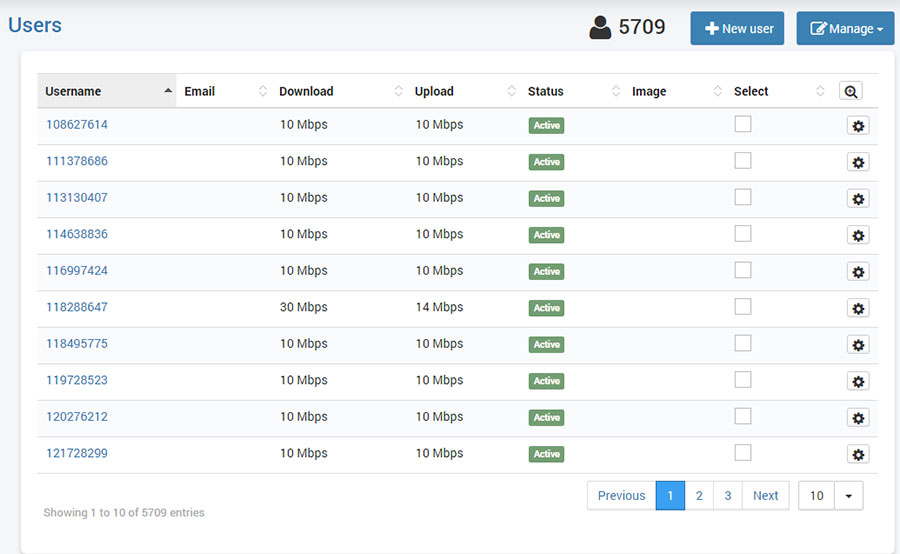
New user button transfers you to New User creation panel.
Using the Manage button is possible to Export Users into Excel (*.xlsx) format, Delete selected and Select All / Unselect users.
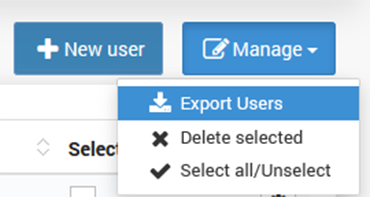
Using account details you can also perform Search in Users panel.

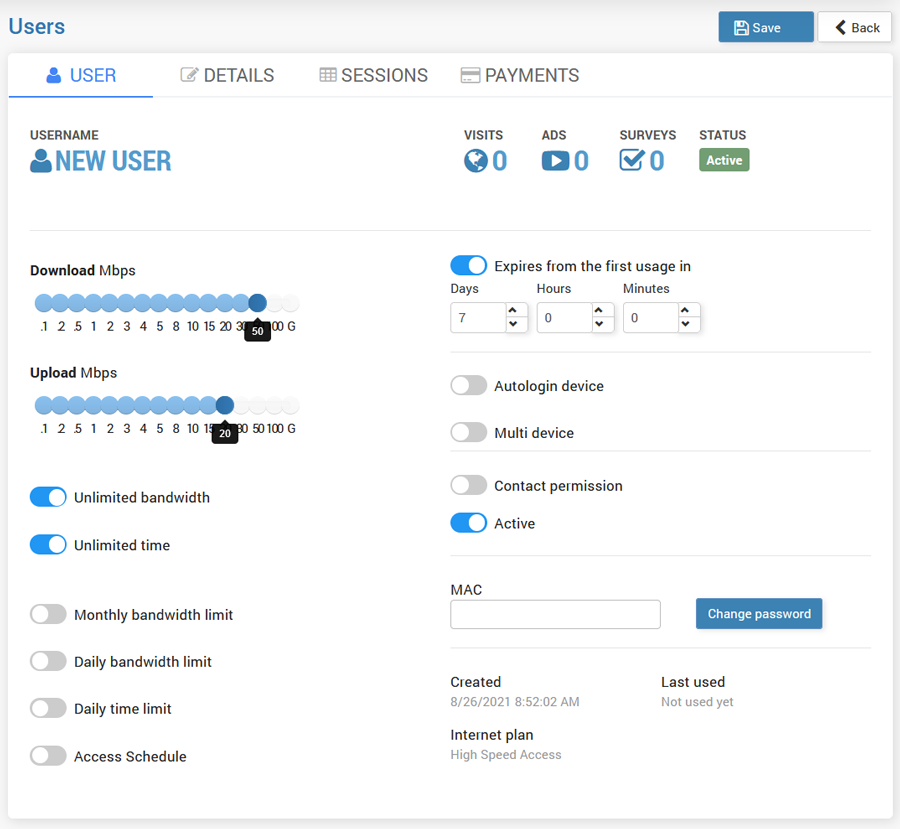
New User panel is used for the creation of the user account.
New user information required for account creation are Username and Password from User tab and Name, Last name and E-mail address from Details tab.
User tab contains following details:
Access Limits:
– Download and Upload rate is set by Internet pan in account creation and can be adjusted later for each user separately. It’s displayed in megabits per second (Mbps).
– Unlimited Bandwidth quota
Bandwidth quota represents total bandwidth traffic available to a user for downloading or uploading. The quota is not a sum of download and upload traffic. If you define 100 GB as the quota, a user can download and upload a maximum of 100 GB, whichever comes first. It’s usually displayed in MB, GB or TB depending on the selected value.
– Monthly bandwidth limit – Total bandwidth traffic available for Internet usage on a monthly basis.
(To reset Monthly bandwidth limit option it is required to disable, save and enable it again)
– Daily bandwidth limit – Total bandwidth traffic available for Internet usage on a daily basis. When all bandwidth time is used, a user can login on the next day
(To reset Daily bandwidth limit option it is required to disable, save and enable it again)
– Unlimited time should be used only if you don’t wish to limit users in time. It’s useful if you charge users by bandwidth or users pay monthly fees
Time available for Internet usage is given in hours and minutes
– Daily time limit – Total time available for Internet usage on daily basis. When all daily time is used, a user can login on the next day
(To reset Daily time limit option it is required to disable, save and enable it again)
– Access Schedule – This feature helps you to define day time when WiFi access is allowed. Using a graphical interface you can draw the blocks which define the time intervals when your services can be used. The graphical grid is displayed like daytime hours on one axis and days in a week (Monday to Sunday) on the other axis.
– Expiration will set expire date from the first login. For example, if you set to 10 days, a user will not be able to log in on the 11th day from the first login.
– Autologin device – Enable Autologin feature for account
– Multi-Device – This option allows more than one user (device) to login with the same account. The users sharing one account also share the total download and upload rate.
˙(For example, 100 KB/s can be used by one user, or it can be used for 10 users to have approximately 10 KB/s each).
Following are details about the account like Contact permission, a date when an account is Created, Last used, Status, MAC address of the device where it is used and Internet plan used for account creation.
Details tab contains customer personal information and creates a valuable addition to the rest of the user account options.
Also, from this page, you have the ability to edit User details.
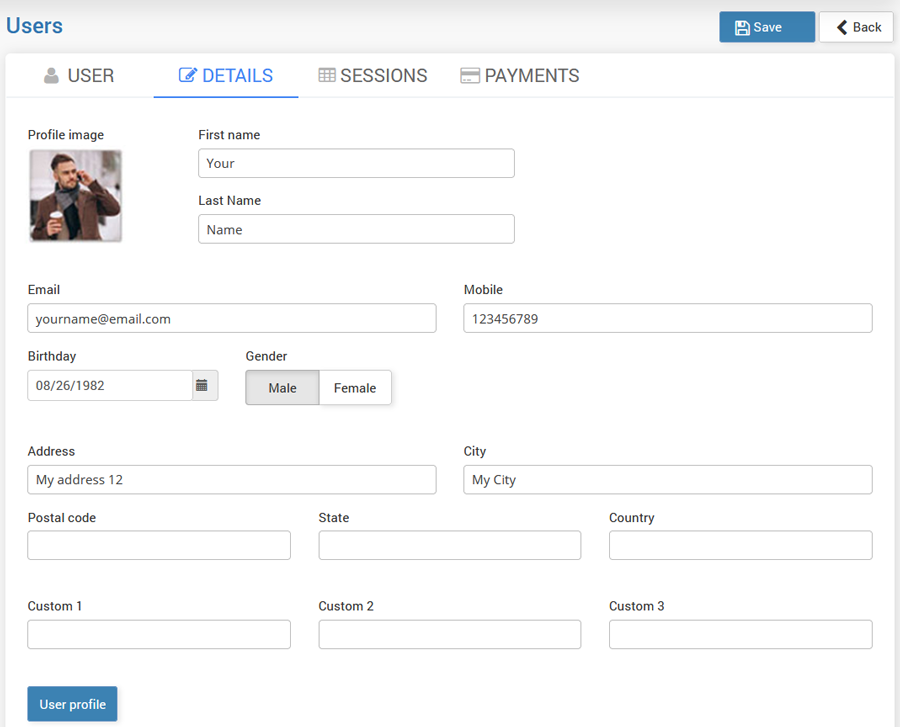

Details include a First name and Last name, Address, City, Postal code, State, Country, Email addresses, Mobile number, Birthday, Gender and Profile image if social media account is used for account creation.
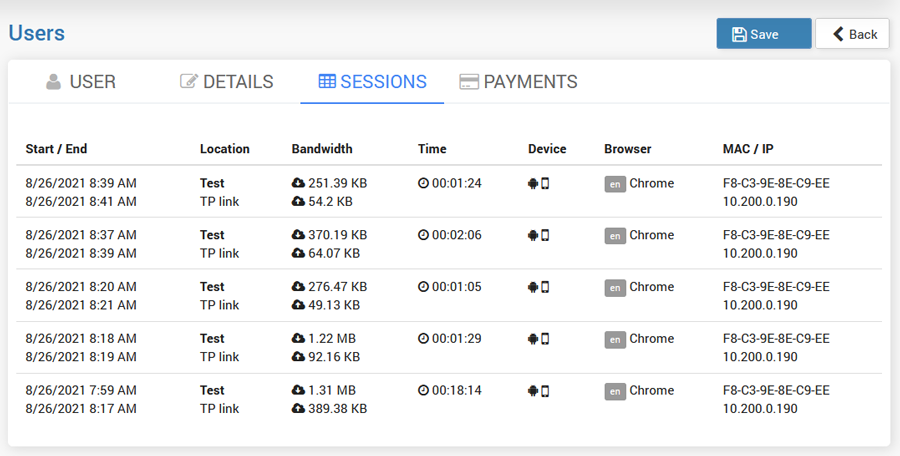
From the Sessions tab, you can check all sessions details.
Available data are:
Start/End, Location, Bandwidth, Time, Device, Browser, and MAC/IP.
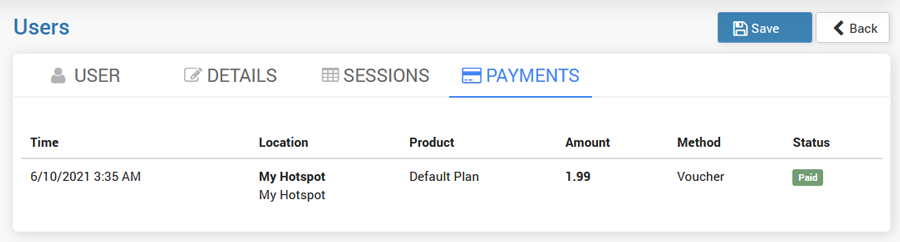
Payments tab includes all relevant informations:
Time when payment is done, Location, Product, Amount, Method and Status.
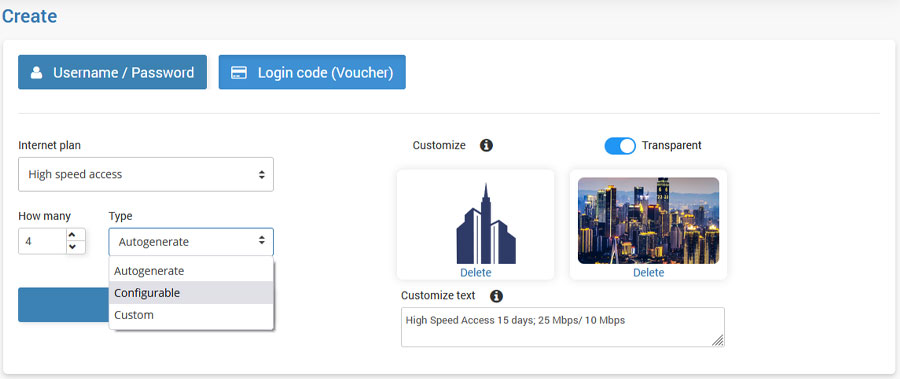
Create panel gives you the ability to create Username/Password and Login Code (Voucher) in a couple of seconds.
The first step is to select between Username/Password or Login Code (Voucher).
The next step is to choose from available Internet Plans.
Set the number of users in the How many box.
Optionally you can add a logo and background image that will be displayed on the ticket.
With the Transparent option enabled, the new transparent layer will be added to the background image.
In the Customize text box you can type the text that will appear on the ticket, or leave it blank to display the Internet Plan name.
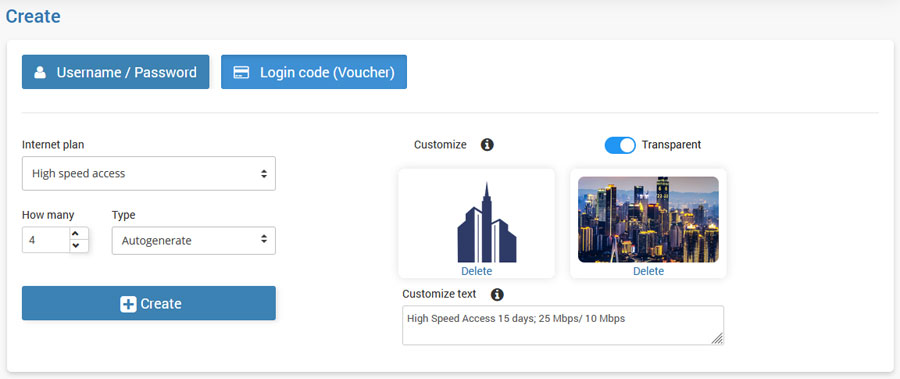
From the Type field select between Autogenerate, Configurable or Fixed Code.
Prefix and Sufix can be added optionally.
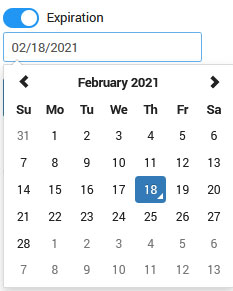
Set custom expiration date or use default from Internet plan.
Press the Create button.
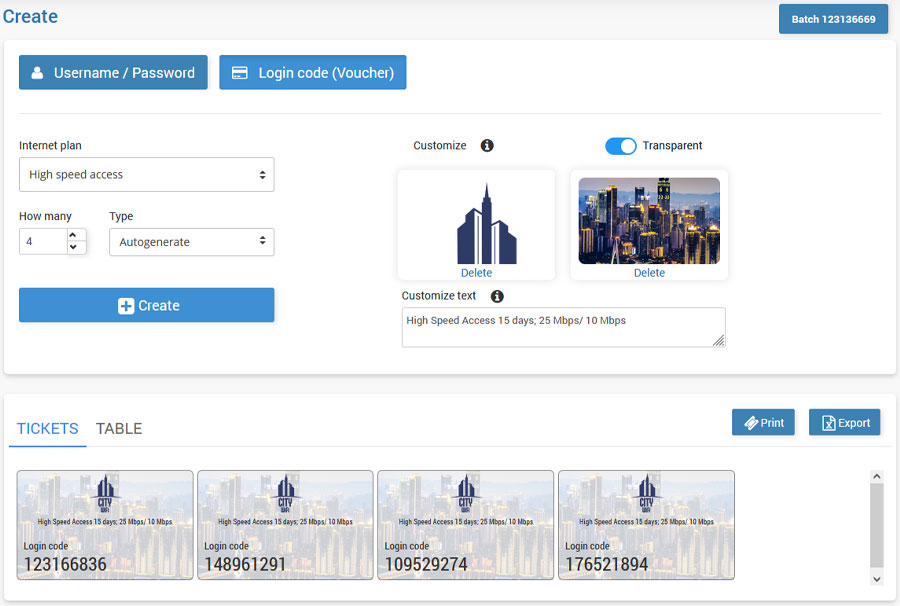
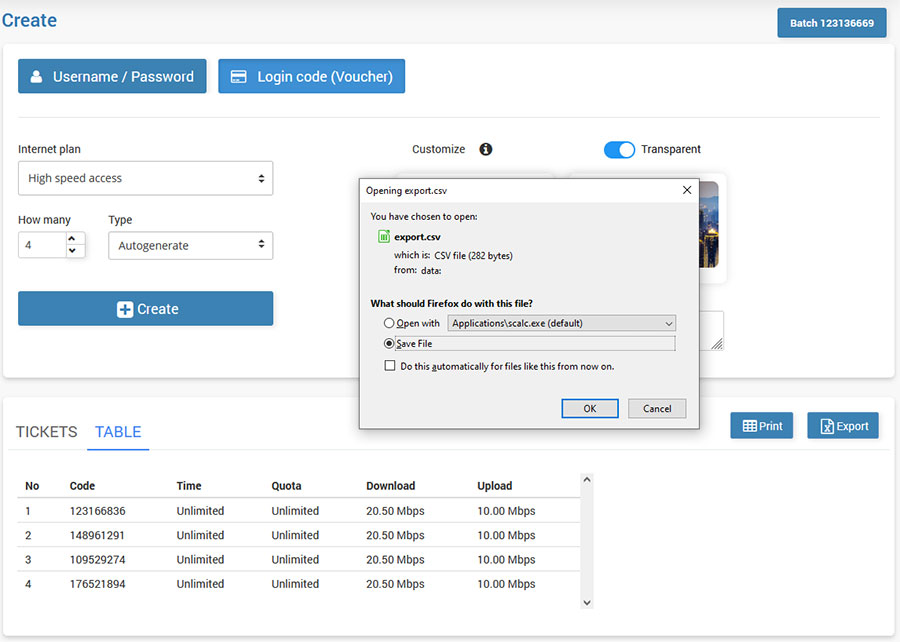
Created users will be loaded and you can choose Tickets or Table view.

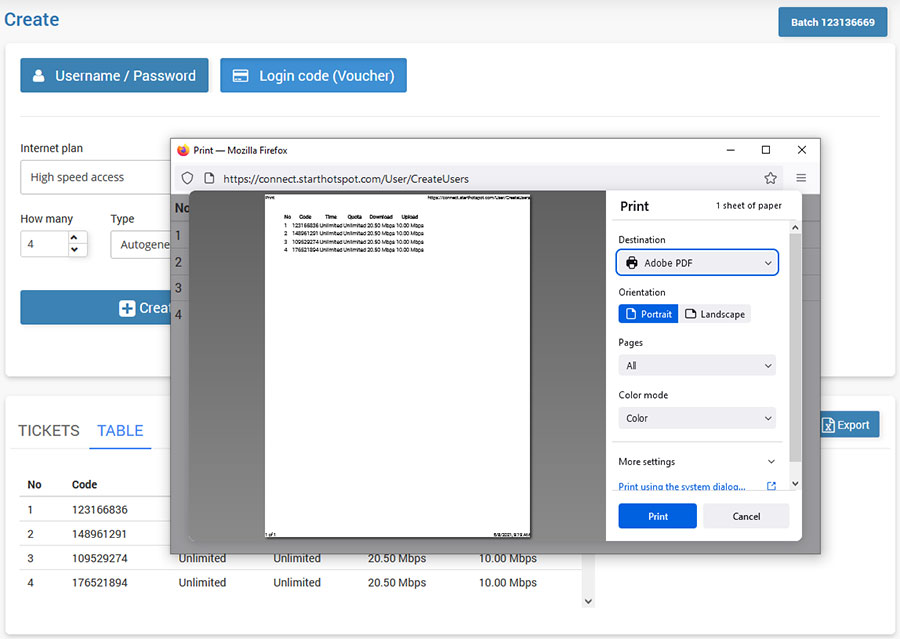
Optionally, you can choose to send them to Printer and Print.
Created users can also be Export to Excel *.csv type file.
The Batch option gives you the ability to delete user accounts either individually or in batches.
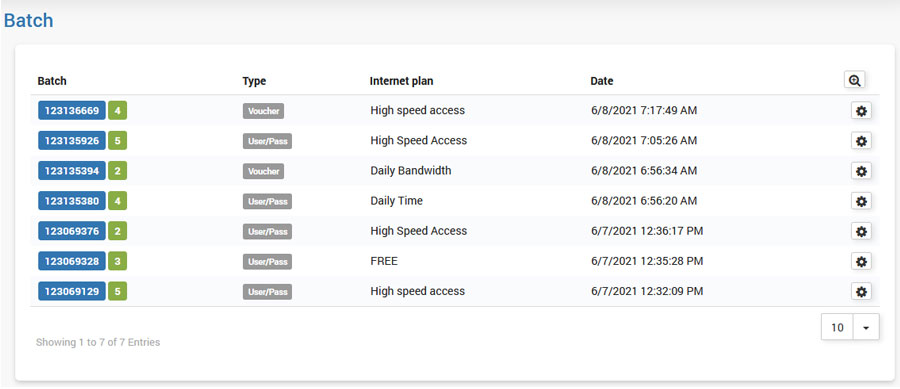
Batch is created every time you create more than 1 user account, either user/pass or voucher login code.
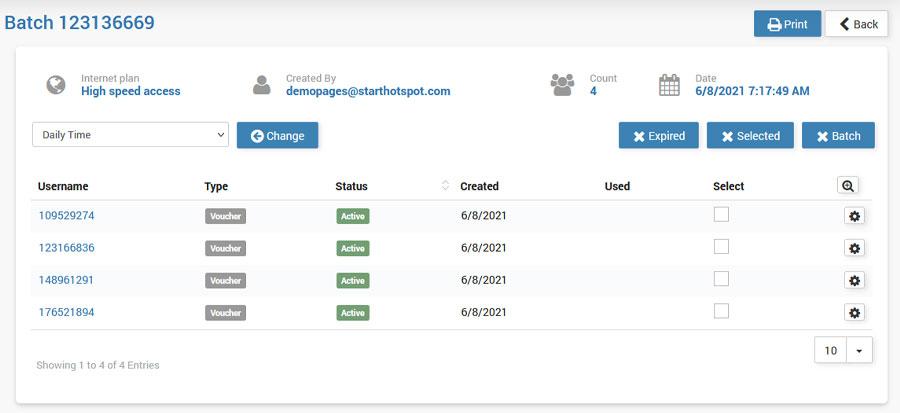
It helps you to manage all accounts in the batch at once. You are able to change the Internet plan on the selected Batch and reprint them again.
To avoid accumulating numerous inactive accounts, you can delete expired accounts, or you can delete only selected ones. If the batch was incorrectly made, you can delete the entire batch.
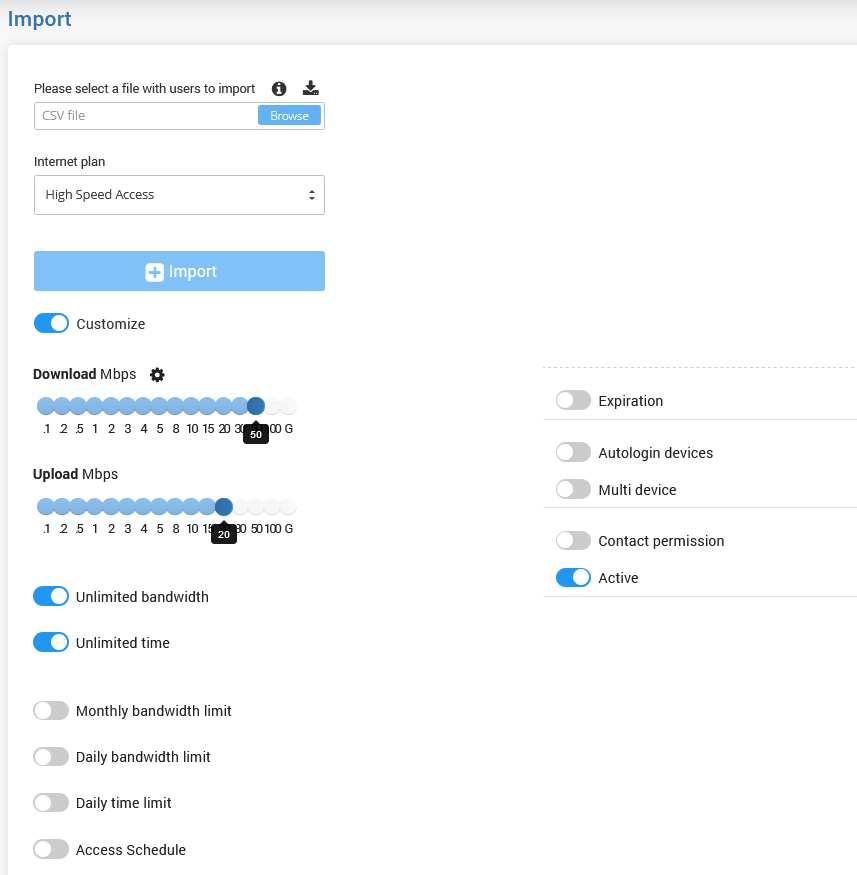
To automate the process of adding users to your Start Hotspot portal from some other software database, you can create a CSV file (sample available for download from the Import page) that contains user information.
It imports both user/pass and voucher/code user accounts. During import, you can select one of your Internet plans, or you can even customize every parameter for these accounts.
Every import is grouped into batches, so you can later manipulate those imports even easier, like delete them, update plan, etc.