Aruba Instant ON
This article describes the installation and configuration steps for Aruba Instant ON. Our test was performed with Aruba InstantON AP1.
Aruba Instant ON
Log in to your Aruba Instant On the portal
Click the Networks icon and Add a new network.
Network Name: Guest WiFi (or whatever you wish)
Network type: Guest
Save changes.
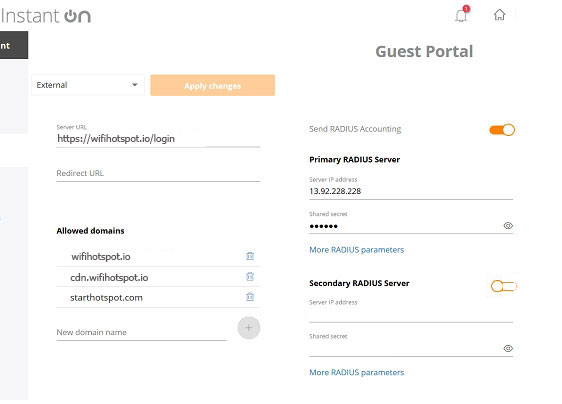
On the created network, click the Customize guest portal and configure the following:
Americas:
Portal type: External
Server URL: https://wifihotspot.io/login
Redirect URL: blank
Send RADIUS Accounting: Enabled
Primary RADIUS Server IP: 13.92.228.228
Primary RADIUS Server Secret: contact our office
Secondary RADIUS Server: Disabled
Europe & Global:
Portal type: External
Server URL: https://wifihotspot.io/login
Redirect URL: blank
Send RADIUS Accounting: Enabled
Primary RADIUS Server IP: 109.245.64.94
Primary RADIUS Server Secret: contact our office
Secondary RADIUS Server: Disabled
On the Whitelist page, type the following domains:
antamedia.net
app.antamedia.net
app.antamedia.com
wifihotspot.io
static.cloudflareinsights.com
13.92.228.228
109.245.64.94
91.150.99.187
ocsp.sectigo.com
ocsp.usertrust.com
ocsp.comodoca.com
crl.sectigo.com
crl.usertrust.com
crl.comodoca.com
crt.sectigo.com
crt.usertrust.com
crt.comodoca.com
apple.com
sectigo.com
usertrust.com
Press Apply changes.
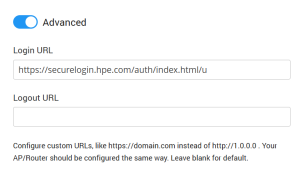
If the default domain is set to HTTP, iOS may prevent the user from logging in after payment. To resolve this, make sure to add this URL on the portal in the Wi-Fi Location / Advanced page:
https://securelogin.hpe.com/auth/index.html/u