This article describes the installation and configuration steps for Aruba Instant IAP. Our test was performed with Aruba AP-303-RW.
To configure via Aruba Instant IAP (Virtual Controller) please follow the instructions below.
Log in to Aruba IAP ( usually available at https://instant.arubanetworks.com:4343 or https://setmeup.arubanetworks.com:4343).
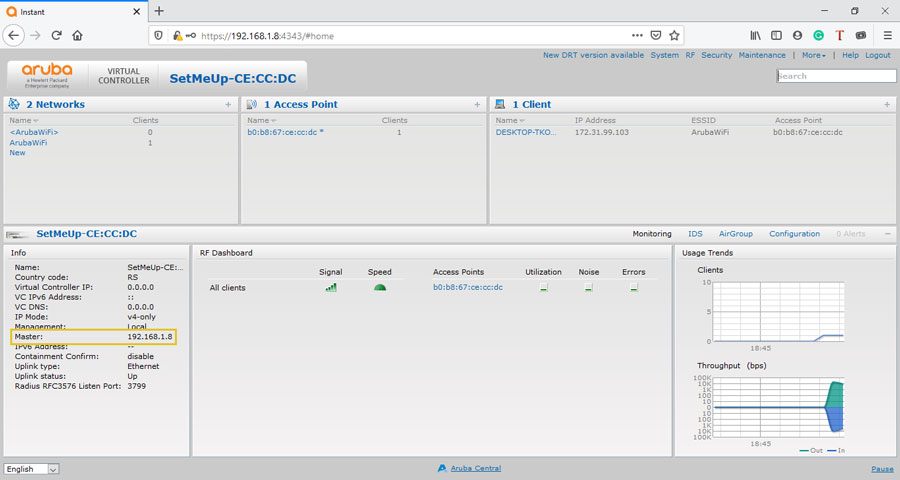
From the Info section check Master IP address ( in our case 192.168.1.8).
This IP address will be used later, after the initial setup, to connect to the Aruba AP.
In the Network section click New and configuration pop-up window will appear.
On the WLAN Settings tab set:
Name – SSID name of your WiFi network (visible to end-user), in our case ArubaWIFI
Primary usage – Guest
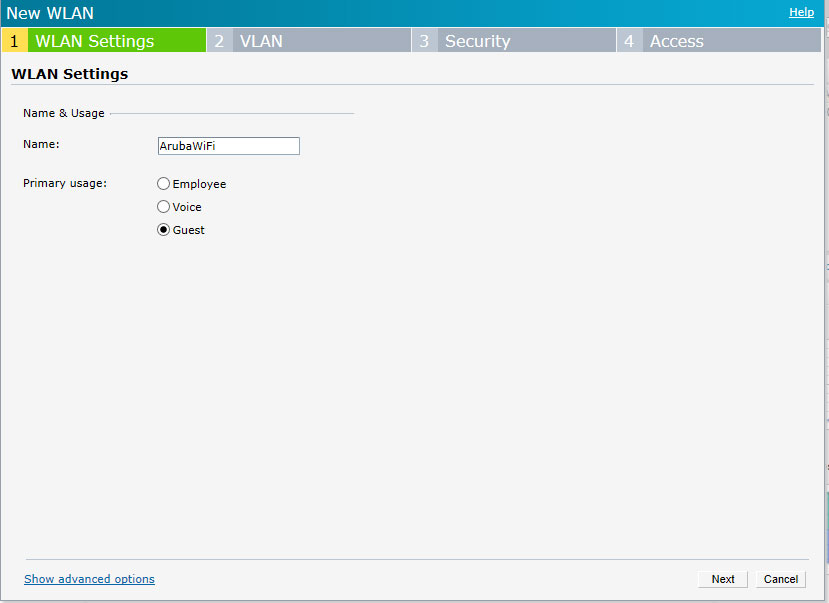 Click Next.
On the VLAN tab select:
Client IP assignment – Virtual Controller managed
Client VLAN assignment – Default
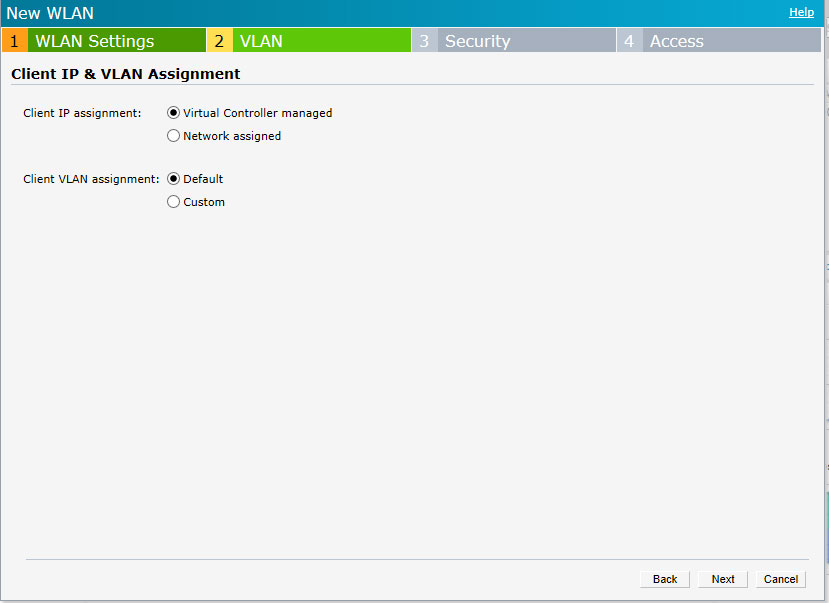 Click Next.
Go to the Security level tab.
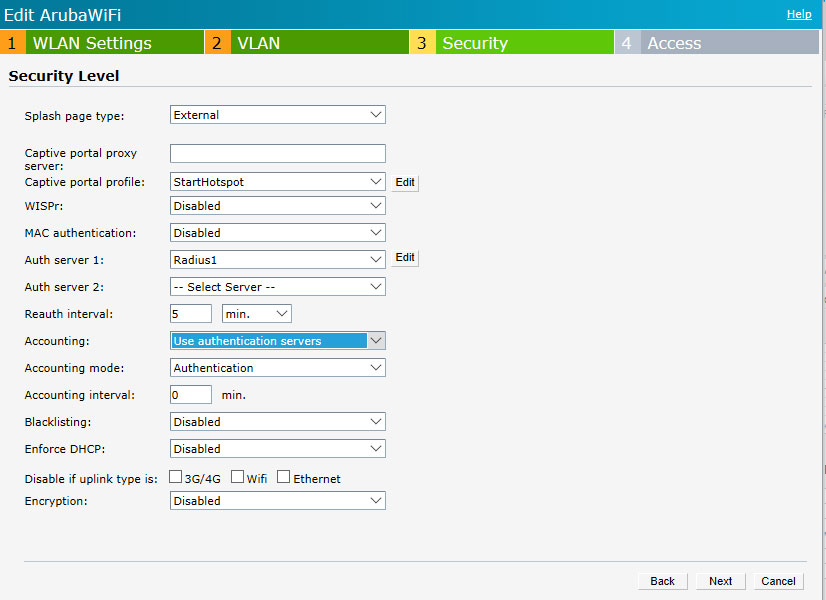
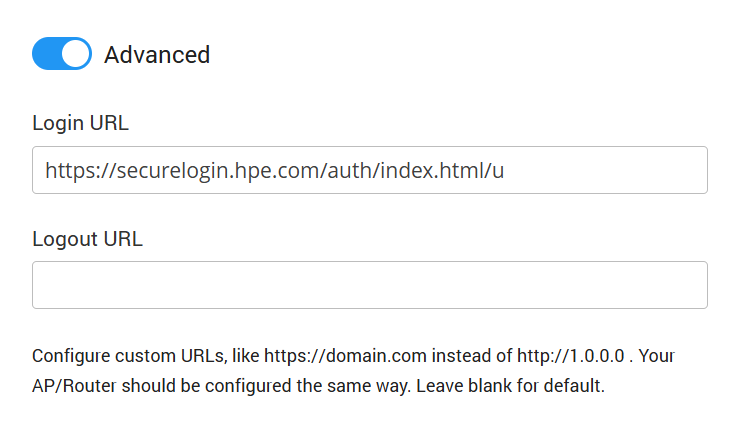
As Captive portal profile select New and configure the following:

Click OK to save changes and continue with the configuration.
As Auth server 1 select New and configure following:
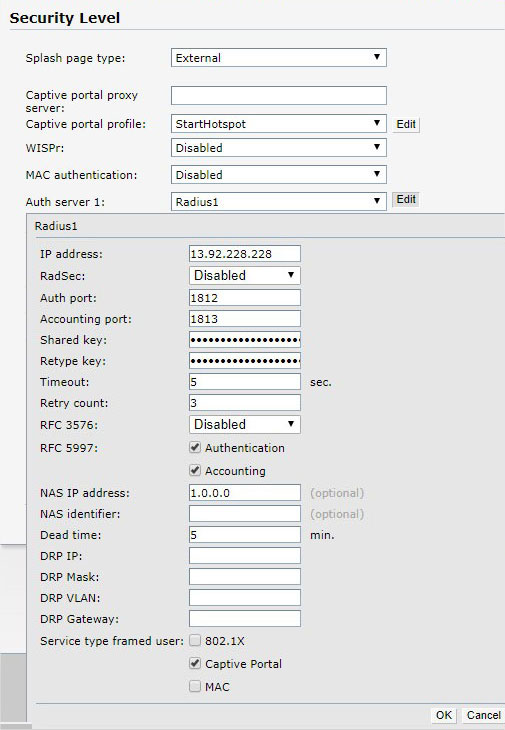
Click Ok.
Go to the Access tab and as Access Rules select Role-Based.
Under Roles click on New and enter Preauth as the name.
Click Ok to add.
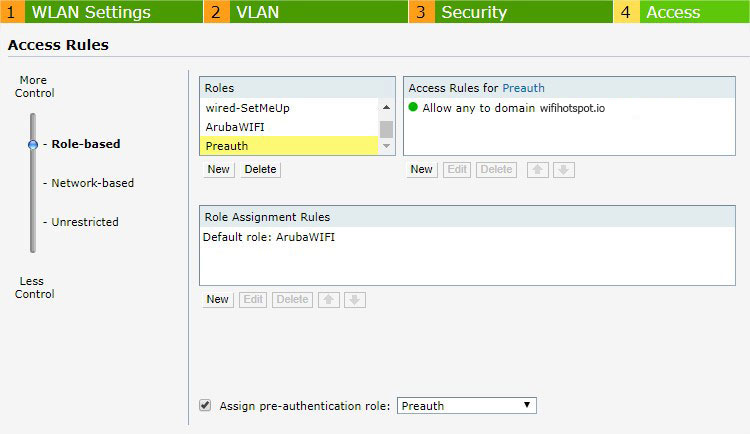
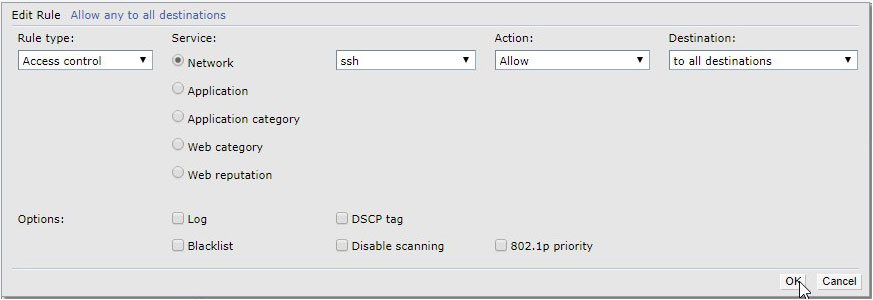
Under Access Rules for Selected Roles click on the Plus icon to add a new rule.
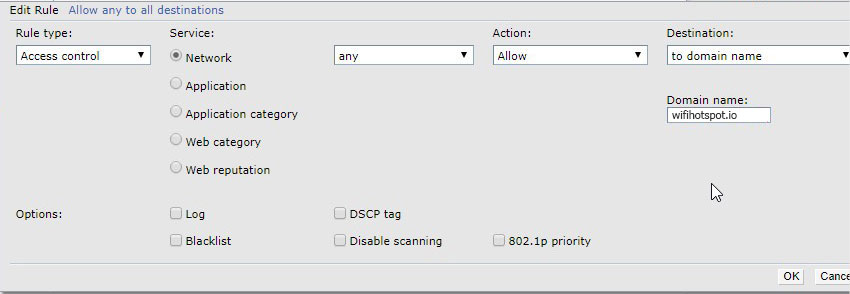
Click Ok, then repeat the process to create a new rule.

Finally, we need to modify format of the mac addresses. This is possible only through CLI. Add the following rule to be able to connect to CLI SSH.
To connect to CLI SSH, we have used Putty.
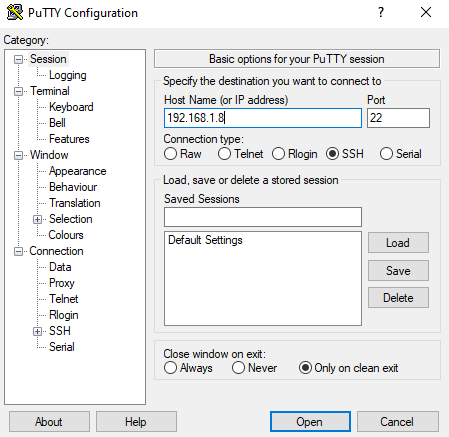
Connect to the Master IP address, login with AP admin and pass ( admin / admin) and type these commands:
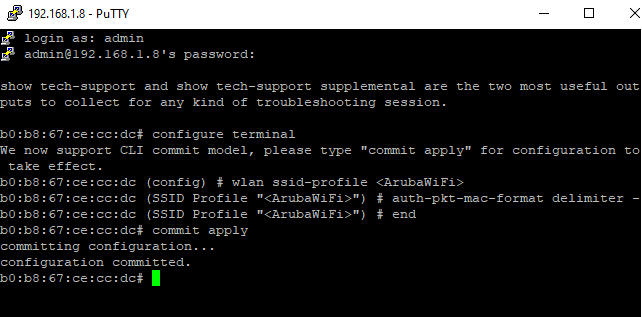
To add domains to walled garden, type these commands:
NOTE: When CLI SSH configuration is finished you will need to delete previously created SSH rule.
This SSL certificate is created with private CA (using OpenSSL), you may get it done using public CA.
1. Generate CSR for FQDN of captive portal. (for example, the url of our captive portal is login.wifihotspot.io , this should be resolvable by DNS of client devices)
2. Submit this CSR to CA (public/private)
3. CA will provide you (depending on the encoding format) probably a .crt file and .key file
4. These files can be opened in notepad. You will see begin certificate — end certificate in .crt file and Begin private key, End private key in .key file.
5. Combine both these files. Simply copy .key file content to .crt file like below
—–BEGIN CERTIFICATE—–
MIIDqzCCApOgAwIBAgIJAMmKxQ6aKcBzMA0GCSqGSIb3DQEBCwUAMHUxCzAJBgNV
upub3KvnMEtPMUHPs4GsmyhiL0TOjVcdWc2ScPgYrgcv/1Pcbh7qErQsd/q+iMYK
nNmUIlWCTIT1fQTdgqSq5uXFoNan3mpf06cyPESG1Q==
—–END CERTIFICATE—–
—–BEGIN RSA PRIVATE KEY—–
MIIEpQIBAAKCAQEAvw1jGLQcFOYExHQUUEhovsEwuVEvkcrBbJymvld+y3NhZMp6
OkeJrPtXItZRIt7PLS+a+iwJvlEKAWimmH9U4eSKRZAaK6t+fjrx2OzXMkcb8tDD
JP8KP/mR3bPuoQT8U8jGJUKqEdwa2mrgv4kW775fdAyOCri/vnrEOpk=
—–END RSA PRIVATE KEY—–
6. Go to Maintenance > Certificates. Select the captive portal, format should be CER, and upload the newly updated file. You have to enter the password for the private key, just enter any password you like, and upload.