Aruba Central
This article describes the installation and configuration steps for Aruba Central. Our test was performed with Aruba AP-303-RW.
Aruba Central
Log in to your account on Aruba Central portal.
From menu on the left, under Wireless Configuration, select Networks.
Click Create New and configure the following:
Type – Wireless
Name (SSID) – ArubaWiFi (or whatever you wish)
Primary Usage – Guest
Click Next and continue configuration.
Client IP Assignment – Virtual Controller Assigned
Click Next and continue configuration.
Splash Page Type – External
Captive Portal Profile – Press + … and set the following.
Name: StartHotspot
Type: Radius Authentication
IP or Hostname: wifihotspot.io
URL: /login
Port: 443
Use HTTPS: Yes
Captive Portal Failure: Deny Internet
Automatic URL Whitelisting: Unticked
Redirect URL: leave blank
Click Save.
Encryption: Disabled
MAC Authentication: Disabled
Primary Server: Press + … and set following:
Americas:
Name: StartHotspot1
IP Address: 13.92.228.228
Shared Key: contact our office
Retype Key: as above
Europe & Global:
Name: StartHotspot1
IP Address: 109.245.64.94
Shared Key: contact our office
Retype Key: as above
Other values should be left at default settings.
Click Save.
Accounting:
Accounting: Use accounting servers
Accounting Mode: Authentication
Accounting Interval: 5 min
Walled Garden:
Under Whitelist click + and type following domains:
antamedia.net
app.antamedia.net
app.antamedia.com
wifihotspot.io
static.cloudflareinsights.com
13.92.228.228
109.245.64.94
91.150.99.187
ocsp.sectigo.com
ocsp.usertrust.com
ocsp.comodoca.com
crl.sectigo.com
crl.usertrust.com
crl.comodoca.com
crt.sectigo.com
crt.usertrust.com
crt.comodoca.com
apple.com
sectigo.com
usertrust.com
Advanced:
Under Reauth Interval set 24 hrs
Click Next.
Access Rules: Role-Based
Under Role click on New and enter Preauth as the Name.
Click Ok.
Under Access Rules for Selected Roles click on the Plus icon.
Add a new rule one by one for each of the following:
Access Control / Network / Any / Allow / To a Domain Name: wifihotspot.io
Access Control / Network / Any / Allow / To a Domain Name: cdn.wifihotspot.io
Access Control / Network / Any / Allow / To a Domain Name: starthotspot.com
Click on Save to each one and then add the next until all are listed.
Finally, add the following rule:
Access Control / Network / Any / Deny / To All Destinations
Under the Role on the left choose default_wired_port_profile, select Assign Pre-authentication Role and select Preauth.
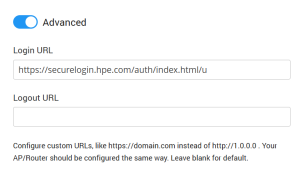
If the default domain is set to HTTP,
Troubleshooting
iOS may prevent the user from logging in after payment. To resolve this, make sure to add this URL on the portal in the Wi-Fi Location / Advanced page:
https://securelogin.hpe.com/auth/index.html/u