
Automation
Automation allows WiFi Hotspot to perform predefined actions automatically when specific customer events occur.
For example, you can send a welcome email after a guest connects, request feedback after disconnect, contact inactive customers, send birthday messages, or pass customer information to an external service.
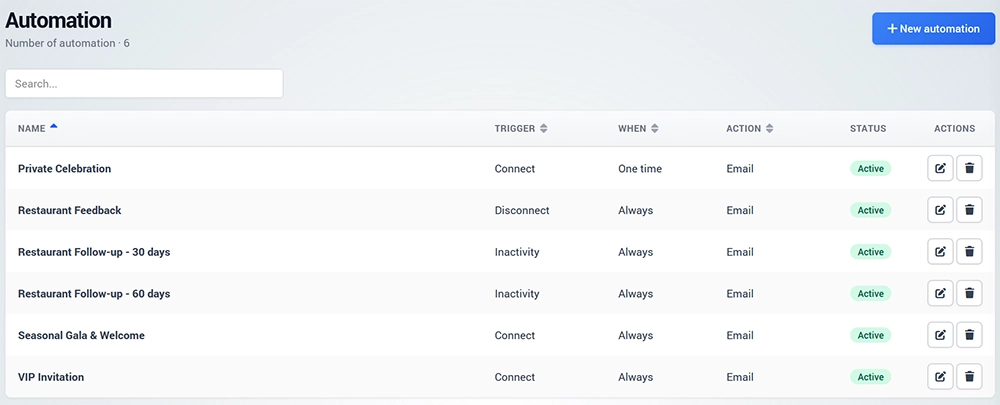
Automation Examples
Automation can be used to:
- Send a welcome message after WiFi login
- Request feedback after a guest leaves
- Contact customers after a period of inactivity
- Send birthday offers
- Add customers to Mailchimp
- Send SMS or WhatsApp messages
- Send customer data to another application through a Webhook
- Connect WiFi customer activity with Shopify workflows
Once an automation is active, WiFi Hotspot performs the configured action whenever its conditions are met.
Create an Automation
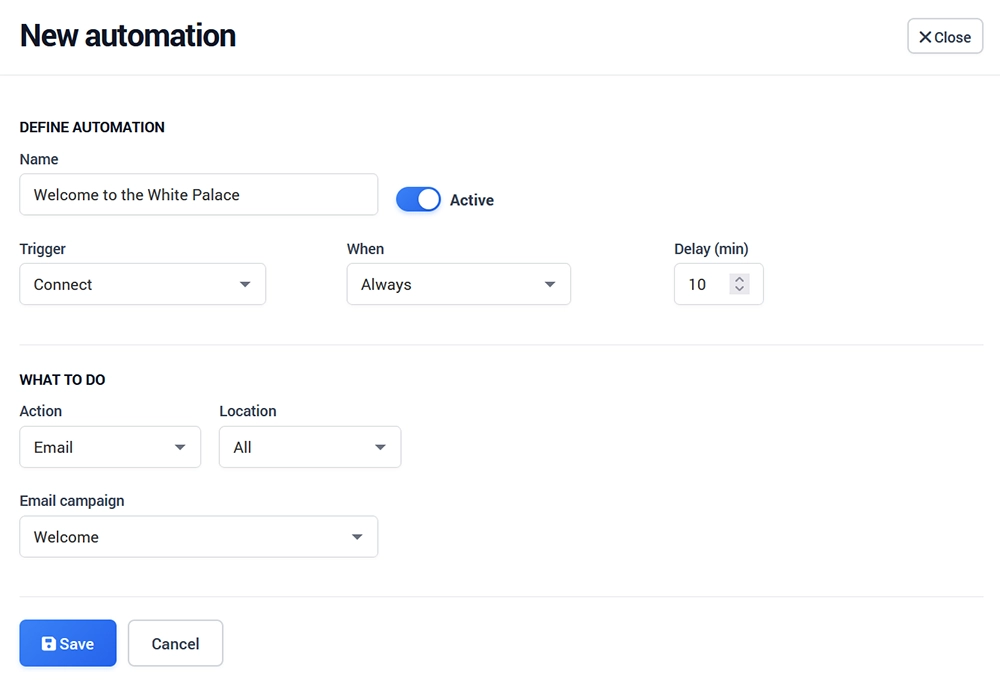
Open Automation and click + New automation.
Configure:
Name
Active
Trigger
When
Delay
Action
Location
The campaign or integration required by the selected Action
Click Save when finished.
Trigger
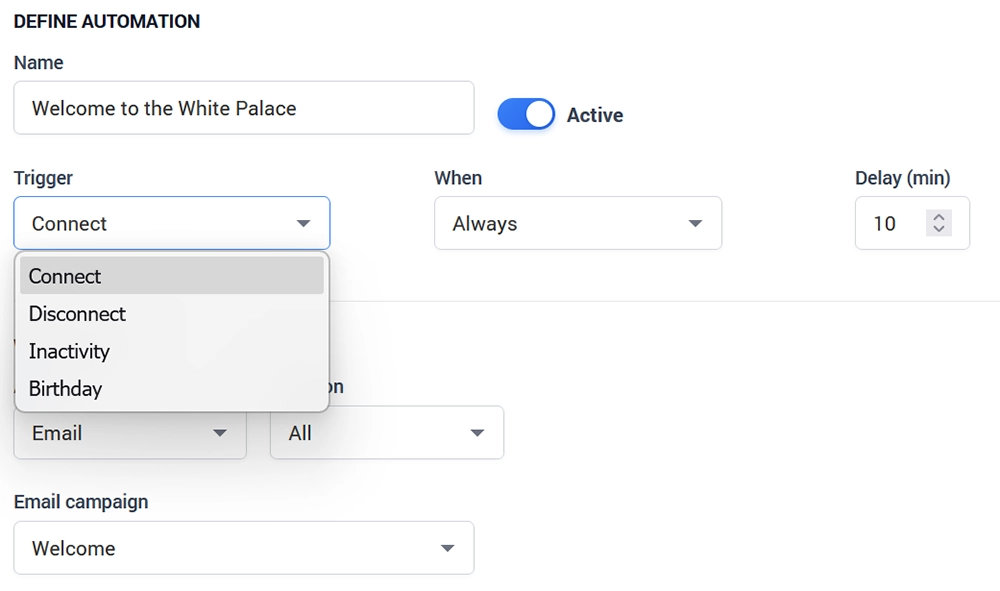
The Trigger defines the customer event that starts the automation.
Available triggers are:
Connect
Runs the automation when the customer connects to WiFi.
Typical uses include welcome messages, offers, or adding new visitors to an external marketing system.
Disconnect
Runs after the customer's WiFi session ends.
This is useful for thank-you messages, feedback requests, or post-visit communication.
Inactivity
Runs after the customer has not returned or connected for the configured period.
Use this for re-engagement campaigns such as:
We miss you — visit us again.
Birthday
Runs according to the birthday stored in the customer's profile.
This can be used for birthday greetings, coupons, or special offers.
When
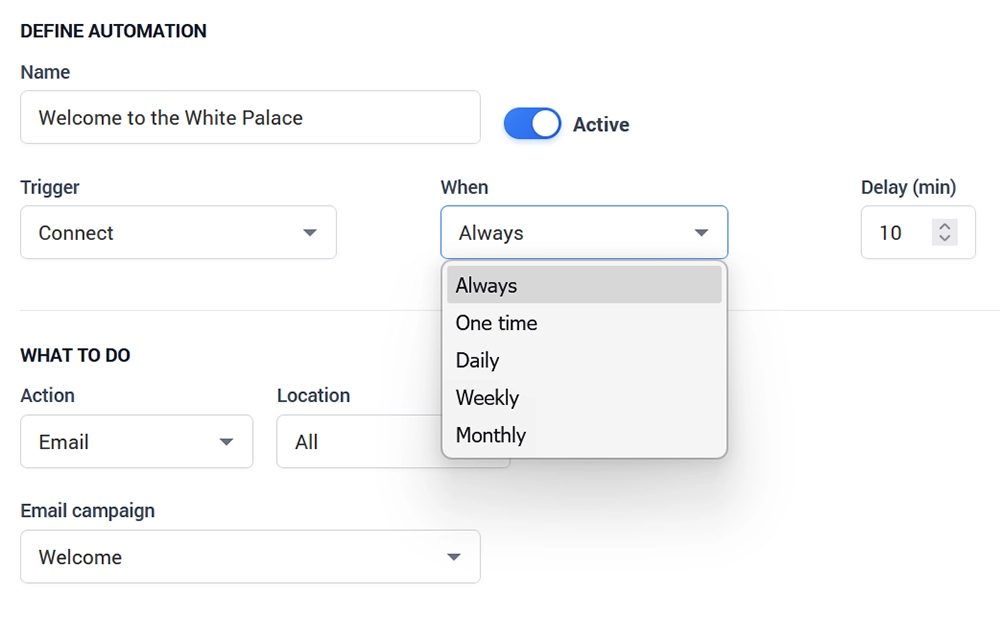
The When option controls how often the automation can run.
Available options include:
Always – Run whenever the trigger conditions are met.
One time – Run only once for the customer.
Daily – Limit the automation to the corresponding daily frequency.
Weekly – Run according to the weekly frequency.
Monthly – Run according to the monthly frequency.
Choose the option according to the type of communication.
For example, a welcome message may use One time, while another operational workflow may use Always.
Delay
Use Delay (min) when the action should not occur immediately after the trigger.
For example:
Send a welcome email 5 minutes after connection.
Send a feedback request after the guest disconnects.
Delay another action according to the intended customer journey.
Set 0 when no delay is required.
Action
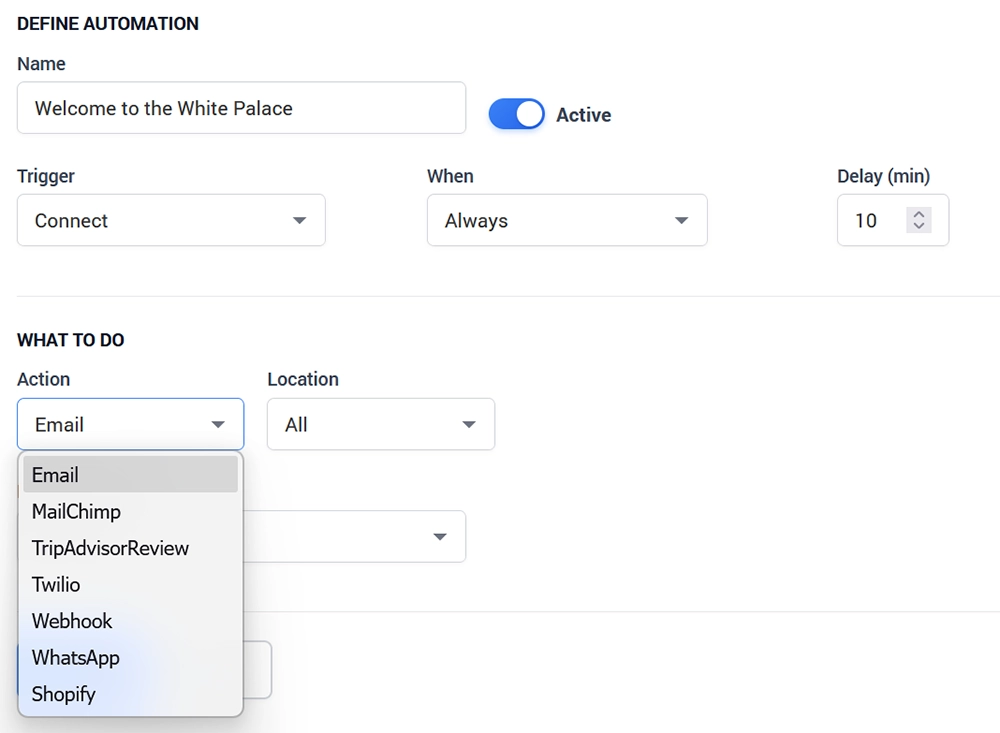
The Action determines what WiFi Hotspot should do when the automation is triggered.
Available actions include:
Email
MailChimp
TripAdvisorReview
Twilio
Webhook
WhatsApp
ShopifyEmail
Select Email to automatically send one of your previously created Email Campaigns.
After selecting Email, choose the required campaign from Email campaign.
For example:
White Palace Lobby campaign
Create the campaign first under WiFi Marketing → Email Campaigns.
MailChimp
Use MailChimp when WiFi customer information should be sent to a configured Mailchimp audience.
This can be used to include eligible WiFi customers in external email marketing workflows.
Configure the Mailchimp credentials and audience required by the integration.
TripAdvisor Review
Use TripAdvisorReview to automate post-visit review requests.
This is particularly useful for hotels, restaurants, and hospitality venues where recent visitors can be invited to review their experience.
Configure the required TripAdvisor integration details before activating the automation.
Twilio
Use Twilio to send automated SMS messages.
Depending on the integration configuration, provide the required Twilio account credentials, sender number, and message.
A common use is sending a follow-up SMS after a WiFi visit.
Webhook
Use Webhook when customer or event data should be sent to another application or your own integration endpoint.
WiFi Hotspot sends the configured event data to the Webhook URL so an external application can process it.
Typical uses include:
CRM integration
Customer database synchronization
Loyalty systems
Custom marketing workflows
Internal applications
The receiving endpoint should be configured to accept the request and return a successful HTTP response.
Here’s the example:
In your app configure https://yourdomain.com as the URL.
On the WiFi Hotspot portal, create a Splash page with free access and data collect.
Do one test signup.
Go to your app and you should see data posted with these headers:
Request Header
{
“user-agent”: “RestSharp/108.16.0.0”,
“content-length”: “838”,
“accept”: “application/json”,
“accept-encoding”: “gzip, deflate”,
“content-type”: “application/x-www-form-urlencoded”,
“service”: “d8QFjYe10OllW87fmGA3m44zRnVzR1/euK2LD5KK3Go=”,
“x-forwarded-for”: “50.118.194.255”,
“x-forwarded-host”: “yourdomain.com”,
“x-forwarded-proto”: “https”
}
Request Body
UserId=8d20b83e-cd319-4246-b74c-825509d70ce4&Username=support*mail.com-563C986C037B&Password=14533bf3&FirstName=Support&LastName=M&Email=support%40antamedia.com
&ContactPermission=False&Mobile=0874464279&UserType=&SignUpSource=7&Status=2&Active=True&Age=
&Birthday=&Gender=0&Address=&City=&PostalCode=&State=&Country=&CustomField1=&CustomField2=
&CustomField3=&DateCreated=11%2F14%2F2024%2012%3A15%3A56%20PM
&LastUsed=11%2F14%2F2024%2012%3A15%3A58%20PM&ProfileImageUrl=&Download=131072000
&Upload=131072000&UnlimitedQuota=True&Quota=0&UnlimitedTime=True&TimeLeft=0&MultiLogin=
False&LoginsPerAccount=1&MAC=58-3C-98-6D-03-7E&Expiration=&EnableExpiration=False&InternetPlan=Default%20Plan&InternetPlanId=20865&AccountId=i83d5b96-6ae8-45e1-58f0-3a911ac9f744&HotspotId=e8e0de1f-30d6-43bb-a878-914cfe77d2d3&LocationId=6178j829-cd30-48f2-969b-0903abd01d35
Use WhatsApp to trigger an automated WhatsApp communication.
This can be used for welcome messages, post-visit communication, reminders, or other permitted customer messaging.
Configure the WhatsApp service first under:
My Account → WhatsApp
Shopify
Use Shopify when WiFi customer activity should trigger the configured Shopify integration.
This can be useful when customer engagement from a physical location needs to be connected with an online commerce workflow.
Configure the Shopify connection before enabling the automation.
Location
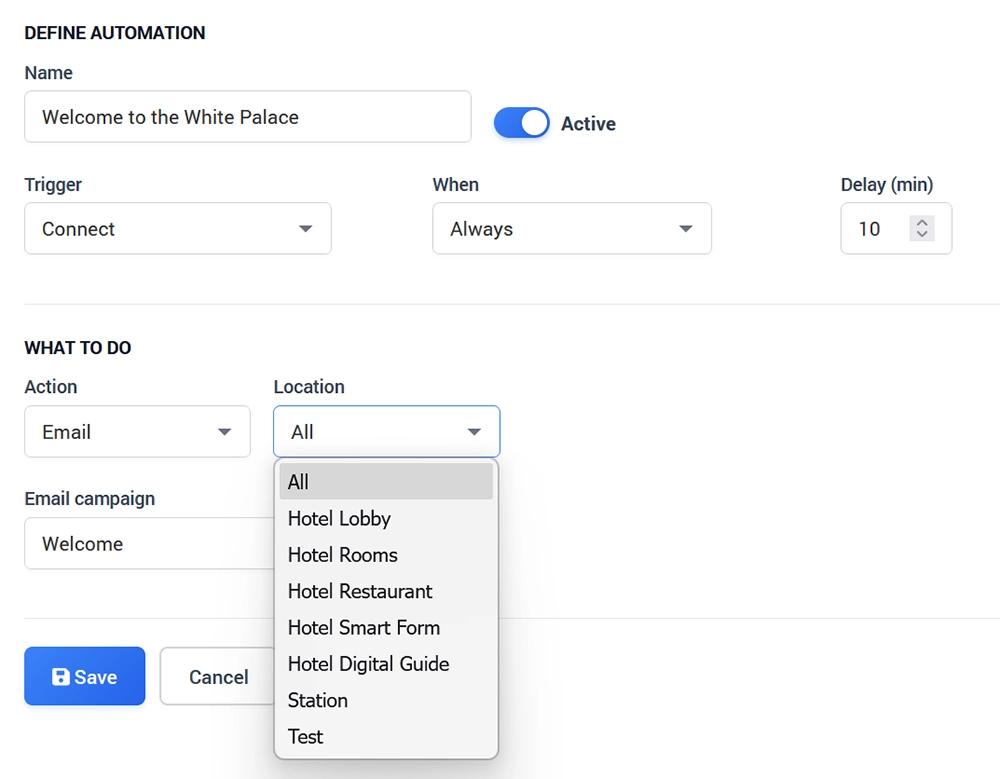
Use Location to control where the automation applies.
Select:
All
when the rule should apply across the account, or select a specific location when the automation belongs only to one hotel, restaurant, store, venue, or other WiFi location.
For example, a restaurant feedback campaign should normally be limited to the restaurant location rather than being triggered by guests from every property.
Activate the Automation
Enable Active when the automation should begin processing matching events.
Disable it when you want to keep the configuration without allowing it to run.
The Automation list displays:
Name
Trigger
When
Action
Status
Use the available actions to edit or delete existing rules.
Recommended Automation Examples
A few practical configurations are:
Welcome message
Trigger: Connect
When: One time
Action: Email
Restaurant feedback
Trigger: Disconnect
When: One time
Action: Email
30-day follow-up
Trigger: Inactivity
Action: Email
Birthday offer
Trigger: Birthday
Action: Email or WhatsApp
CRM synchronization
Trigger: Connect
When: Always
Action: Webhook
Contact Permission
Marketing actions should only be sent to customers who are eligible to receive that type of communication according to your configured consent process and applicable requirements.
A WiFi connection, phone number, or email address should not by itself be treated as marketing permission.
Use Contact Permission on the Splash Page where customer consent is required.
Test an Automation
Before relying on an automation in production:
Create the campaign or configure the integration used by the Action.
Create the Automation rule.
Use a test customer account.
Trigger the selected event.
Confirm that the Delay and When settings behave as expected.
Verify that the action is executed.
Check the resulting email, SMS, WhatsApp message, Webhook request, or external integration.
Activate the rule for production only after testing.