 ZyXEL
ZyXEL
Please select a model and download HotspotOS.
DownloadHotspotOSConfigurationTroubleshoot
Please reset the AP / WiFi router to factory settings to avoid problems with some previous configuration.
Connect your computer to the Zyxel router web interface.
Go to the Firmware upgrade section.
Navigate to the location where the HotspotOS for your model is downloaded and press Open.
Press the Firmware Update button.
Click Upload to complete the HotspotOS installation.
The HotspotOS installation procedure can take a few minutes.
During this process, you will see information about the processing.
Reconnect LAN cable or Disable/Enable NIC card in order to get new valid IP address in 10.200.0.x range from router.
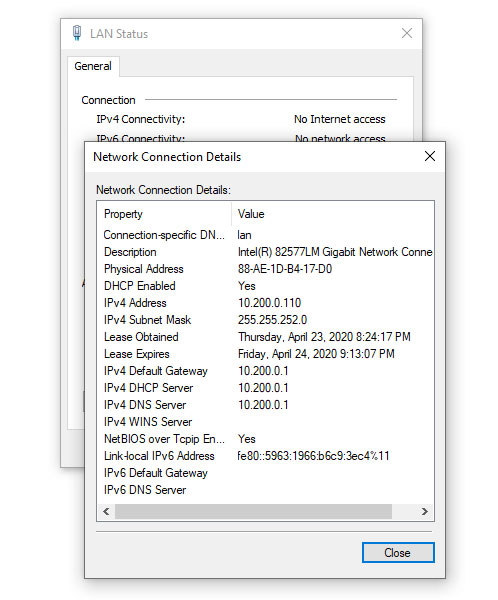
Start your browser and in URL field type http://10.200.0.1:8089/ to login to HotspotOS.
Username: admin
Password: admin
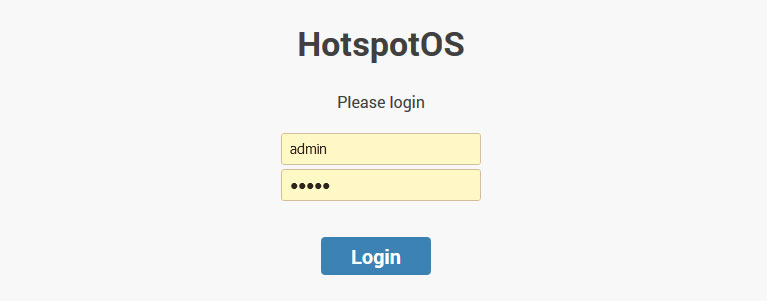
Press the Login button to access to Status tab.
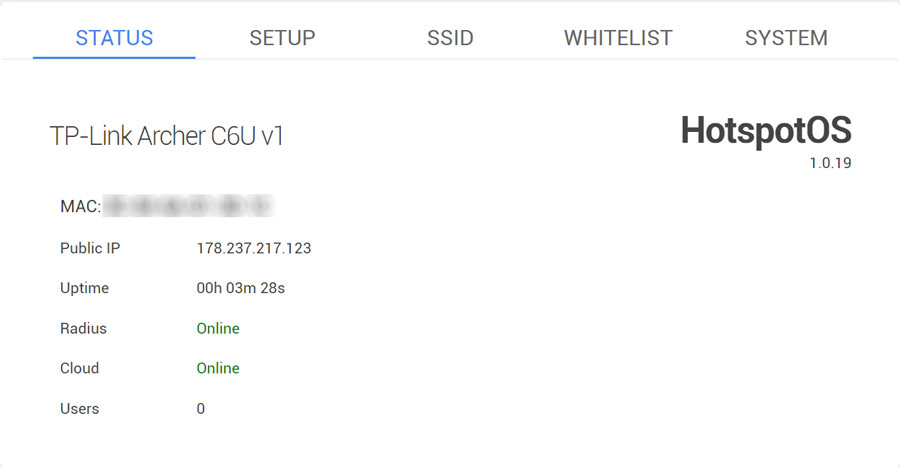
On the HotSpotOS Status page, you can check AP MAC address, Public IP, device Uptime, Radius and Cloud status, and a number of users connected to AP.
The MAC address of your AP will be used in the SignUp process.
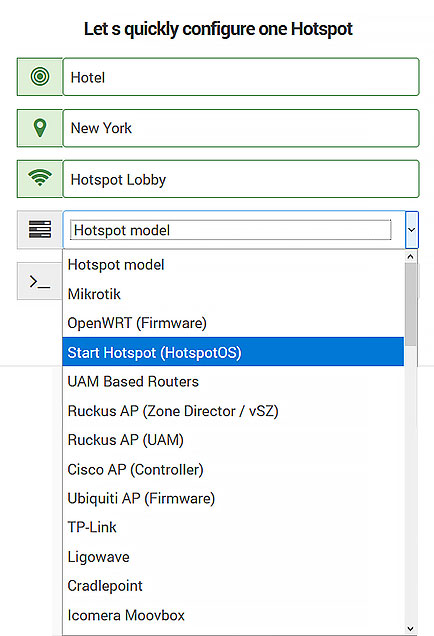
During SignUp, after typing HotSpot name, select as HotSpot model HotspotOS, and add your MAC address from the Status tab.
From the Setup page configure your AP.
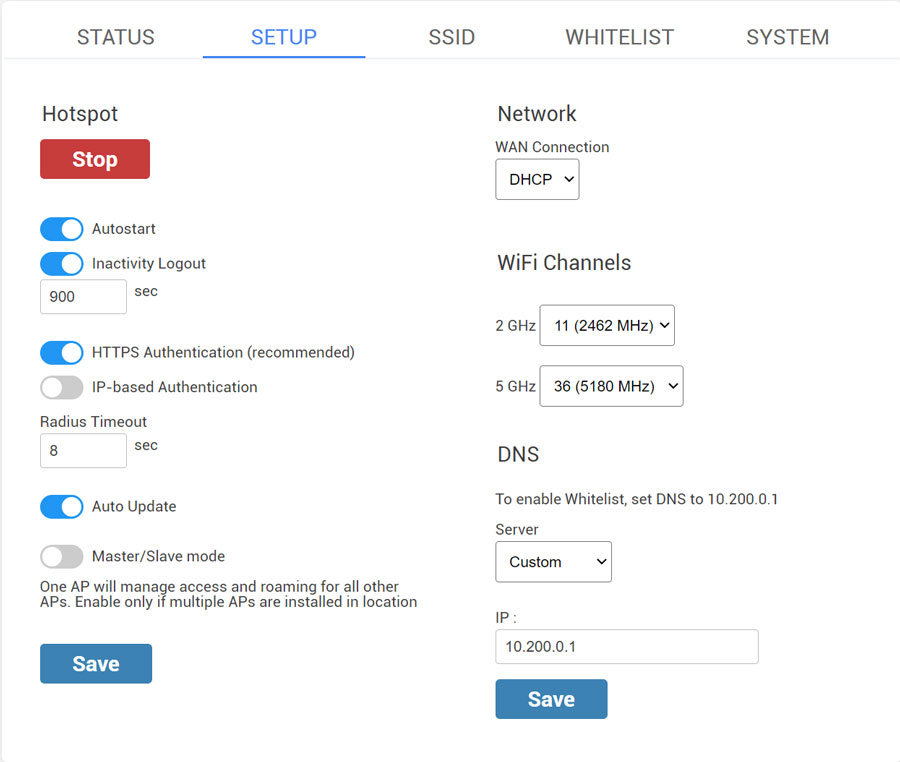
The Hotspot is started and the Autostart and Inactivity Logout options are active by default.
Inactivity Logout is set to 900 sec. Inactivity period defines how long will the device stay logged-in without activity. This prevents repeated logins if the connection temporarily breaks.
IP-based Authentication is used to switch AP domain ap.wifihotspot.io to 10.200.0.1
It is recommended to disable this option to avoid issues with https-based websites.
Radius Timeout – 8sec
Auto Update – enabled
Master/Slave mode
One AP will manage access and roaming for all other APs.
Enable only if multiple APs are installed in a location.
By default as Network WAN Connection is set DHCP, but you can choose network protocol based on your needs. Our recommendation is to use DHCP Network Protocol.
WiFi channels – Eleven channels are designated in the 2 GHz range, spaced 5 MHz apart from each other. Those eleven channels in the spectrum are allowed anywhere in the world.
DNS – Custom
IP – 10.200.0.1
Save changes.
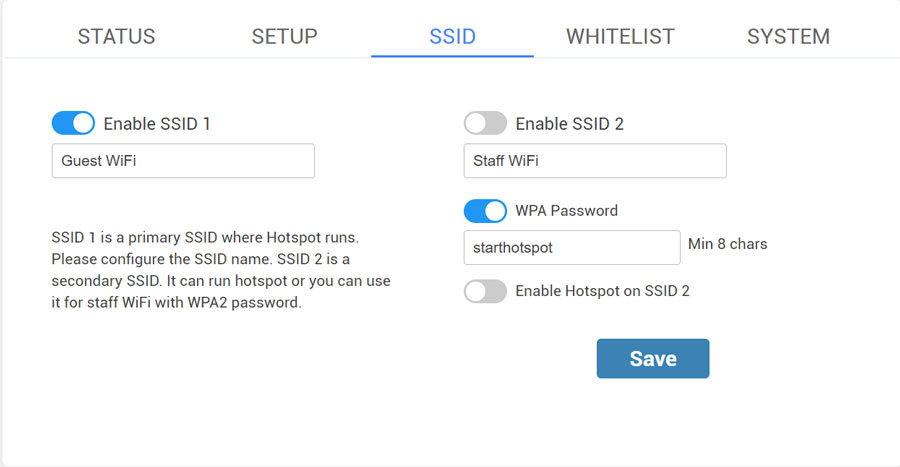
From the SSID tab, you can Enable SSID 1 and 2.
Configure the SSID name and enable it.
Secondary SSID 2 is mostly used for staff WiFi with WPA2 password but you can also enable Hotspot on it.
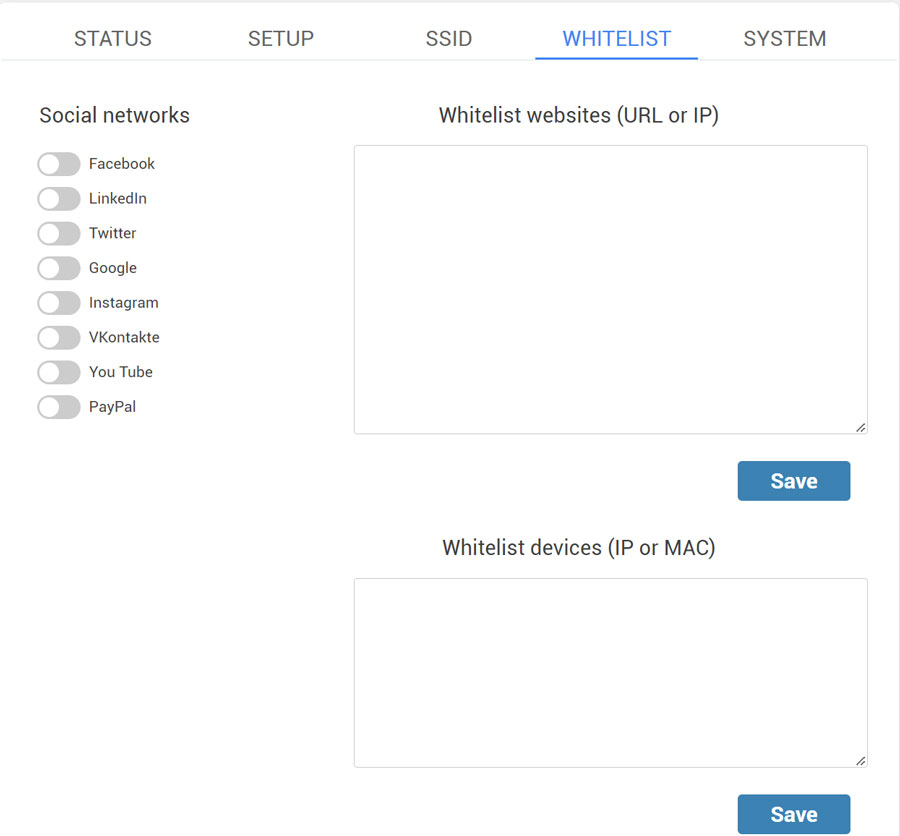
If you want to use Social network login feature or Paypal as payment gateway, enable it on the Whitelist tab and Save changes.
You can also whitelist websites based on URL, IP, or MAC.
From the System tab, you can flash HotspotOS image and change the Admin password.
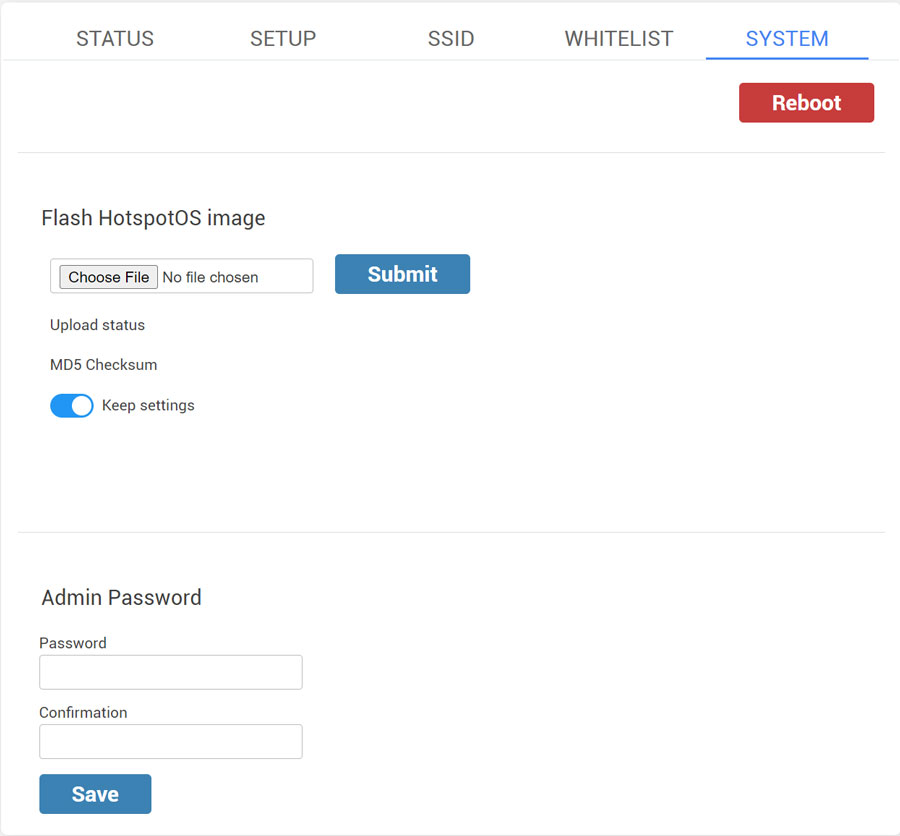
When you finish setup, restart the AP / WiFi router to apply changes.
ZyXEL HotspotOS Download
ZyXEL NBG6617
Download HotspotOS
First install / debricking / restore stock:
0. Have a PC running a TFTP server @ 192.168.1.99/24
1. Connect the PC to any LAN-Ports
2. Put the hotspotos…-factory.bin (or V1.00(ABCT.X).bin for stock) file into the TFTP server root directory and rename it to just “ras.bin”.
3. power-cycle the router and hold down the WPS button (for 30sek)
4. Wait (for a long time – the serial console provides some progress reports. The u-boot says it best: “Please be patient”.
5. Once the power LED starts to flashes slowly and the USB + WPS LEDs flashes fast at the same time. You have to reboot the device and it should then come right up.
Installation via Web-UI:
0. Connect a PC to the powered-on router. It will assign your PC an IP-address via DHCP
1. Access the Web-UI at 192.168.1.1 (Default Passwort: 1234)
2. Go to the “Expert Mode”
3. Under “Maintenance”, select “Firmware-Upgrade”
4. Upload the HotspotOS image
5. Wait for the Device to finish.
It will reboot into HotspotOS without any additional actions needed.
ZyXEL WRE6606
Download HotspotOS
Install via TFTP:
Connect to the devices serial. Hit Enter-Key in bootloader to stop autobooting. Command `tftpboot` will pull an initramfs image named `C0A86302.img` from a tftp server at `192.168.99.08/24`.
After successful transfer, boot the image with `bootm`.
To persistently write the firmware, flash an HotspotOS sysupgrade image from inside the initramfs, for example transfer via `scp root@192.168.1.1:/tmp` and flash on the device with `sysupgrade -n /tmp/`.
Not Working:
– Mode-toggle-switch
ZyXEL NBG6817 (Armor Z2)
Download HotspotOS
ZyXEL P-2812HNU-F1
Download HotspotOS
NOTES: Future upgrades can be done by flashing *sysupgrade.bin from web interface.
Step 1: Place hotspotos-lantiq-xrx200-P2812HNUF1-uImage-initramfs in your tftp folder
Step 2: Set Your IP address to “192.168.1.2” and start TFTP server. See also above for instructions.
Step 3: Upload initramfs image
Step 4: Run initramfs image and wait till fully booted and press Enter to activate the console
Step 5: set root password.
Step 6: Log into the modem on the web interface and go to System flash firmware and flash up to and including 18 release, if you want to install snapshots or 19 and above you need to increase the space reserved for the kernel.
You do this by installing this image first https://github.com/Mafketel/p2812hnu-f1-files/blob/master/openwrt-lantiq-xrx200-zyxel_p-2812hnu-f1-squashfs-sysupgrade.bin and then go back into the web interface and flash the one you want.
This assumes that you are able to enter the web interface, if this does not work. you can continue in the serial console this way. If not use Linux scp or WinSCP to upload hotspotos-lantiq-xrx200-zyxel_p-2812hnu-f1-squashfs-sysupgrade.bin to /tmp.
Step 7: the router Reboots itself
ZyXEL P-2812HNU-F3
Download HotspotOS
At the present time, a working version needs to be from trunk r43988.
Target System:Lantiq Subtarget:XRX200 Target Profile:ZyXEL P-2812HNU-F3.
NOTES: Future upgrades can be done by flashing hotspotos-lantiq-xrx200-P2812HNUF3-*-sysupgrade
Step 1: Place hotspotos-lantiq-xrx200-P2812HNUF3-* images in tftp folder
Step 2: Set Your IP address to “192.168.1.2” and start the TFTP server
Step 3: Upload kernel image
tftp 0x80800000 openwrt-lantiq-xrx200-P2812HNUF3-uImage
Step 4: Erase NAND (whole chip, U-Boot is stored in NOR so it can be done without harming U-Boot, make sure to undo the two bootsel pin shorting before continuing, else nand won’t be detected!)
nand erase.chip
Step 5: Flash kernel image onto NAND
nand write 0x80800000 0x0 0x200000
Step 6: Upload initramfs image
tftpboot 0x80800000 openwrt-lantiq-xrx200-P2812HNUF3-uImage-initramfs
Step 7: Run initramfs image and wait till fully booted
bootm 0x80800000
Step 8: Upload UBI image to /tmp in Your router by SCP/WinSCP after setting root passwd on OpenWrt
Step 9: Format and Flash UBI image
(run ‘mount’ command to get correct /dev/mtdX if you get an error, and use it in the other commands as well)
ubidetach -p /dev/mtd4
for squashfs on top of ubi (default config RO, changes can be reverted):
ubiformat /dev/mtd4 -f /tmp/openwrt-lantiq-xrx200-P2812HNUF3-squashfs-ubinized.bin
for ubifs(all data R/W, only option to revert changes is by reflash):
ubiformat /dev/mtd4 -f /tmp/openwrt-lantiq-xrx200-P2812HNUF3-ubifs-ubinized.bin
Step 10: Reboot router
Step 11: Stop U-boot autoboot process and modify to autoboot OpenWrt at power on
setenv nboot ‘ nand read 0x80800000 0x0 0x200000; bootm 0x80800000’
setenv bootcmd ‘run nboot’
saveenv
Step 12: Power off and on router
ZyXEL Keenetic Extra II
Download HotspotOS
The only way to flash HotspotOS image is to use TFTP recovery mode in U-Boot:
1. Configure PC with static IP 192.168.1.2/24 and TFTP server.
2. Rename “hotspotos-ramips-mt76x8-zyxel_keenetic-extra-ii-squashfs-factory.bin”
to “kextra2_recovery.bin” and place it in TFTP server directory.
3. Connect PC with one of LAN ports, press the reset button, power up the router, and keep the button pressed until the power led start blinking.
4. The router will download file from the server, write it to flash and reboot.